14 • SCREENGUARD AUTOMATIC SCREEN FILTERS OPERATION INSTALLATION AND MAINTENANCE GUIDE
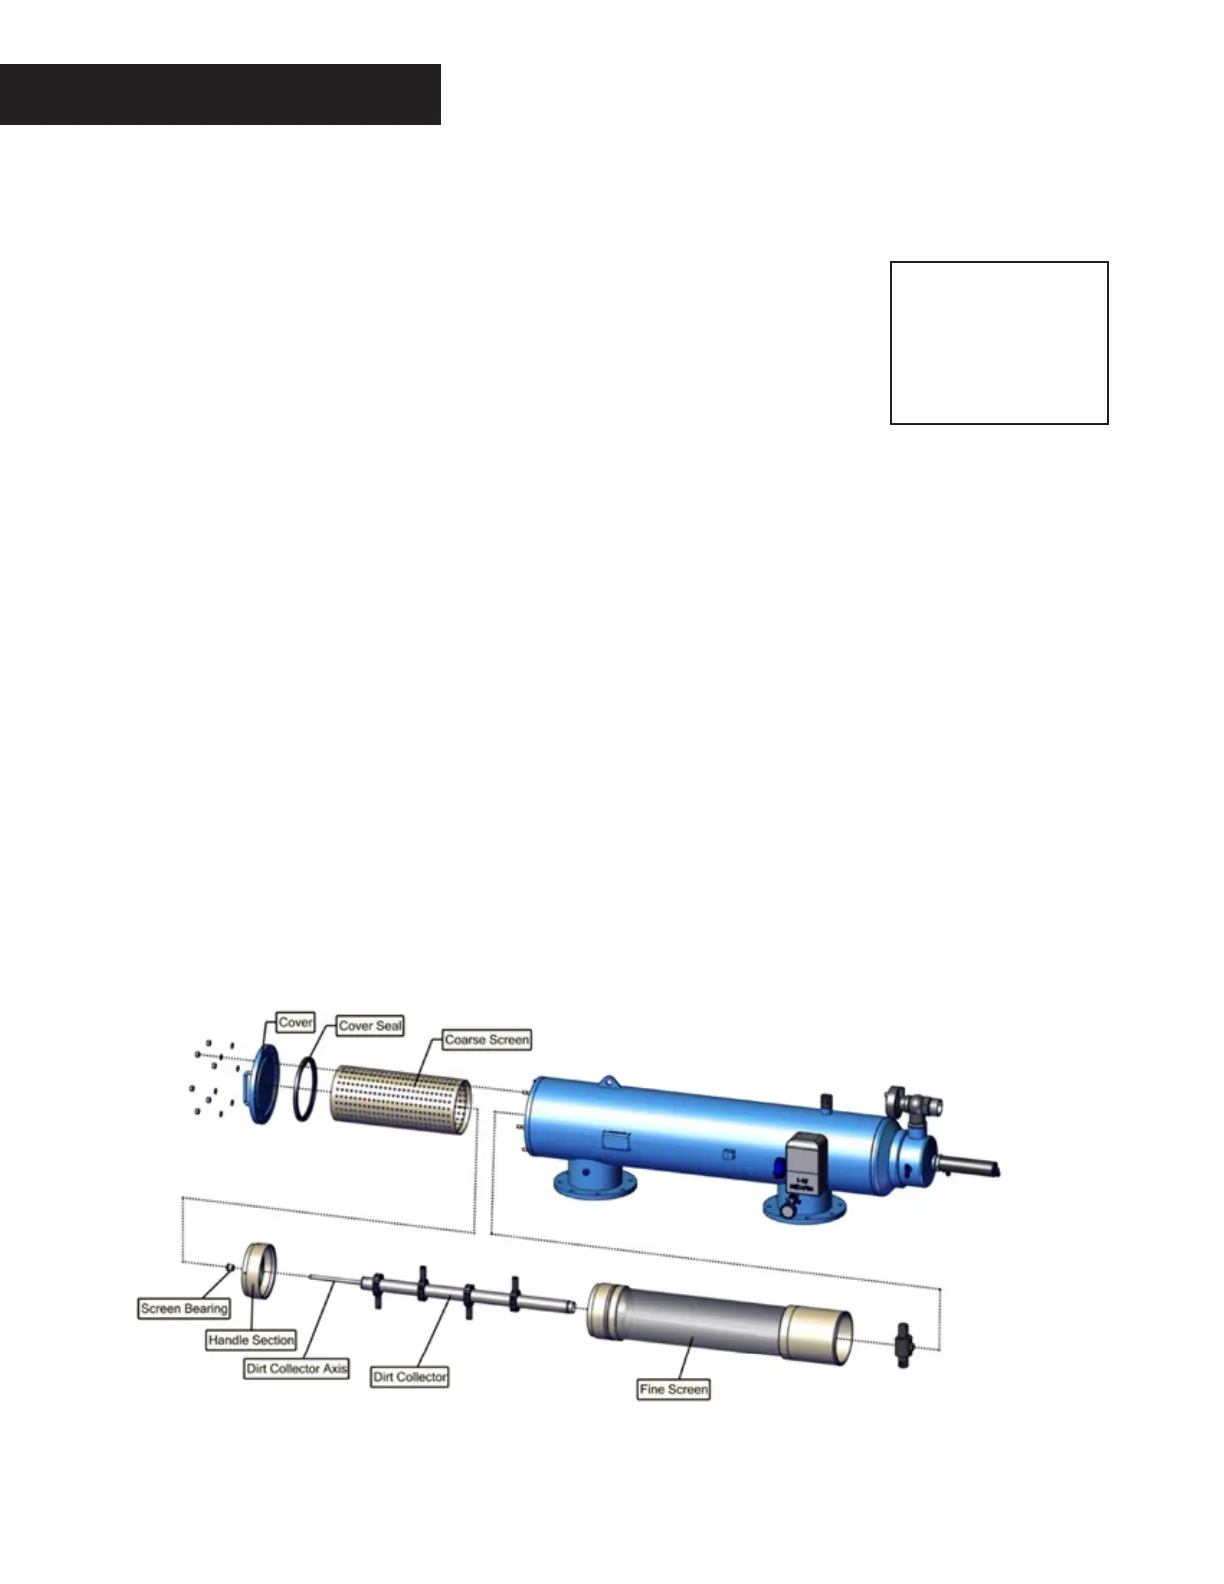
FINE SCREEN ASSEMBLY REMOVAL & REPLACEMENT (FIGURE 9)
1. Close the inlet and the outlet line valves.
2. Verify that the filter is drained prior to service.
3. Remove the nuts and washers connecting the cover to the filter housing.
4. Remove the cover from the filter’s housing and remove the cover seal from the cover groove.
5. Pull out the coarse screen from the fine screen assembly using the gripping handle.
6. Pull the fine screen assembly out of the filter housing assembly with the dirt collector.
7. Remove both O-rings (445) from the current fine screen assembly.
8. Unscrew (clockwise - cw) the hydraulic motor from the dirt collector.
9. Unscrew (counterclockwise -ccw) the fine screen handle section from the fine screen, loosen using screen wrenches.
10. Carefully pull the dirt collector out of the fine screen assembly.
11. Unscrew (ccw) the fine screen damaged sections and replaced them with new sections.
12. Slide the dirt collector into the fine screen, through the dirt collector bearing.
13. Position both O-rings (445) into the new fine screen assembly, if required replace them.
14. Lubricate the O-ring (445) with silicon grease.
15. Screw (cw) the fine screen handle section to upper screen section; make sure the dirt collector axis passes through the screen
bearing. Tighten using screen wrenches.
16. Screw (ccw) the hydraulic motor to the dirt collector.
17. Slide the new fine screen assembly into the filter housing assembly.
18. Slide the coarse screen into the fine screen assembly.
19. Verify that the straight side of the cover seal fits into the groove located in the cover.
20. Put the cover on its place on the filter’s housing and Install the nuts and washers connecting the cover to the filter housing.
21. Open the inlet and the outlet line valves.
22. Check for leaks.
23. Perform a flushing cycle manually by pushing the manual button (M on the screen display). (See Figure 4).
24. Verify that the hydraulic flushing valve closes after 10 seconds.
FIGURE 9
WARNING
Take precautions while
operating the filter as the
filter may enter a flushing
mode automatically,
without prior warning.
MAINTENANCE

 Loading...