6
4.3) Optional programming
Optional programming operations can only be performed after the “0” and “1” positions have been programmed
Pr
ogramming the intermediate position “I”
If an intermediate position “I” has been memorised, the shutter can be moved to the programmed position by simultaneously pressing keys
▼ and ▲ on the transmitter.
To memorize the intermediate position proceed as follows:
1. Using keys ▲■▼on a remote control, move the shutter to the position that you wish
to memorise as “I”
2. Press and hold down (approx. 5 seconds) key ■ until you hear the beep
5s
3. Release and then press again key ■ for 5 more seconds until you hear 4 short beeps
5s
4. Press keys ▼ and ▲ simultaneously until 3 beeps signal that the position has been
memorised
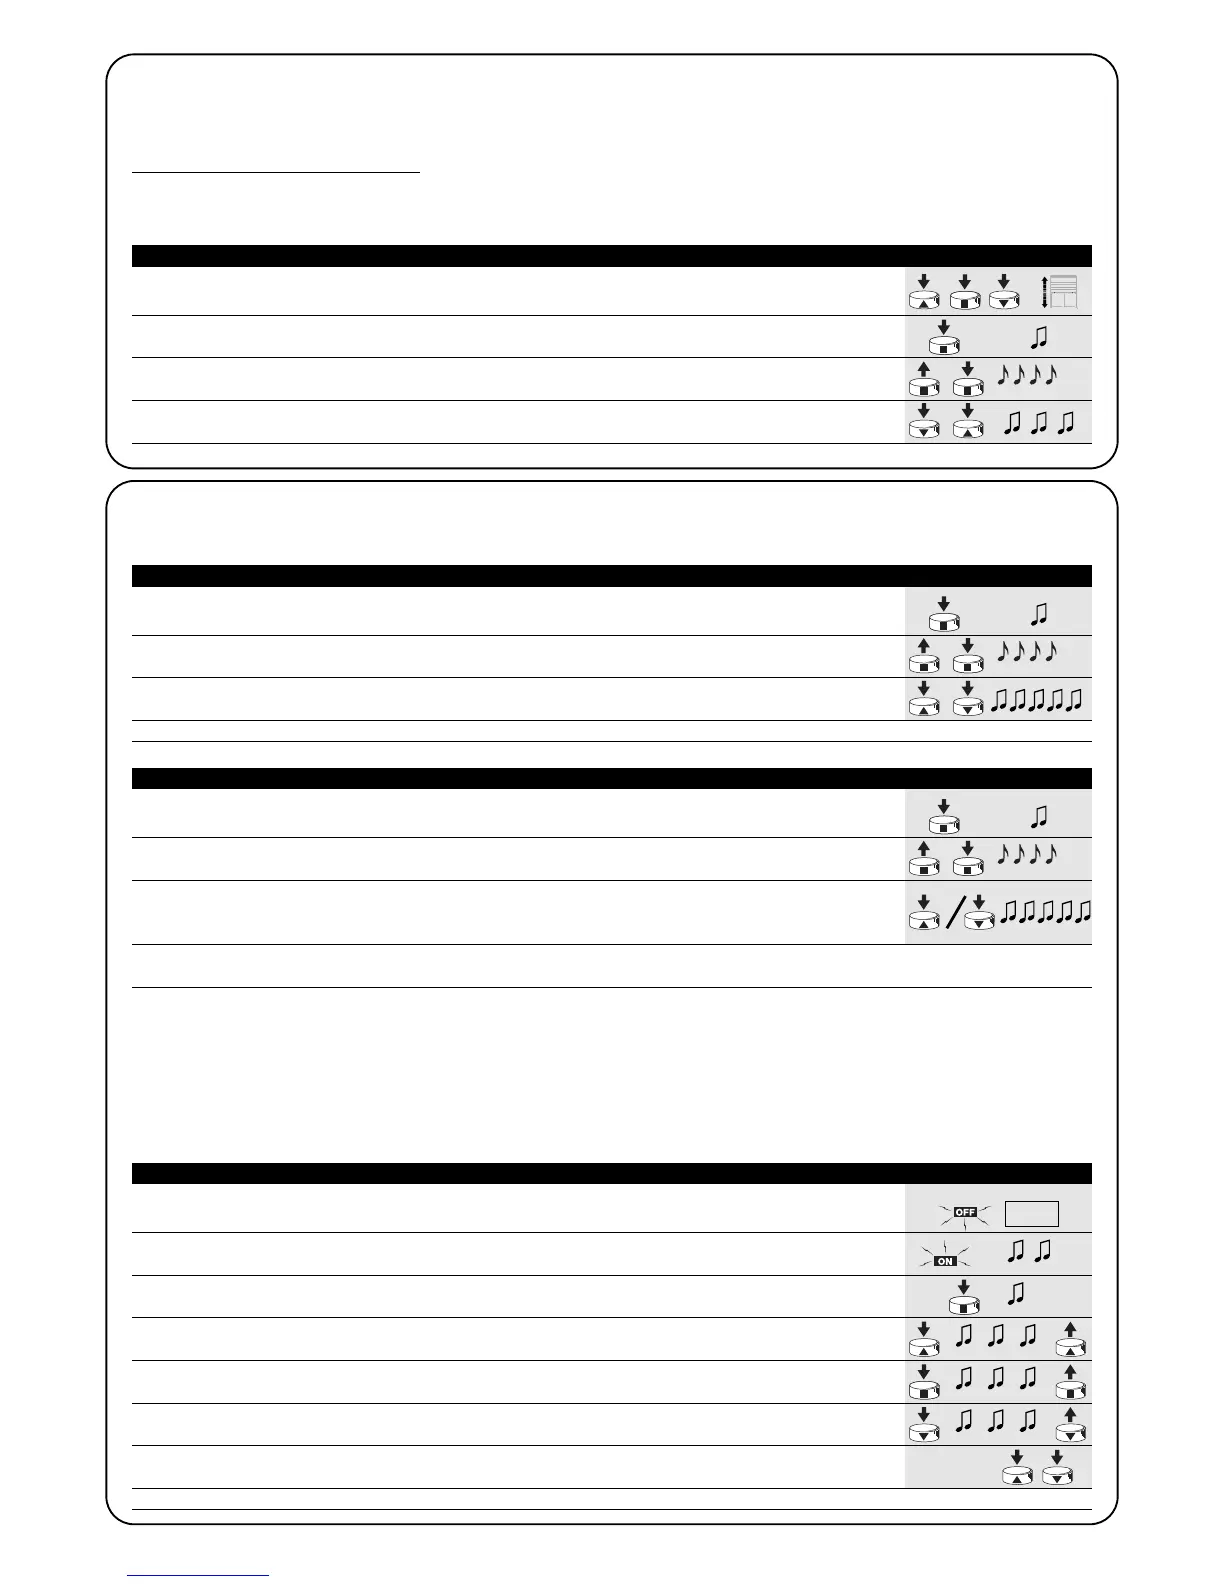
Table “A6” Programming the intermediate position “I” (fig 12) Example
4.4) Modifying the memorised positions
To modify the memorised positions, first you need to erase them, then you must reprogram the new positions.
If you need to erase all the data contained in the memory of the NEOMAT control unit, carry out the following procedure.
The memory can be erased:
• with a non-memorised transmitter starting from point A.
• with a previously memorised transmitter starting the procedure from point N°1
The following can be erased:
• only the transmitter codes, finishing at point N°4
• all the data (transmitter codes, positions, wind levels, TTBUS address, etc.), completing the procedure.
1. Press and hold down key ■ on a previously memorised transmitter until you hear a beep
(approx. 5 seconds) 5s
2. Release and then press again key ■ for 5 more seconds until you hear 4 short beeps
5s
3. Press keys ▲ and ▼ simultaneously until 5 beeps signal that the intermediate position
has been erased
It will now be possible to programme the new intermediate position (Table “A6”)
Table “A7” Erasing intermediate position “I” (fig 12) Example
1. Press and hold down key ■ on a previously memorised transmitter until you hear a beep
(approx. 5 seconds) 5s
2. Release and then press again key ■ for 5 more seconds until you hear 4 short beeps
5s
3. Press either the ▲ key (if automatic or manual programming has been carried out) or the ▼
key (if semiautomatic programming has been carried out), until you hear 5 beeps.
This indicates that positions “0” and “1” have been deleted.
WARNING: After positions “0” and “1” have been erased, the shutter will only move by manual control, therefore a new position must be
memorised (Tables “A3”, “A4”, “A5”)
Table “A8” Erasing positions “0” and “1” (fig 13) Example
A. Switch the motor off, activate the Step-by-Step input (by connecting up the white and black
wires)and keep it active until the end of the procedure
B. Power the motor and wait for the 2 initial beeps
1. Press and hold down key ■ on a previously memorised transmitter until you hear a beep
(approx. 5 seconds) 5s
2. Press and hold down key ▲ on the transmitter until you hear 3 beeps; release key ▲ exactly
during the third beep. 5s
3. Press and hold down key ■ on the transmitter until you hear 3 beeps; release key ■ exactly
during the third beep
4. Press and hold down key ▼ on the transmitter until you hear 3 beeps; release key ▼ exactly
during the third beep
5. If you wish to erase all the data, press the ▲ and ▼ keys together within 2 seconds and then
release them within 2s
After a few seconds 5 beeps will signal that all the memorised codes have been erased.
Table “A9” Erasing the memory (fig 14) Example
➨
➨
➨
PP
 Loading...