ENGLISH – 21
Table 10
MAINTENANCE NOTICE THROUGH FLASH AND MAINTENANCE
INDICATOR
Number of
manoeuvres
Signal on “Flash”
Maintenance
indicator signal
Below 80% of the
limit
Normal (0.5 sec on,
0.5 sec off)
Lit for 2 seconds
at the start of the
opening manoeuvre
Between 81% and
100% of the limit
Remains lit for 2
seconds at the start
of the manoeuvre
Flashes for the
entire duration of the
manoeuvre
Exceeding 100% of
the limit
Remains lit for 2
seconds at the
start and end of the
manoeuvre then
carries on normally
Flashes always
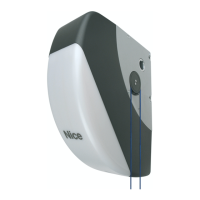
7.7 VERIFYING THE NUMBER OF MANOEUVRES
COMPLETED
The “Maintenance notice” function can be used to verify the
number of manoeuvres completed as a percentage of the set limit.
FUSE
LED
FUSE
L7
L1
24
To do this:
1. press and hold the
o
button until LED “L1” starts ashing
2. release the
o
button when LED “L1” starts ashing
3. press the
p
or
q
button to shift the ashing LED to “L7”,
that is, the “entry LED” for the “Maintenance notice” pa-
rameter
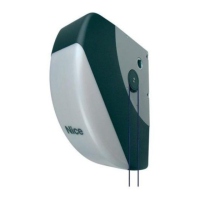
4. press and hold the
o
button. With the
o
button pressed:
– wait roughly 3 seconds until the LED representing the cur-
rent level of the “Maintenance notice” parameter lights
up
– press and immediately release the
p
and
q
buttons
– the LED corresponding to the selected level will ash a
few times; the number of ashes indicates the percentage
of manoeuvres performed (in multiples of 10%) with re-
spect to the set limit. For example: with the maintenance
notice set to L7 namely 10000, 10% corresponds to 1000
manoeuvres; if the visualisation LED ashes 4 times, it
means that 40% of the manoeuvres has been reached
(being between 4000 and 4999 manoeuvres). If 10% of
the manoeuvres has not yet been reached, the LED does
not ash at all.
5. release the
o
button.
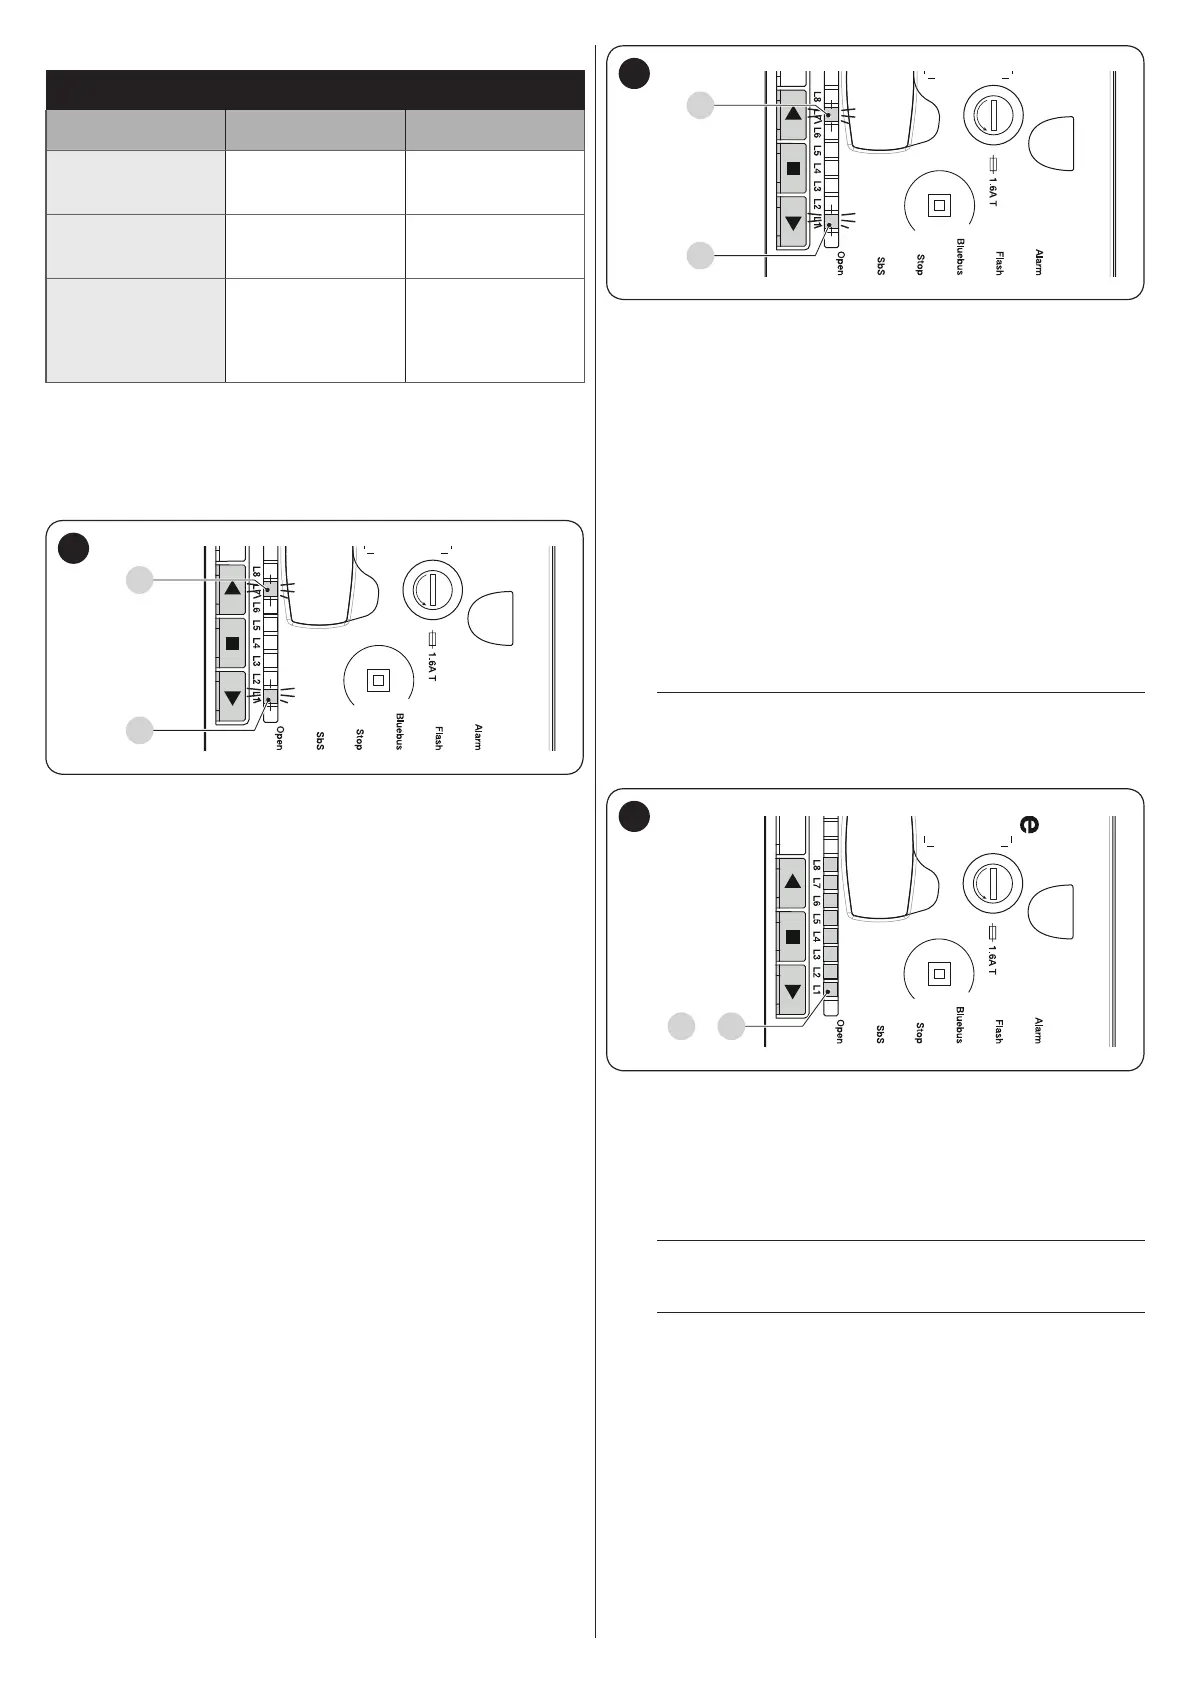
7.8 MANOEUVRE COUNTER RESETTING
Once maintenance has been performed on the system, the ma-
noeuvre counter must be reset.
FUSE
LED
FUSE
L7
L1
25
To do this:
1. press and hold the
o
button until LED “L1” starts ashing
2. release the
o
button when LED “L1” starts ashing
3. press the
p
or
q
button to shift the ashing LED to “L7”,
that is, the “entry LED” for the “Maintenance notice” pa-
rameter
4. press and hold the
o
button. With the
o
button pressed:
– wait roughly 3 seconds until the LED representing the cur-
rent level of the “Maintenance notice” parameter lights
up
– press and hold for at least 5 seconds the
p
and
q
but-
tons then release them. The LED corresponding to the
selected level will emit a series of fast ashes to signal that
the manoeuvre counter has been reset
5. release the
o
button
7.9 MEMORY DELETION
m
The procedure described below restores the con-
trol unit’s default settings. All the custom settings
will be lost.
FUSE
LED
FUSE
L1 ... L8
26
To delete the control unit’s memory and restore all the default set-
tings, proceed as described below:
1. press and hold the
p
and
q
buttons until the programming
LEDs “L1-L8” light up (after roughly 3 seconds)
2. release the buttons
3. if the operation was successful, the programming LEDs “L2”
and “L8” will ash rapidly for 3 seconds.
l
With this procedure it is possible to also delete any
errors left in the memory.
l
This procedure does not cancel the parameter rel-
ative to the motor’s rotation direction and the num-
ber of manoeuvres executed.
 Loading...