13
NSFX
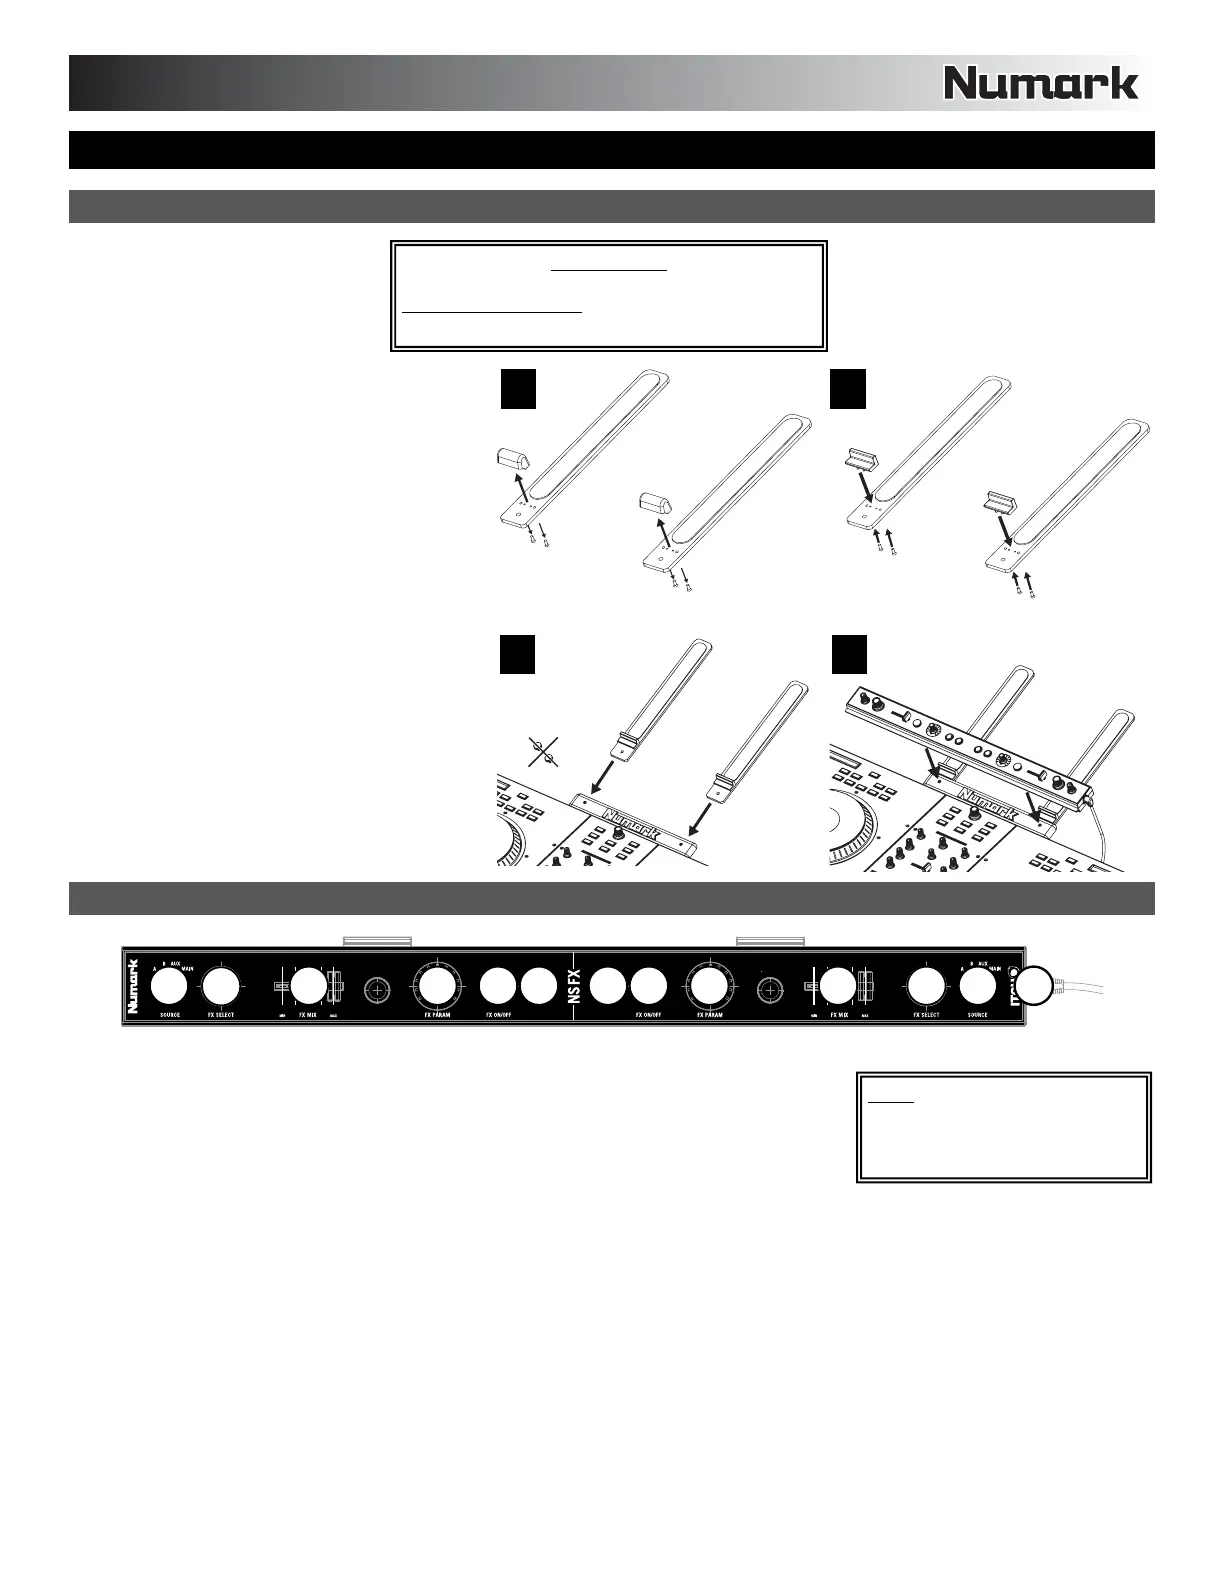
ASSEMBLY INSTRUCTIONS
1. With the prongs of your NS7's laptop stand
removed from the main piece, use a Phillips-
head screwdriver to remove the two large
screws and bumpers from each prong.
2. Replace the original bumpers and screws with
the new ones included with the NSFX.
Note: Use only the screws included with the
NSFX to secure the new bumpers. (They are
smaller than the original ones.)
3. Insert the prongs into the slots of the main
bracket of the laptop stand. Do not use the
original thumb screws that were included with
the laptop stand.
4. Place NSFX on top of the main bracket of the
laptop stand, inserting the thumb screws of
the NSFX into the holes in the bracket.
Tighten the screws to secure NSFX to the
laptop stand.
5. Connect the NSFX's attached USB cable to a
free USB port on your computer.
FEATURES
12
2
3
3
4
4
556
6
77
1. USB CONNECTION – Attach this cable to a free USB port on your computer. NSFX's
LEDs will illuminate when the connection is made.
2. SOURCE – Selects the channel that will be sent through the effect. You can select one of
the following (which will be displayed in the software):
• DECK A – The effect will be heard on Deck A.
• DECK B – The effect will be heard on Deck B.
• AUX –The effect will be heard on the MIC / AUX channel.
• MIX – The effect will be heard on the entire (Master) mix.
3. FX SELECT – Turn this knob to select an effect to apply to the channel, which will be displayed in the software. You can also
press the knob to move automatically to the next effect.
4. FX MIX – Adjusts the amount of the effect, which will be displayed the software. To hear less of the effect (a "dry" mix), move this
fader to the left. To hear more of the effect (a "wet" sound), move this fader to the right.
5. FX PARAM – Turn this knob to adjust the parameter of the effect, which will be displayed in the software.
6. FX ON / OFF – Press this button to activate or deactivate the effect. The button's LED will illuminate when the effect is on.
7. TAP TEMPO – Tap this button at the desired tempo to enter a BPM manually, which will help determine the speed of rate-based
effects. This BPM reading will be shown in the software. You can tap this button to enter a new tempo at any time, or you can
return to the track's auto-BPM by holding the button down (see TEMPO SOURCE for more information).
1
2
3
4
Note: In order to use your NSFX,
you will need two free USB ports
on your computer – one for NS7,
one for NSFX.
IMPORTANT:
Before connecting NSFX to your computer, visit
www.serato.com/itch
to download the latest
version of Serato ITCH.
 Loading...