TUBES
Replacing tubes
20
Replacing tubes
ATTENTION
Improper disassembly
Damage to the tubes due to improper disassembly or assembly.
► Changing tubes is a job for qualified technicians!
1. Switch off the preamplifier, unplug the power cord from the wall socket, and allow the unit
10 minutes to cool down.
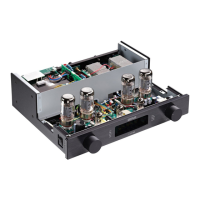
2. Remove the cover by loosening the M4 torx screws (a total of 10 for the cover without control
unit and 7 for the shortened cover with control unit). Do not remove the control unit from the
device.
3. Carefully remove the tubes from their sockets, taking care not to exert sideward pressure on the
sockets.
4. Fit new tubes. Please ensure that the tube pins are all perfectly straight before inserting your
new tubes. Straighten any bent pins very carefully by hand if necessary.
Cleaning
tips
Cleaning agents and contact cleaners are not recommended for tube sockets.
► Clean dirty sockets with compressed air and carefully clean tarnished tube
pins using a wire brush or toothbrush.
Please
note:
No adjustments are necessary to your amplifier after fitting new tubes.
It may take new tubes some time (up to 300 hours) to achieve their optimum sound
quality.
Manufacturing faults in tubes may only become evident after about 100 hours of
use. You should therefore be wary of installing untested tubes.
Tube service life
Thanks to the protection circuits and soft start electronics, the output tubes used in your amplifier
should achieve an average service life of 5 to 10 years.
Because the tubes have different service lives, it should never be necessary to renew the entire
tube complement at the same time.
 Loading...