Connect The Interface And Power Cables
24
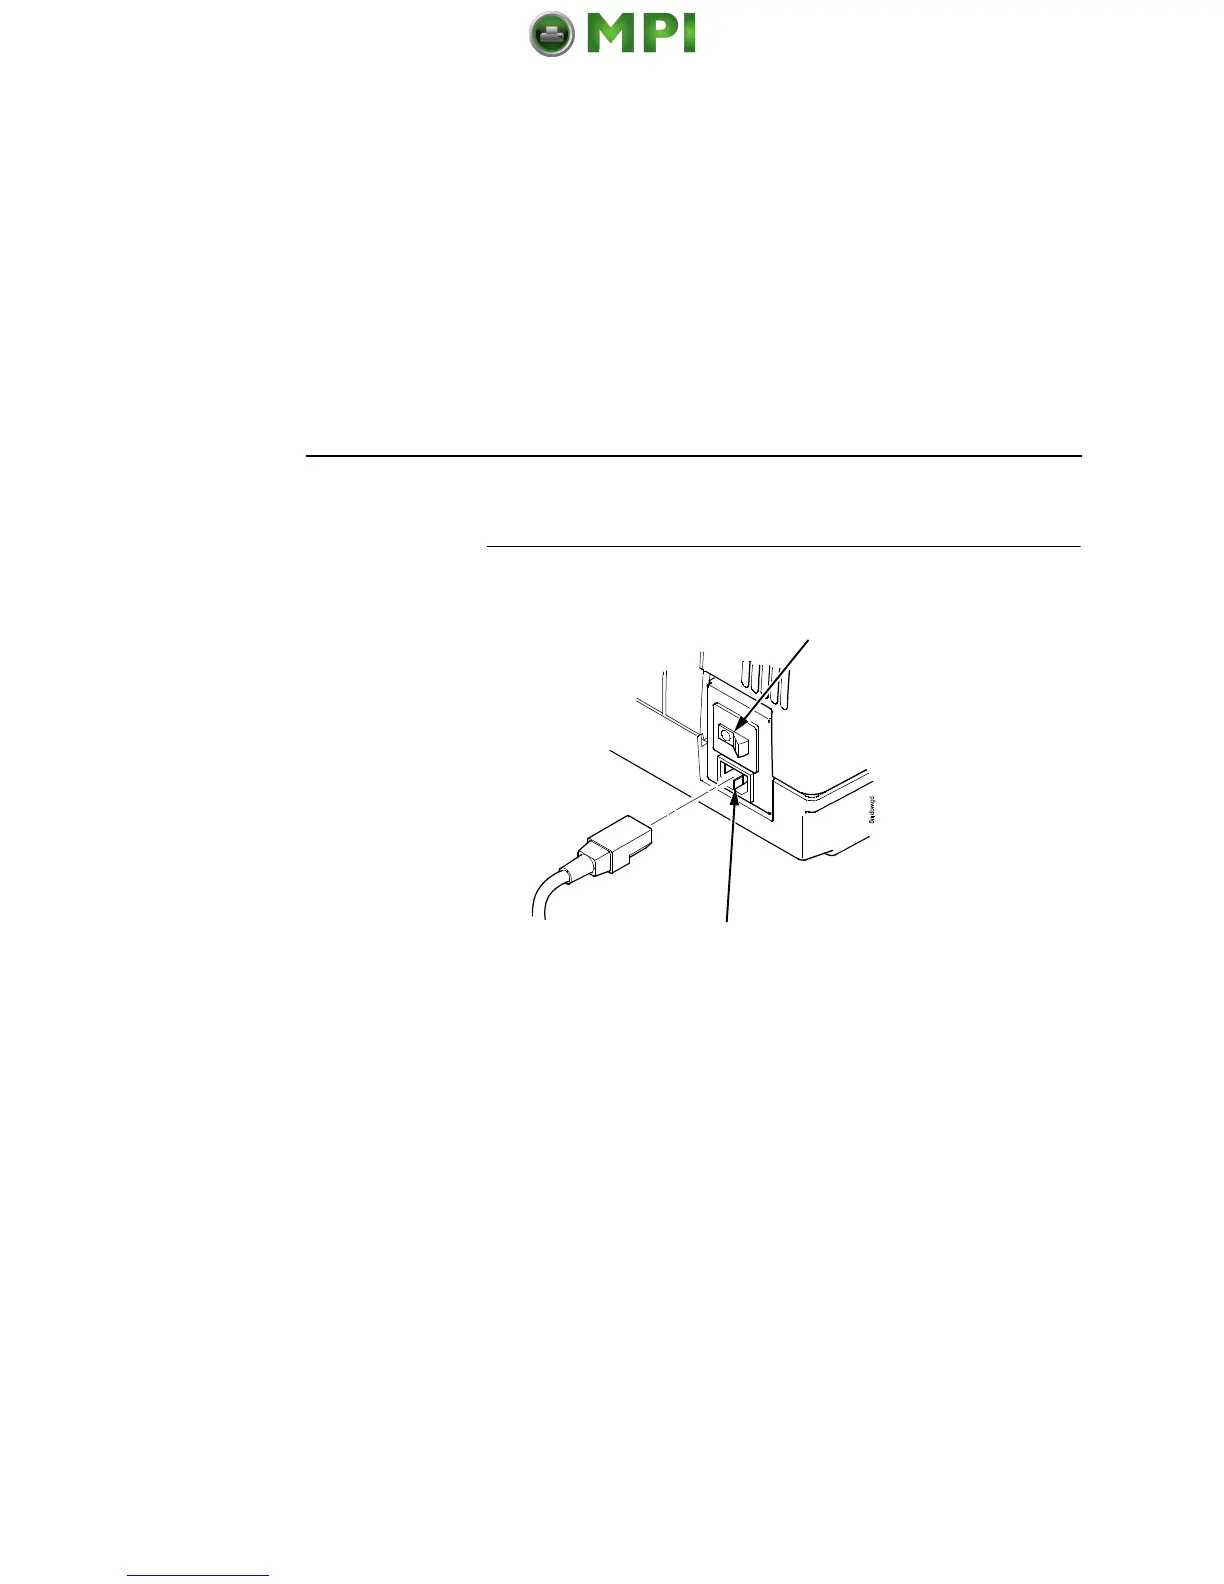
Pedestal Model
Figure 16. Attaching the AC Power Cable
1. Make sure the printer power switch is set to O (Off).
2. Remove the cover from the I/O connector you have selected.
3. Attach the I/O cable connector to the printer interface connector
(page 23).
4. Plug the power cord into the printer AC power connector, then
into the AC power outlet.
IMPORTANT
Printer power should be supplied from a separate AC circuit
protected at 10 amperes for 100 - 120 volts or 5 amperes for
200 - 240 volts at 50 or 60 Hertz.
5. Turn the printer on.
6. Continue on page 25.
Power Switch
AC Power Connector
 Loading...