Install the Servo Drive according to the following instructions.
Install the Servo Drive on the vertical metal surface.
To provide electrical conduction, remove any paint from the surface on which you install
the Servo Drives. Also, it is recommended that you apply conductive plating if you make
the mounting bracket by yourself.
The recommended tightening torque for installing the Servo Drive is 1.5 N·m. Make sure
that the threaded portion has the sufficient strength to withstand the recommended
torque.
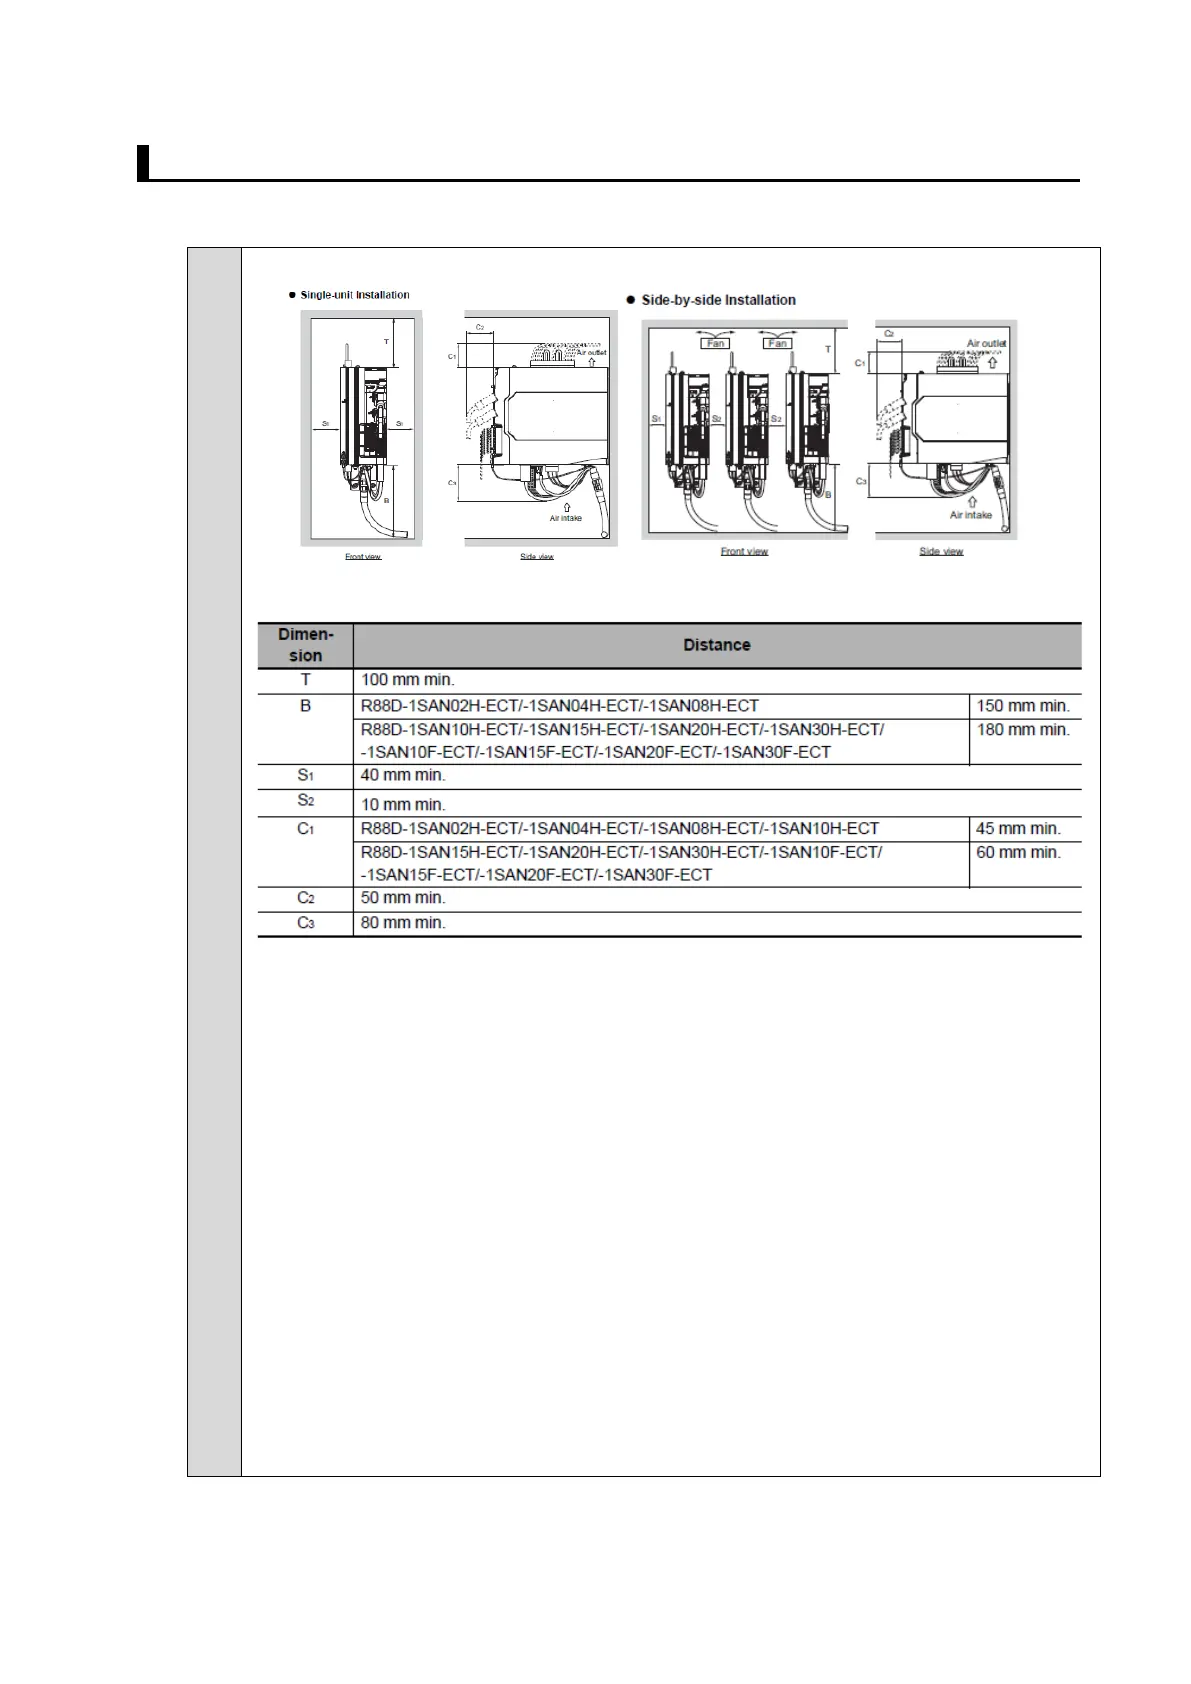
You can install Servo Drives without the clearance of S
2
if the operating ambient
temperature is from 0 to 45°C.
When mounting the shield clamp, use the threads included in the Servo Drive or
specified standard threads.
Before installing the Servo Drive on the control panel, mount the shield clamp to the
Servo Drive. Then connect the cable and fix the cable to the shield clamp.
When you connect PC to the USB connector of the Servo Drive, separate the USB cable
from other cables such as the main circuit power supply cable.
 Loading...