3-7
CLEANING THE SPARK ARRESTOR
Refer to Table 3-1 for scheduled cleaning of the
spark arrestor muffler. Cleaning is required for maxi-
mum genset performance. Park the vehicle away
from grass, brush or debris that could be ignited by
sparks expelled during this procedure.
WARNING
A hot muffler can cause severe
burns. Let the muffler cool down before remov-
ing or installing cleanout plugs or screens.
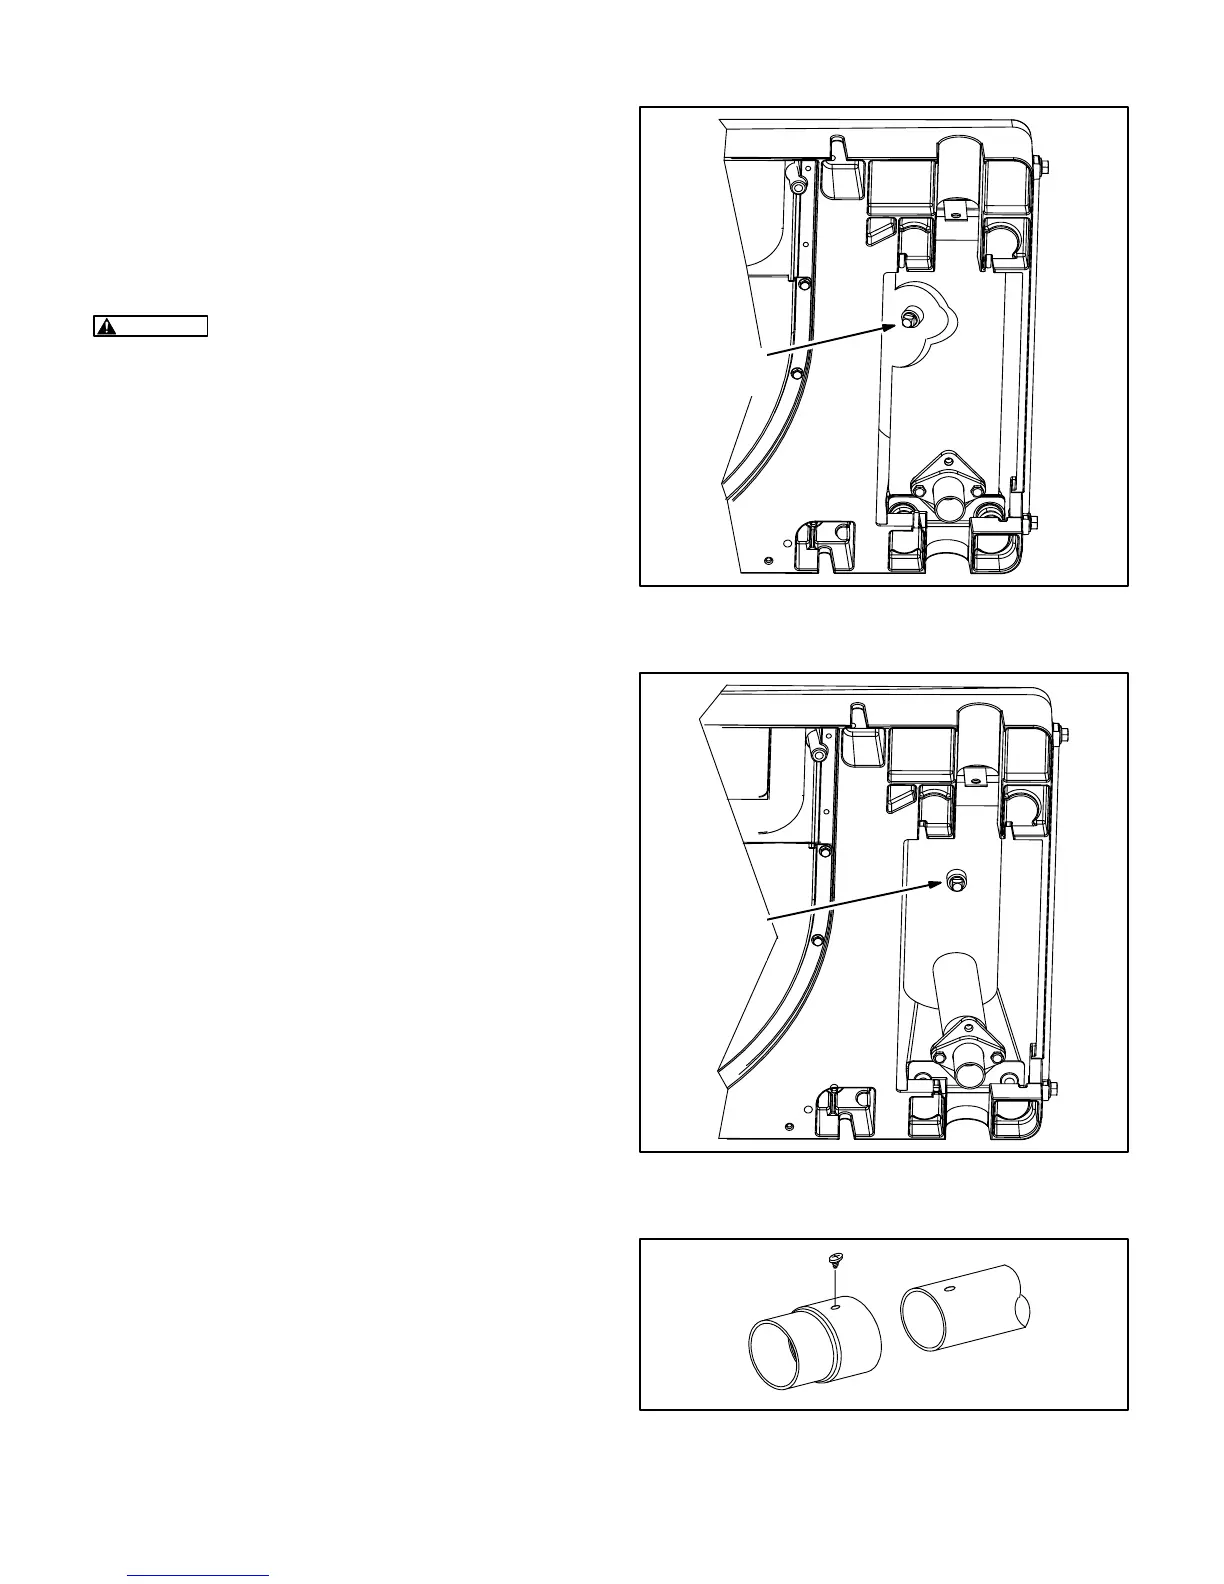
HGJAA & HGJAD: A double-drum muffler is
mounted inside the genset. The cleanout plug is in
the top drum, but accessible from below, though not
readily visible. In Figure 3-5 a portion of the lower
drum is cut out so that the location of the plug is vis-
ible.
1. Locate the square-headed cleanout plug by
hand and solidly seat a 7/16 inch, eight point,
3/8 inch drive socket wrench with 3 inch exten-
sion on the plug. Then add a swivel section and
6 inch extension and turn with a ratchet to re-
move the plug.
2. Start and load the genset to near full power. Let
the genset run for about five minutes to expel
the soot in the muffler.
3. Stop the genset, allow the muffler to cool down
and then reinstall the plug.
HGJAB & HGJAE: See Figure 3-5 if double-drum
or Figure 3-6 if single-drum. On a single-drum muf-
fler the cleanout plug is accessible from below as
shown in Figure 3-6.
1. Remove the plug with a 7/16 inch, eight point
socket wrench.
2. Start and load the genset to near full power. Let
the genset run for about five minutes to expel
the soot in the muffler.
3. Stop the genset, allow the muffler to cool down
and then reinstall the plug.
HGJAC & HGJAF: The muffler is externally
mounted. If it has a clean out plug like the one shown
in Figure 3-6, use the instructions for Series HGJAB
as a guide. Alternatively, the end of the tail pipe may
have a spark screen (Figure 3-7). If so, remove the
screw that secures the spark screen, clean the
screen with a wire brush and re-install it.
CLEANOUT
PLUG
FIGURE 3-5. HJGAA & HGJAD CLEANOUT PLUG—
VIEW FROM BELOW
CLEANOUT
PLUG
FIGURE 3-6. HJGAB & HGJAE CLEANOUT PLUG—
VIEW FROM BELOW
FIGURE 3-7. TYPICAL SPARK SCREEN
 Loading...


