66
Recording
This section explains how to record the input source and
how to record audio and video from separate sources.
Notes:
• The surround sound and DSP listening modes cannot
be recorded.
• Copy-protected DVDs cannot be recorded.
• Sources connected to the analog multichannel input
cannot be recorded.
• Sources connected to a digital input cannot be
recorded. Only analog inputs can be recorded.
• DTS signals will be recorded as noise, so don’t
attempt analog recording of DTS CDs or LDs.
• While the Pure Audio listening mode is selected, the
VCR/DVR OUT V and S jacks don’t output video sig-
nals, so select another mode when recording.
Audio sources can be recorded to a recorder (e.g., cas-
sette deck, CDR, MD) connected to the TAPE OUT jack.
Video sources can be recorded to a video recorder (e.g.,
VCR, DVR) connected to the VCR/DVR OUT jacks.
See pages 20 to 36 for hookup information.
Note:
• If you select a different input source during recording,
that input source will be recorded instead.
You can overdub audio onto your video recordings by
simultaneously recording audio and video from two sep-
arate sources. This is possible because only the audio
source is switched when an audio-only input source,
such as TAPE, TUNER, or CD, is selected, the video
source remains the same.
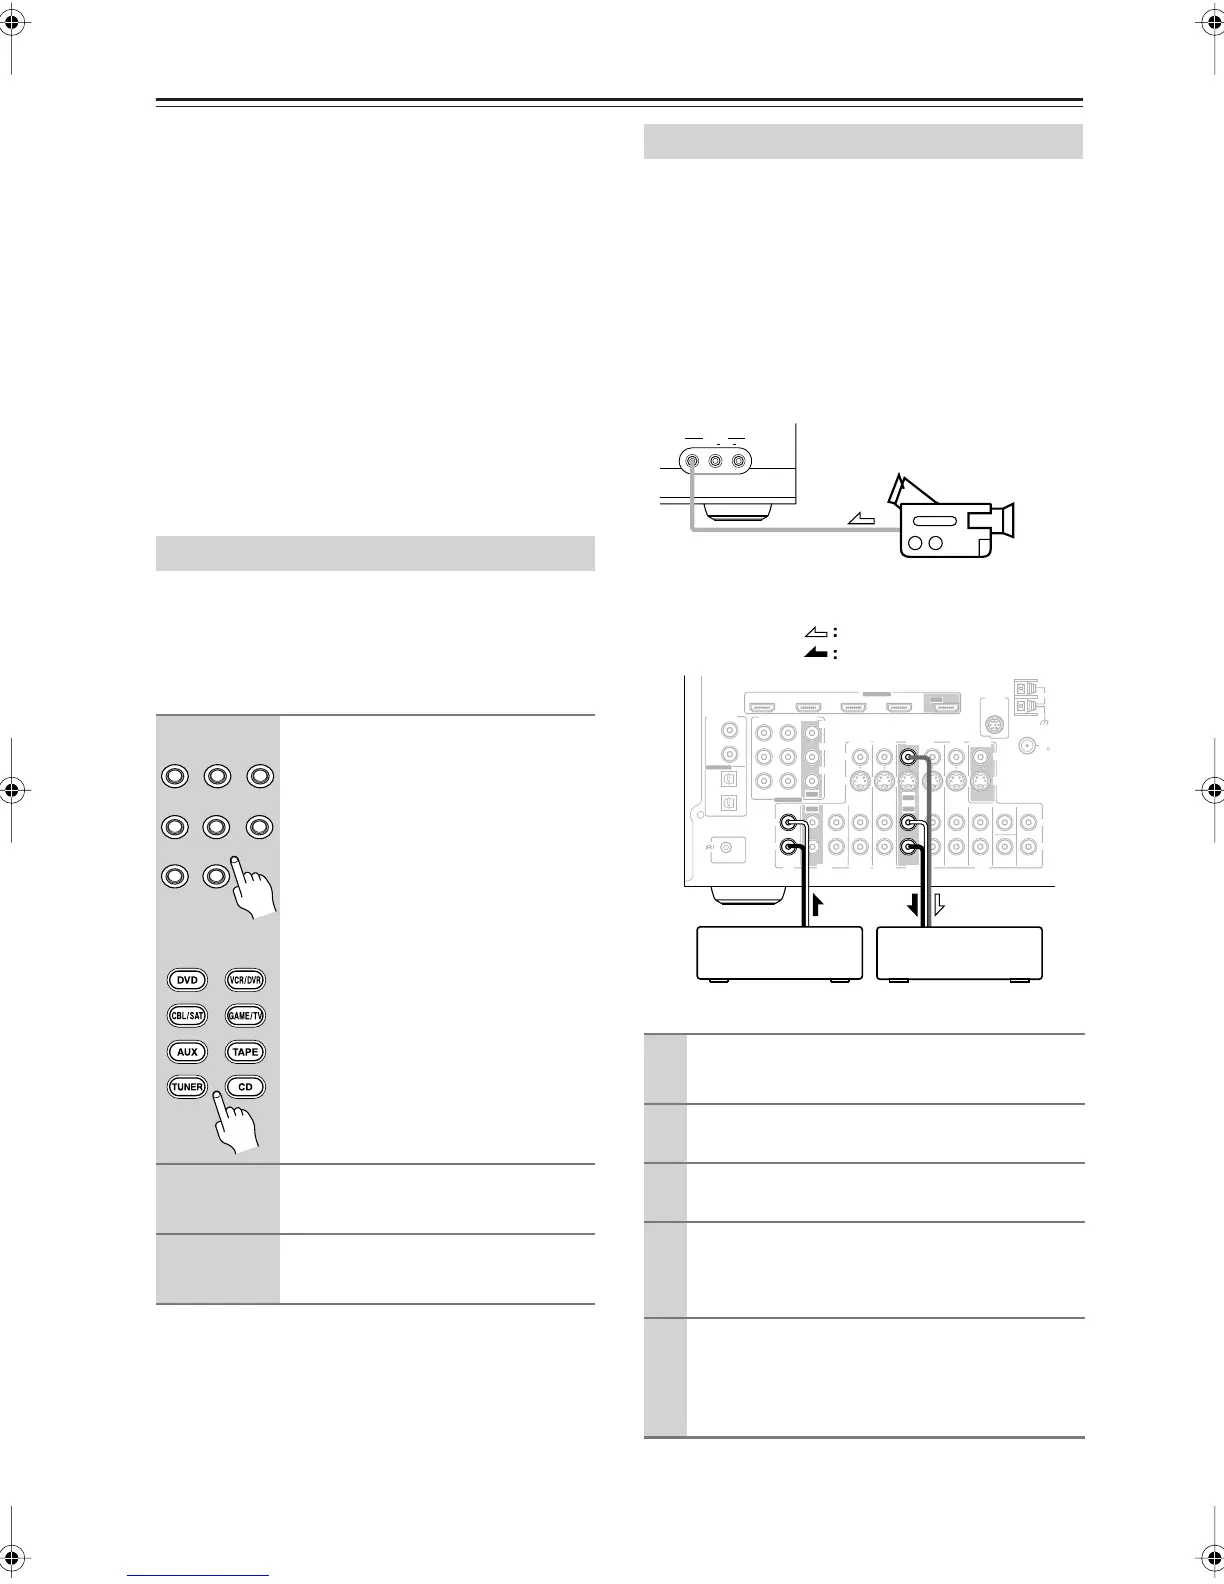
In the following example, audio from the CD player con-
nected to the CD IN and video from the camcorder con-
nected to the AUX INPUT VIDEO jack are recorded by
the VCR connected to the VCR/DVR OUT jacks.
Recording the Input Source
1
Use the input selector buttons to
select the source that you want
to record.
See “Which Connections Should I
Use?” on page 21 to see which signals
can be output and recorded.
You can watch the source while record-
ing it. The AV receiver’s MASTER
VOLUME control has no effect on
recording.
2
On your recorder, start record-
ing.
3
On the source component, start
playback.
DVD VCR/DVR CBL/SA
GAME/TV AUX TAPE
TUNER
CD
Remote
controller
Recording from Different AV Sources
1
Prepare the camcorder and CD player for
playback.
2
Prepare the VCR for recording.
3
Press the [AUX] input selector button.
4
Press the [CD] input selector button.
This selects the CD player as the audio source but
leaves the camcorder as the video source.
5
Start recording on the VCR, then start
playback on the camcorder and CD player.
Video from the camcorder and audio from the CD
player are recorded by the VCR.
ANTENNA
FM
AM
75
REMOTE
CONTROL
COAXIAL
OPTICAL
1
(DVD)
2
(CBL/SAT)
1
(GAME/TV)
2
(CD)
DIGITAL IN
ASSIGNABLE
IN 1(DVD)IN 2
COMPONENT VIDEO
Y
C
B/PB
CR/PR
ASSIGNABLE
HDMI
IN 1
IN 2
IN 3
IN 4
ASSIGNABLE
R
L
R
L
IN IN IN
IN
IN
IN
IN
IN IN
SUB
WOOFER
FRONT SURR
SURR BACK
CENTER
CBL/SAT
GAME/TV
GAME/TV
CBL/SAT
VCR/DVR
VCR/DVR
DVDTAPECD
DVD
MONITOR
OUT
S
V
S
V
SIRIUS
(DVD)
(GAME/TV) (CBL/SAT) (VCR/DVR)
OUT
OUT
OUT
OUT
OUT
Camcorder
VCR
CD player
video signal
audio signal
TX-SR606En.book Page 66 Friday, May 9, 2008 1:28 PM
 Loading...