Bleeding Hydraulic brakes
For those who can bleed their brakes properly, Optima offers standard and Rider bleeding kits
to its customers
4
1
, which come with a complete instruction manual. Please contact optima for
a bleeding kit, using the address found on page 30, resources.
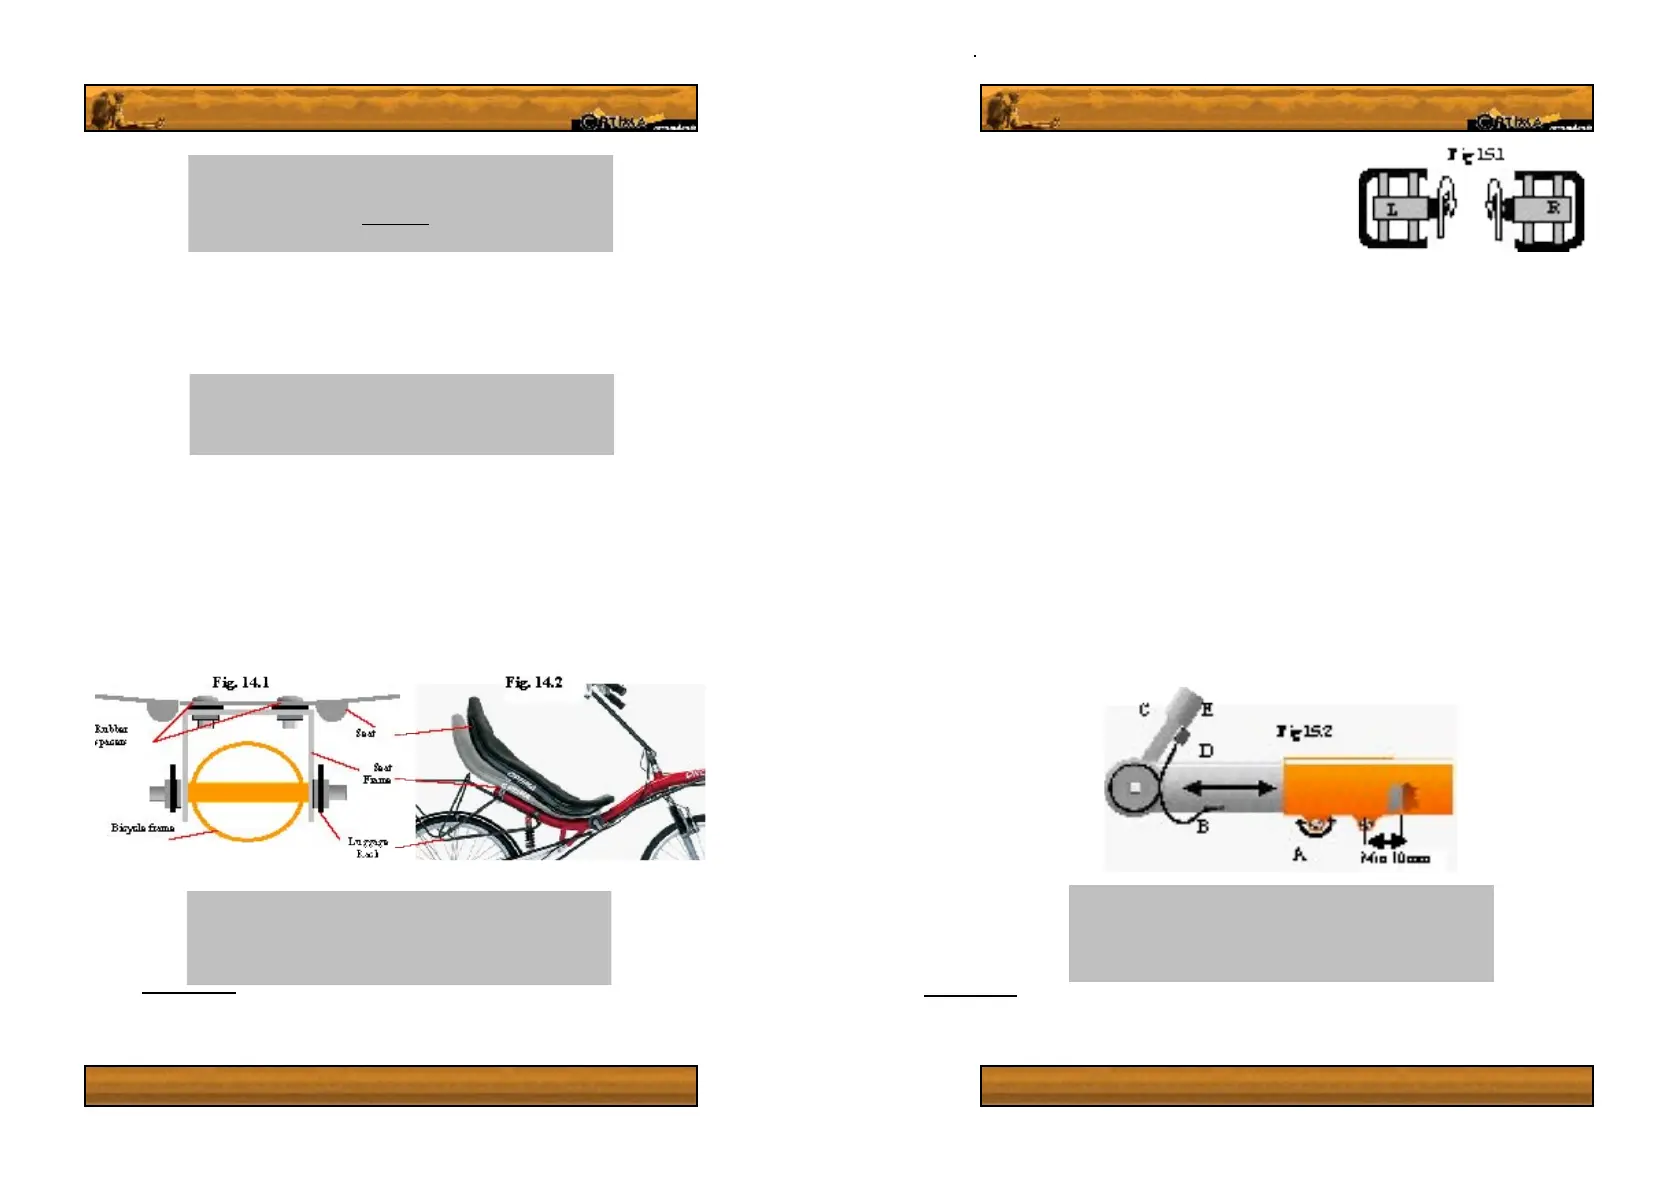
6. Fitting the seat and rack.
4
Rider kit comes with an extra syringe and lead for the dual slave system. This special kit is
cheaper than buying two Magura service kits, which you would otherwise have to do.
For low handlebar models, please go to step 10 on page 17 rst. The seat must be installed
using the rubber spacers, 3 & 6 mm Allen keys and the 10 mm bolts provided. The seat
mountings allow for adjustment of the angle of the seat, of approximately 5 degrees (g
14.2). The seat mounting frames are fastened using a 6mm allen key, and a 5mm allen key
on the bolt holding the seat frame and chain router on the lower right hand side. The rack
xes to the frame using the upper seat xtures and the bolts half way down the seat support
tube.
If you own a Orynx or Dolphin, your rack, if you ordered one, will be different from the rack
on the bicycle shown in gure 1.1. This rack fastens onto the same points as the standard
rack, but it integrates the upper seat frame. (g. 1.1, part numbers 2 and 35) The Stinger
rack fastens to the upper adjustable seat mounting, and is connected to the seat itself with 4
bolts instead of two.
Tip: When adjusting the angle of your seat, you will need to
change the extension of the pedal boom slightly. If you lay the
seat back, reduce the extension of the boom. If you bring the
seat upright, lengthen the boom extension slightly.
Caution! Do tighten the bolts holding the seat onto the seat
frame over 6 NM
-1
. Failure to follow this guideline will either
immediately crack your seat, or reduce it’s service life. Let the
Caution! Bleeding hydraulic brakes of air is a potentially
dangerous process if not done correctly. We strongly advise
that you get your brakes bled by an experienced bicycle
mechanic if you are not absolutely certain that you can do it.
14
5
This requires a special tool: a chain breaker or pin pusher. Go to your local bike store if you don’t
know how to use one or are not condent in adjusting your chain, as a badly connected chain will
break.
7. Installing the Pedals
Now get the Pedals, and slightly grease the thread on
them. Feed the pedal thread into the cranks manually,
remembering that the left hand pedal has an inverted
thread (To tighten, turn counter-clockwise.) The right
hand side has a normal thread (turn clockwise to tighten).
Caution! The pedal boom MUST NOT be extended beyond
the point at which the end of the boom is less than 10
mm inwards from the inner of boom clamping bolt (A, fig
16.2). Failure to follow this guideline will result in increased
fatigue and potential failure of the frame of your bicycle.
15
8. Installing the pedal Boom
Loosen the screws on the bottom of the frame where the boom enters the frame feed the boom
into the frame, ensuring the derailleur post, if present, is on top and the chainwheels are on
the right hand side of the boom, in the direction the bike travels. If you own a condor or a rider,
keep in mind that for any extension or shortening of the pedal boom, you will need to undo
the derailleur cable rst. When you cut the cable to length, take note that doing so will limit the
extent to which you can extend the boom in future, without buying a new inner cable.
Start the setup process by setting your seat in the most upright position possible. Now adjust the
length of the pedal boom up so that your knee is slightly bent when your heel is on the pedal at
it’s full extension. Make sure that you feel comfortable with the setting – some people like their
pedals closer than others. If you did not tell us your leg length in the ordering procedure you
will now need to adjust the chain length
5
, as described on page (XX). If you have short legs,
you may even need to cut down the pedal boom to allow for the bike to be set up correctly. We
advise you do to a local bike store to have this done. If you cannot or wish to do it yourself,
use a good jig and a sharp metal saw to cut the pedal boom down.
To get the pedal boom aligned properly in rotation, line the boom up with the seat and handlebars.
Once you have the boom properly aligned, tighten the bolts rmly.
 Loading...