13.Chain length and Pulleys.
Pulleys
Each Optima bicycle is equipped with at least one chain guiding pulley, which
will not need much maintenance. These pulleys both guide the chain and
prevent the bicycle’s rear suspension from being inuenced by pedalling
forces. The fastenings for the pulleys double as anchorage points for the
protective chain tubes, which reduce the amount of dust that gets to your
chain and protect your clothing.
It is crucial that the chain is guided over the pulleys correctly, as failure to do so could result
in damage to the bicycle frame and seat. Make sure that the larger diameter pulley (70mm /
3 in diameter) guides the chain as it goes from the top of the rear cog cassette, to the top of
the front chainwheels of the crank.
The three low swung Optima’s (Baron, Cobra and Stinger) have 1 or two return pulleys to
allow for better clearance
for steering (g 18.1). These
smaller pulleys were only
designed to take a minimal
load, and incorrectly routing
the chain will brake them and
their ttings. The rest of the
optima range has one pulley
for the upper driving side of
the chain, and use a long
ared tube to guide the chain
back to the rear cassette.
Chain length.
With the pedal boom set
up at the correct extension
and the chain routed past all
pulleys and through all tubes, put the chain into the smallest front chainwheel and smallest
rear cog. The rear derailleur’s chain tensioning arm
should now be pointing backwards, as seen in g. 18.3.
(the two teethed pulleys are attached to the tensioning
arm) If the arm points downwards, lengthen the chain
slightly. If it points upwards slightly or the chain is not held
tense and hangs, shorten the chain.
You will need a special tool for this: a chain pin pusher.
Push out the pin of the chain totally, and reconnect the
chain using the included bronze coloured superlink. To
release the superlink, squeeze the two plates together
and slide their pins together.
18
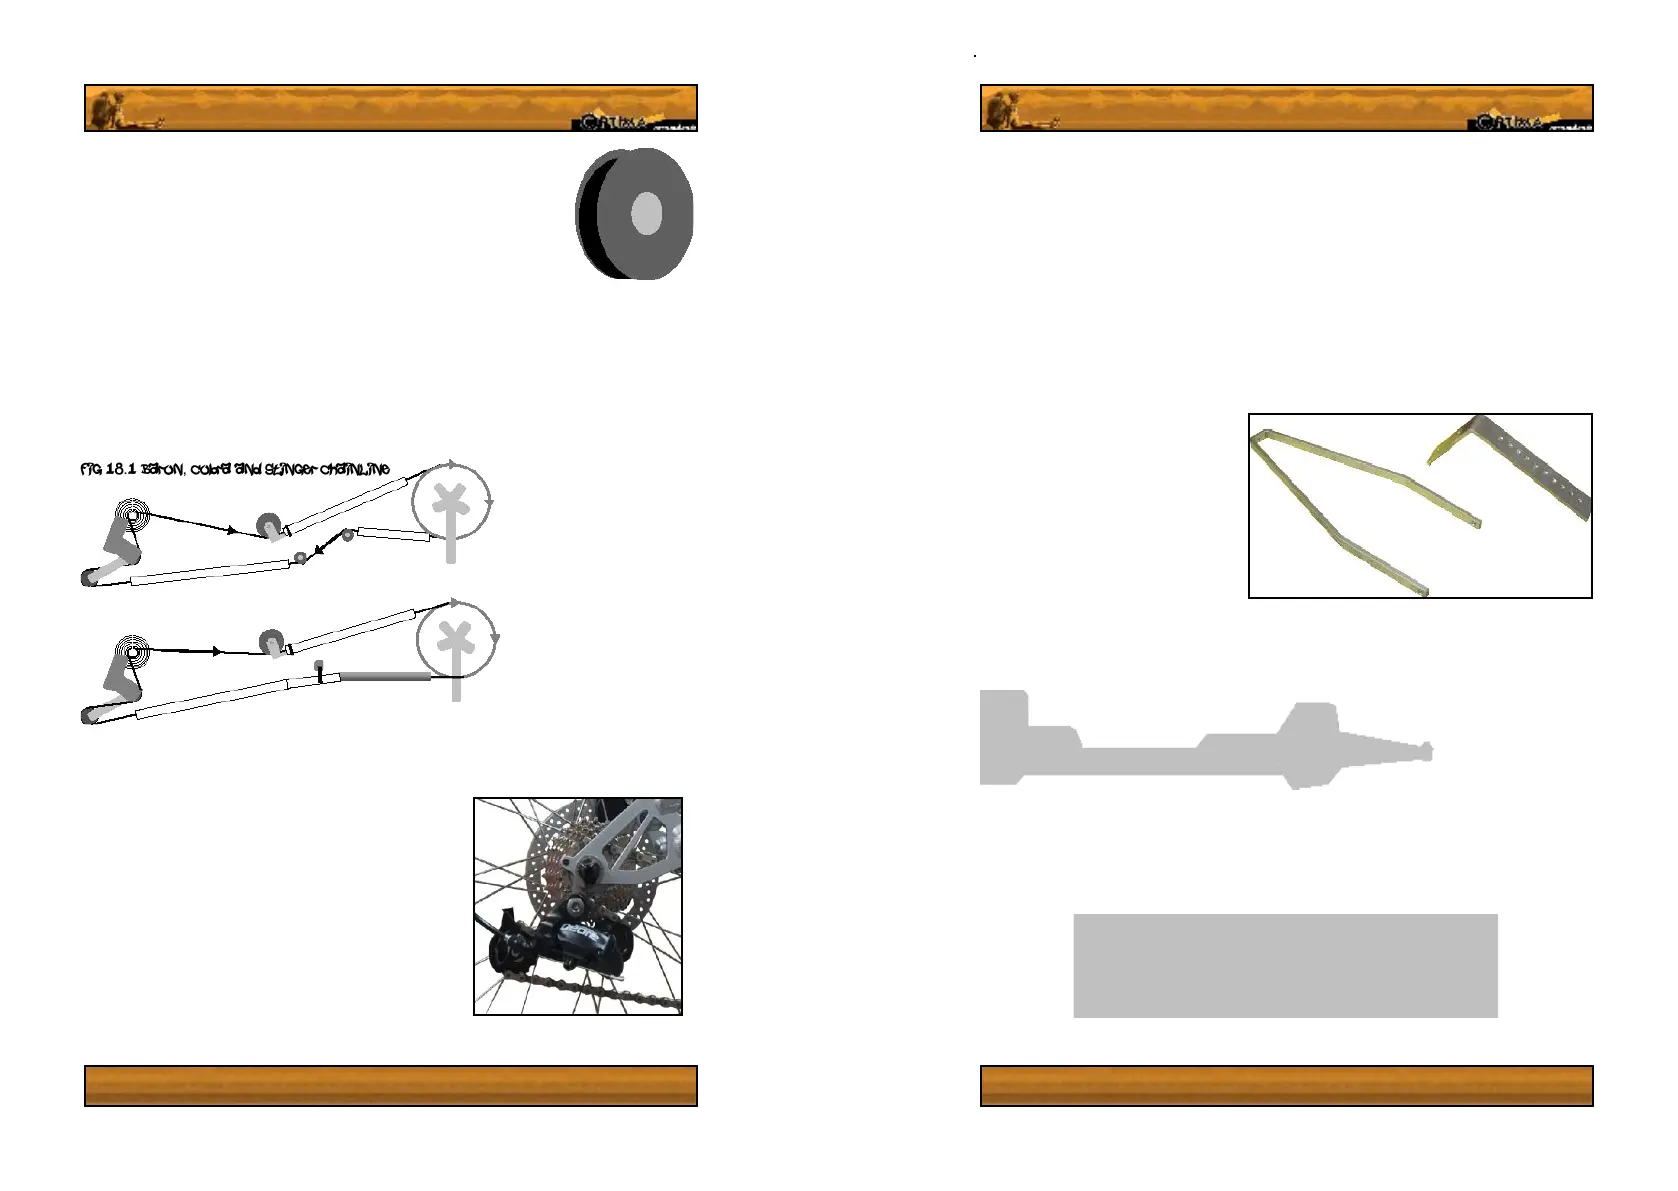
Fig 18.1 Baron, Cobra and Stinger chainline
Standard chainline
Fig 18.2 Chain length setup
19
14.Brakes.
The brakes may need slight adjustment out of the box bus should be working properly.
Optima sets up its bikes so that the right hand brake lever is for the rear brake, and the left
hand lever is for the front.
Be careful in learning to use the brakes on a recumbent – the rear wheel will break out easily
if you use them over zealously. On a recumbent you cannot move around like on a normal
bike, making a recovery more difcult.
15.Mounting an aerodynamic fairing (Baron
Option)
A correctly installed fairing will reduce
your wind resistance by 10%, giving
you a competitive edge or that extra
bit of range on a ride. Follow these
instructions carefully and you will look
back – but only to see all the people
you’ve passed! A fairing kit can be
ordered from any official Optima
representative and includes a Fairing,
bolts, spacers, a support arch and a
seat attachment plate.
The rst step in installing a fairing is
to put your seat all the way back, or to the position you wish to keep it in once the cowling is
installed. (The fairing will not t properly if the seat is more than half way upright.)
Now nd the included
template for the cut-
out for the wheel
and derailleur on
the underside of the
fairing, shaped like g
19.1. Make double and
triple sure to align the template properly, with the side marked derailleur side, on the correct
side of the fairing! (All you need to look for is ‘inside template side’ When this text is facing
YOU, the side facing down is the side described in the text.) Read the last sentence between
brackets again, because if you mess up here you can’t go back a step!!!
Tip: It is important that the fairing ts you like a glove: any
openings will effectively turn your fairing into a parachute
giving the opposite effect to what you want! Ask your optima
representative for hints and tips if you are uncertain of
anything.
 Loading...