– 11 –
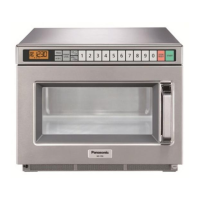
7. Open the door and take the food out.
The oven lamp will turn on. The digital display will show the originally selected
time and heating stage number.
8. Close the door.
The oven lamp will turn off and 1 minute later the Digital Display Window will go
blank.
Note: For the heating cycle of the third and later stages, select Power Level once
again after Step 3 on page 10 and set a heating time.
See Special Note of “Manual Single Stage Heating” on page 10.
C. Programming Memory Pads for Single Stage Heating
The oven can not be programmed until the program lock feature is deactivated.
(See page 15, J. To Activate Program Lock.)
1. Make sure the oven is plugged into a properly earthed electrical outlet.
2. Open the door and leave it open.
3. Touch Prog Pad.
“PROG” sign will start to blink in the Digital Display Window.
4. Touch Memory Pad you desire to program.
The pad number and the previously programmed information will appear in the
Digital Display Window.
[Example]: Touch Memory Pad “5”.
5. Select the desired Power Level by touching Power Level Selector Pad.
The selected power level will be displayed in the window and the single stage
heating indicator “1” will start to blink.
[Example]: Touch Power Level Selector Pad 10 times for DEFROST power.
6. Set the desired heating time by touching the appropriate Number Pad.
Note: The maximum set time for “DEFROST” and “P0” is 30 minutes, and
15 minutes for all others.
[Example]: Touch Number Pads “1”, “0” and “0” for 1 minute.
7. Touch Prog Pad again.
The “PROG” sign and the single stage heating indicator “1” will stop blinking. This
means that you have completed programming the selected Memory Pad for the
single stage heating.
8. 3 seconds after programming is completed, “0” will appear.
9. Program the remaining Memory Pads as desired by repeating Steps 3–7 above.
Note:
When the “PROG” Display is blinking, the program can be cancelled and/or
one touch on Stop/Reset Pad erased the programmed Number/Memory
Pad number.
When you want to program B or C side, touch Shift (A/B/C) Pad before
touching Program Number Pad.