– 34 –
Explanation of Self Diagnostics Failure Code
Installation Instructions for Stacking
This oven monitors its operation and displays a Failure Code in the Digital Display Window when a problem occurs.
What to do when a failure code appears:
Unplug the oven and wait more than 10 seconds before reconnecting.
If normal operation does not resume, follow the chart below.
CODE PROBLEM WHAT TO DO (BELOW)
F01 Temperature of exhaust air too High 1./2./3./4./5.
F33 Defective Thermistor Circuit 1./5.
F44 Defective Control Panel 1./5.
F81–82 Defective Relay Circuit 5./6./7.
F86–87 Defective Relay Circuit 1./5.
U30 Memory cooking has exceeded the maximum time during
double quantity and triple quantity setting.
Check and change the time.
— See page 9, step 5 “Note”.
1. Oven shuts off automatically. Disconnect the power cord from the wall socket.
2. Oven beeps continuously.
3. Oven resets for operation when cool.
4. Move oven to cooler location.
5. If problem persists call service agent.
6. Oven will operate even if failure code appears, just not as designed. Call service agent.
7. Touch Stop/Reset Pad and try again.
Note: Above Codes shown in the display do not indicate all the possible failures on the unit.
Important
1. Disconnect the power cord from the wall socket
before attempting installation.
2. For stacking installation, you must use the
Panasonic Joint Plate A1134-3280 (Available
via service route).
3. Combination of the unit for stacking is limited
within only the following models.
NE-1753, NE-1853
4. Do not stack more than one oven above bottom
oven.
Preparation
Be sure the oven cavity is empty.
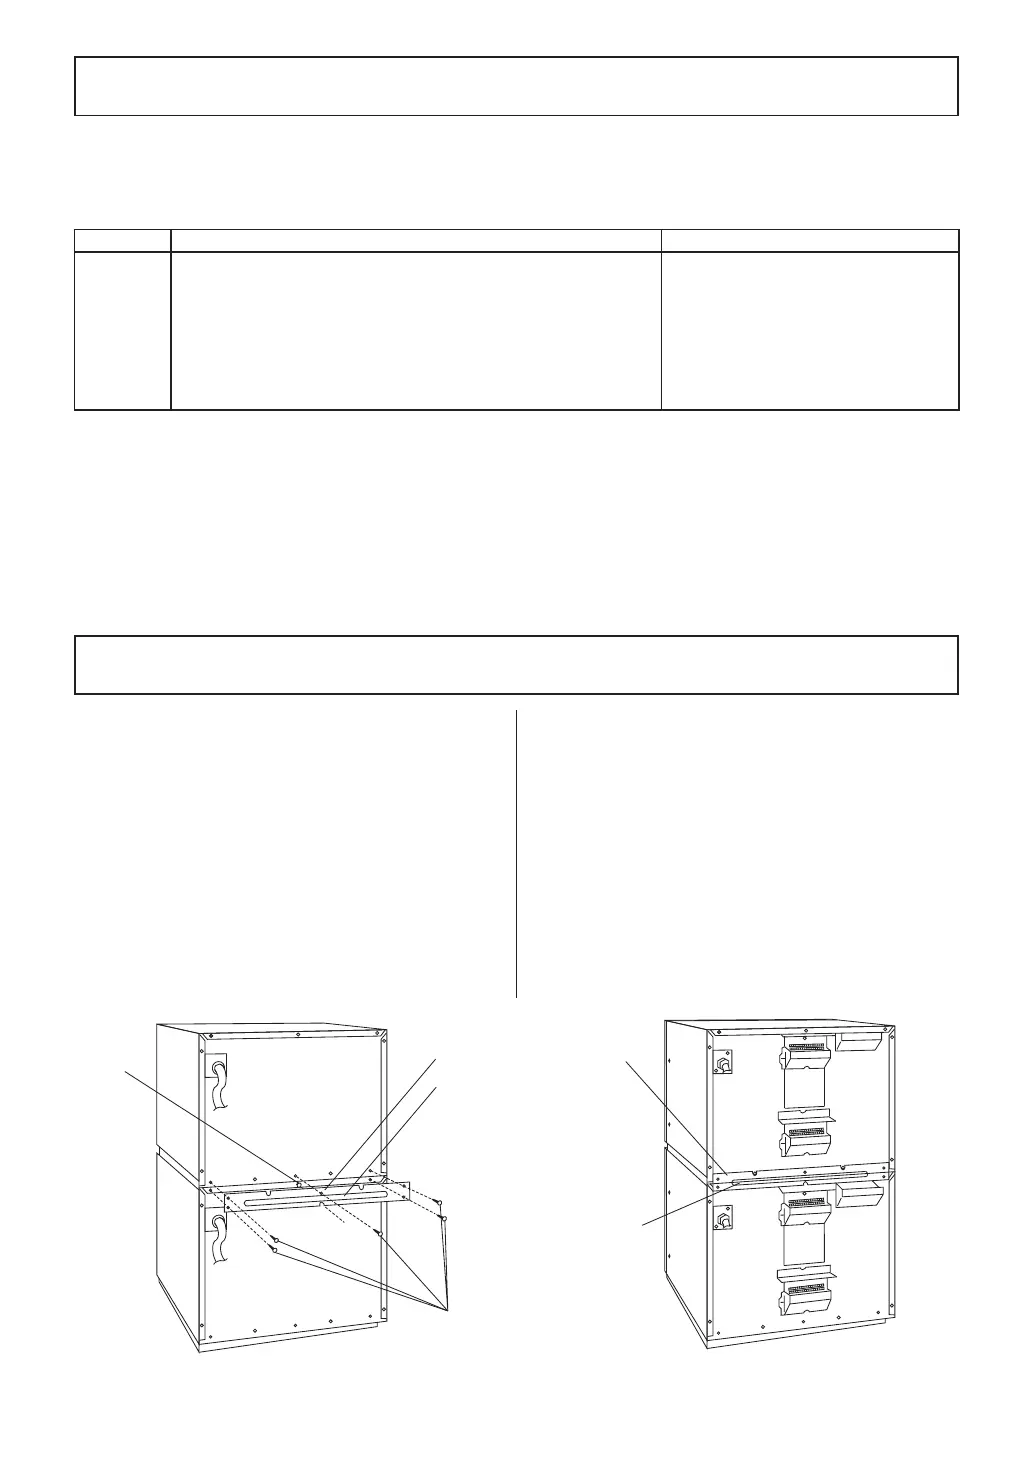
Installation
1. Stack the units and remove five screws a as
shown in Fig. 1.
2. Loosen the screw b.
3. The projection on the Joint Plate must face
away from the oven. Place the Joint Plate on
the screw b.
4. Attach and tighten five screws a and the screw
b. See Fig. 2.
5. Ensure the top oven is at a safe and workable
height.
Joint Plate
Joint
Plate
Projection
Projection
Fig. 1 Fig. 2
 Loading...