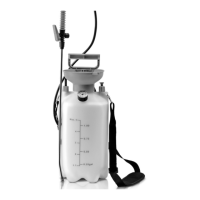
17 GB/IE
Note: Before you open the container
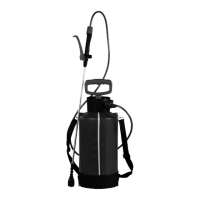
5
,
pull the safety valve
3
to the side to
release any residual pressure still present
in the container
5
.
Note: You can unfold the feet
15
at
bottom of the bottle to have extra stability.
Draw the pump
2
out of the
container
5
.
Now fill the container
5
.
Note: Fill the container
5
with only
the amount of liquid that you actually
need for that particular spraying session
(not more than 5 l).
Lock the pump handle
1
to the pump
cover
2 a
. Place the pump
2
back into
the container
5
and turn the pump
handle
1
clockwise as far as it will go.
Building up the
operating pressure
Turn the pump handle
1
anti-clockwise
to unlock it before pumping.
Move the pump handle
1
up and down
until the pressure sprayer has been
pumped up to a pressure not exceeding
the maximum permissible operating
pressure of 2.5 bar. To ensure this value
is not exceeded, monitor the pressure
gauge
4
during the pumping process.
Note: If the pressure of the air in the
container
5
exceeds 2.5 bar, the pres-
sure is automatically released through
the safety valve
3
.
Press the pump handle
1
downwards
into the recesses and turn it clockwise
to lock.
Now take the spray tube
8
out of the
holder.
Note: Unfold the feet
15
and stand on
the step surface for better stability when
pumping on the ground.
Fold up the feet
15
by pressing the
“PUSH” button if you are pumping when
carrying the product on your shoulder.
Spraying
Hang the pressure sprayer over your
shoulder by the carrying strap
6
.
Note: Ensure that the pressure sprayer
is always kept upright. Only when held
in this orientation will the sprayer work
properly.
Hold the spray tube firmly by the han-
dle
11
and direct the adjustable spray
nozzle
7
e.g. at a plant.
Note: You can rotate the spray head
to change to different spray function:
Straight line (Fig. B1), Mist (Fig. B2),
Shower (Fig. B3), Rainfall (Fig. B4).
There are three movable section con-
nected to the spray head, so that you
can adjust to an appropriate angle for
spraying (Fig. B).
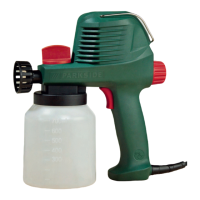
Press the trigger
13
to start the spraying
process.
Release the trigger
13
to stop the spray-
ing process.
Note: When the pressure in the con-
tainer
5
is no longer sufficient to spray,
pump the container
5
to increase the
pressure again up to but not exceeding
the maximum permissible operating
pressure of 2.5 bar. You can check the
operating pressure using the pressure
gauge
4
(see “Building up the operat-
ing pressure”).
Pull the safety valve
3
to the side as
far as it will go to release the residual
pressure in the container
5
(Fig. E).
 Loading...