Installation 4
Before you install your pump
NOTICE:Wellmustnotbemorethan20’depthtowater.
1. Longrunsandmanyfittingsincreasefrictionandreduceflow.Locate
pump as close to well as possible: use as few elbows and fittings
aspossible.
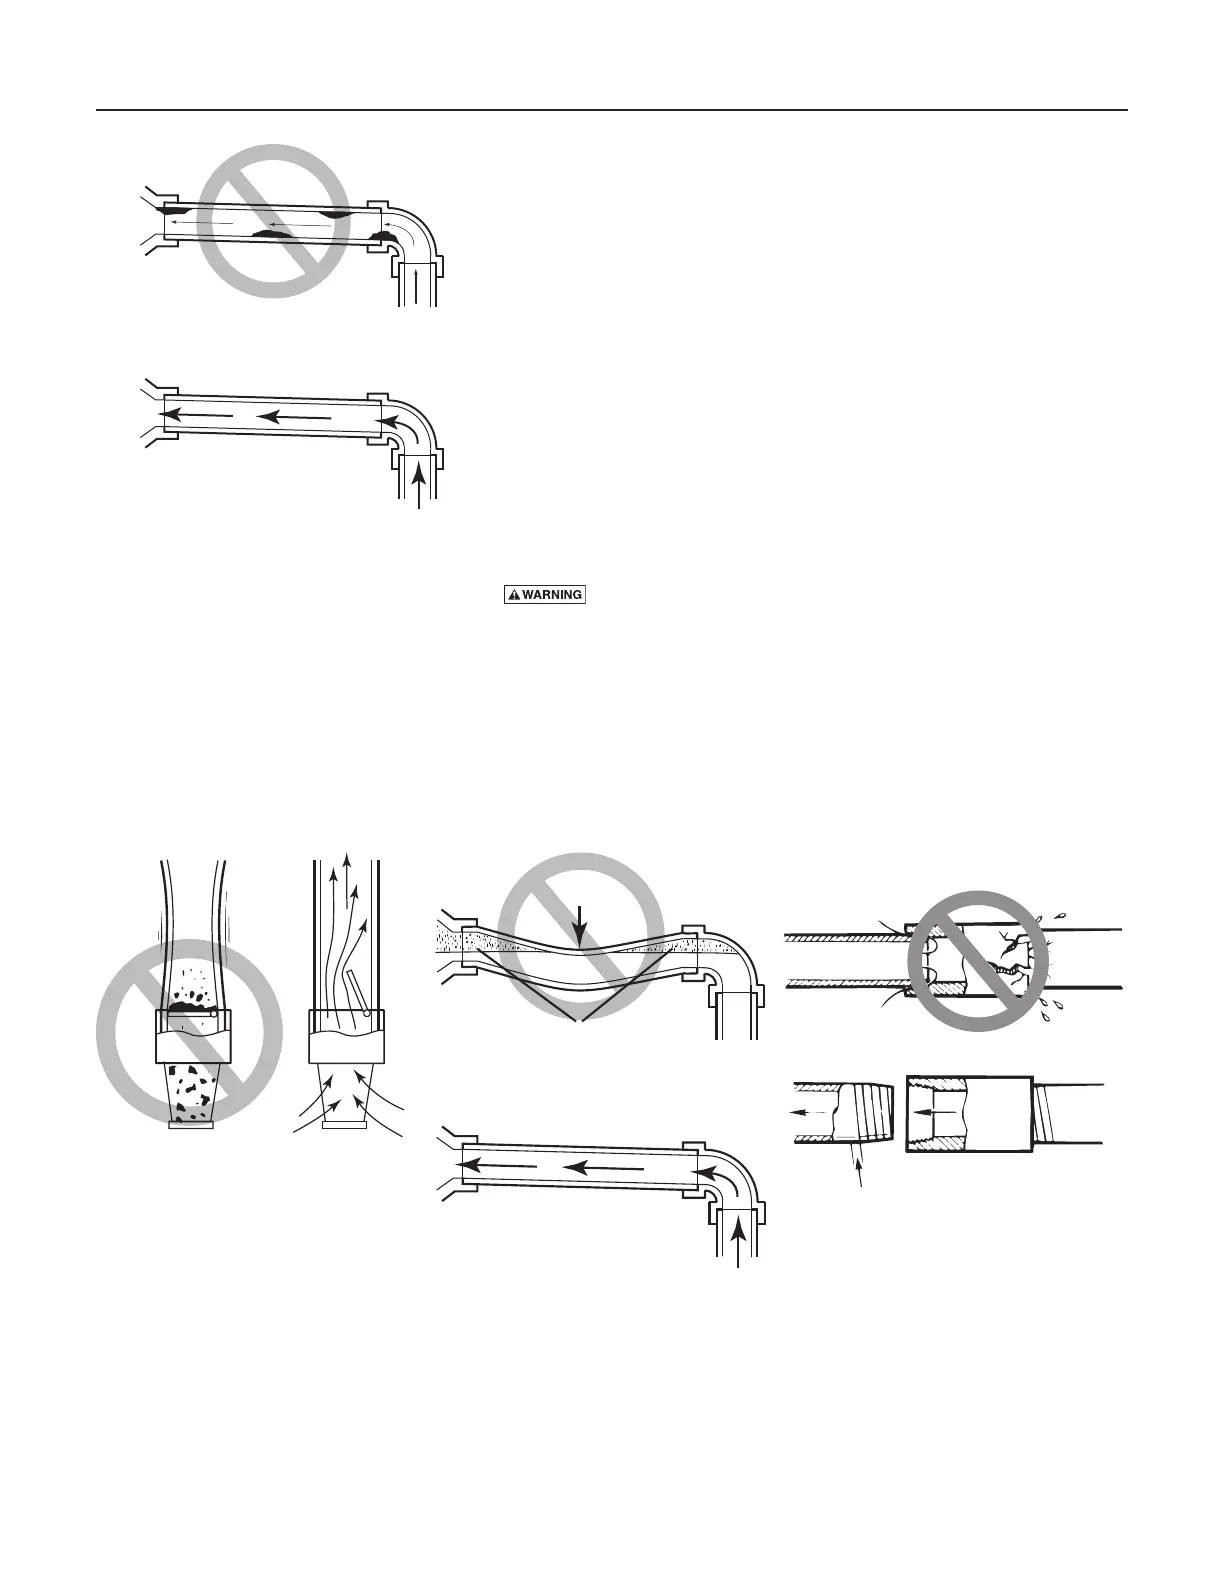
2. Besurewellisclearofsand.Sandwillplugthepumpandvoid
thewarranty.
3. Protect pump and all piping from freezing. Freezing will split pipe,
damage pump and void the warranty. Check locally for frost protection
requirements(usuallypipemustbe12”belowfrostlineandpumpmust
be insulated).
4. Besureallpipesandfootvalvearecleanandingoodshape.
5. Noairpocketsinsuctionpipe.
6. Noleaksinsuctionpipe.UsePTFEpipethreadsealanttapetoseal
pipejoints.
7. Unionsinstallednearpumpandwellwillaidinservicing.Leaveroom
to use wrenches.
8. Risk of explosion. Pump body may explode if used as a
boosterpump.DONOTuseinaboosterapplication.
NOTICE:Usetheinstallationmethodwhichmatchesyourwelltype.
9. Installacheckvalveinthepumpsuctionport.Besurethattheflow
arrow points toward the pump. Failure to install a check valve on the
inlet side of the pump may allow the pump body to drain between
pump cycles, causing dry running, seal or internal failure, and voiding
the warranty.
Body
From
Well
Dirt and Scale Plug Pump and Pipes!
Use New Pipe for Best Results.
Clean Flow!
Figure 1 – No Dirt or Scale in
SuctionPipe
Figure 2 – Foot Valve Must
WorkFreely
Figure 3 – No Air Pockets in
SuctionPipe
No Sags
Sags Allow Air Pockets
If Air Pockets Form, Water Won’t Flow.
Keep Pipe Straight and Angled up to Pump.
1101 0697
Suction pipe.
If air flows
water won’t
Use PTFE tape.
Use PTFE pipe thread sealant tape or pipe joint
compound approved for use on PVC.
Figure 4 – Suction Pipe Must Not Leak
 Loading...