Set-up and Initial Commissioning
23
2
3
8
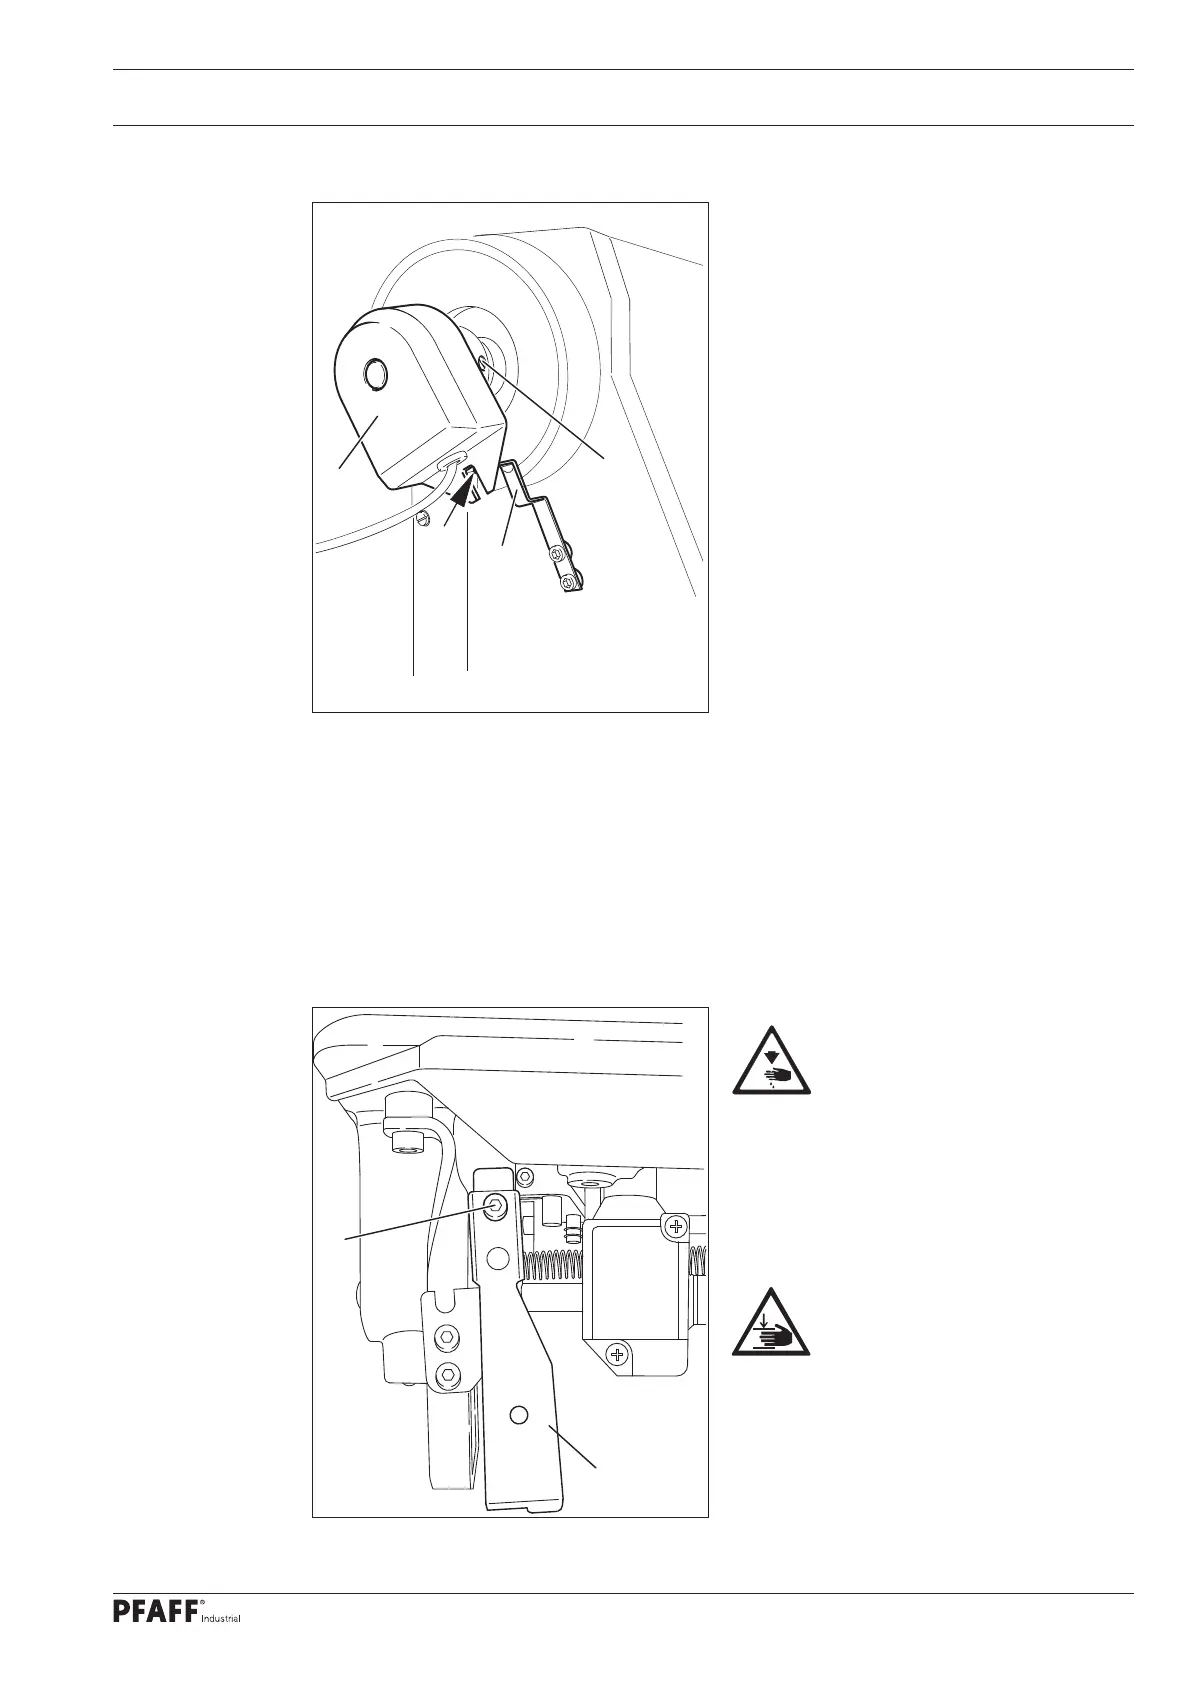
.01.07 Mounting the synchroniser
Slide the synchroniser 1 onto the shaft
so that the position fi nger 2 is positioned
in the synchroniser groove (see arrow)
Tighten the screws 3.
Insert the synchroniser plug on
the control box (see Chapter 8.02
Connecting the plug-in connections
and ground cable).
Adjust the synchroniser, this must
be learned with parameter t0819
in machines with gear reduction.
The needle reference position t0810
must be reset after an update. An
adjustment of the treadle t0820 must
also be carried out, see Chapter 4.4
Positions of the drive service manual.
Fig. 8 - 07
1
2
8
.01.08 Assembling the anti-tipping device
Fig. 8 - 08
1
Switch off the machine!
Risk of injury due to accidental
machine start-up!
Screw on the anti-tipping device 1
included in the accessories with the
screw 2.
Do not operate the machine
without the anti-tipping
device 1!
Risk of injury by crushing
between the sewing head and
the table top!
 Loading...