Operation 04
11
En
English
DeutschFrançais
Nederlands
Italiano Español Русский
Chapter 4:
Operation
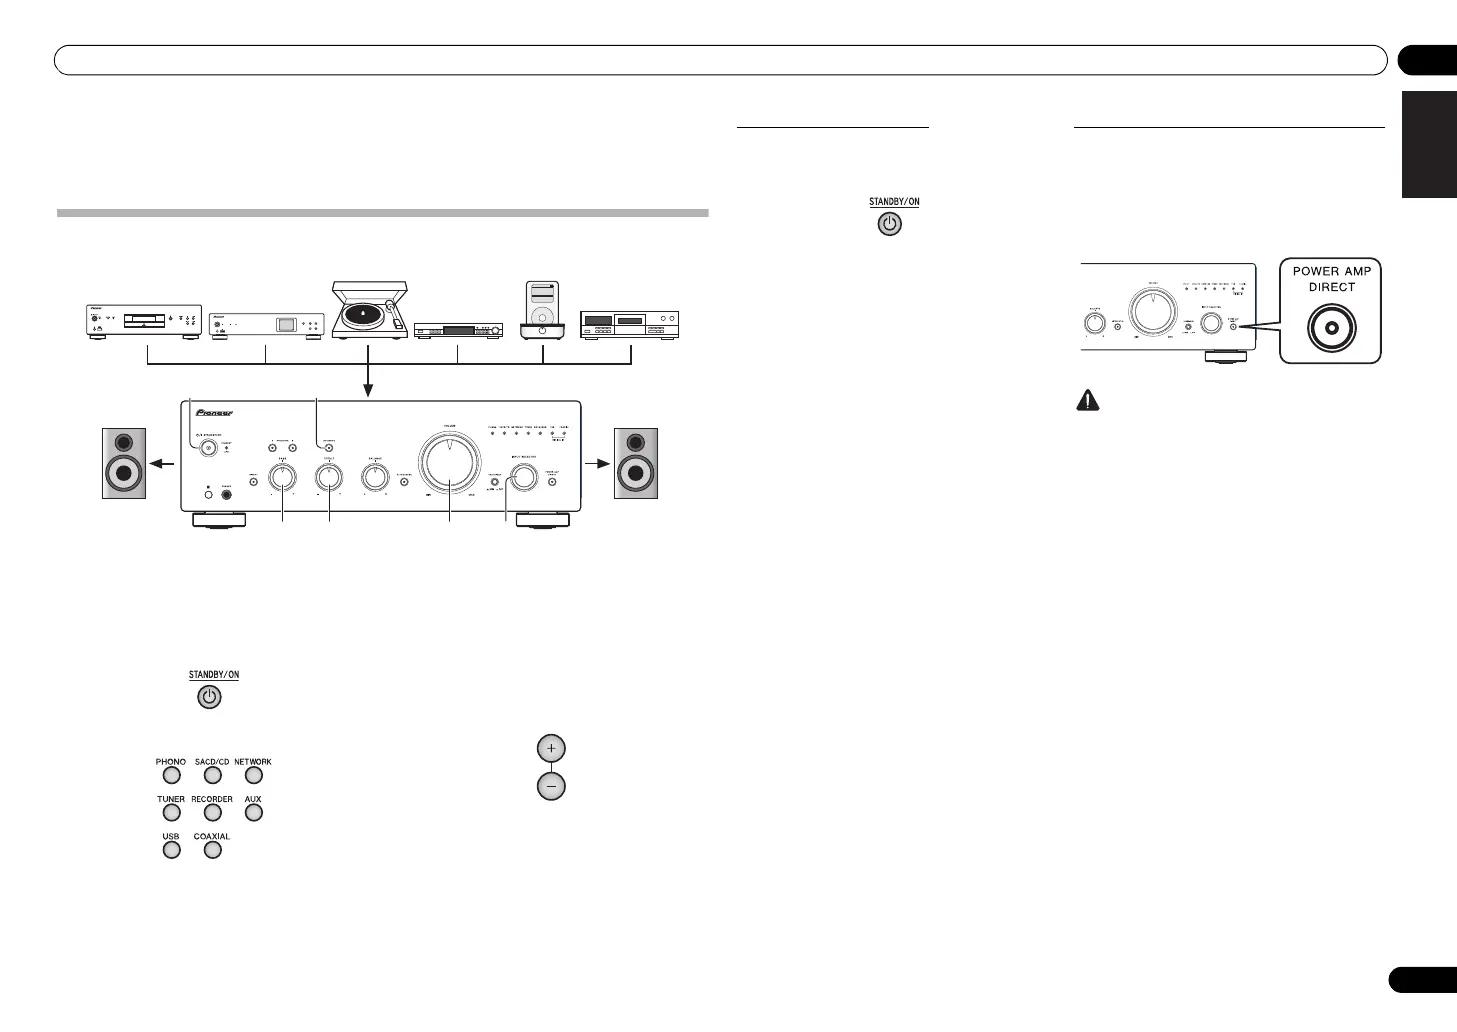
Playback
1 Turn on the power of the playback
component.
2 Turn power ON to the unit.
• If the unit is in the standby mode, press the remote
control’s STANDBY/ON button.
3 Select the source you want to playback.
Select the playback component.
• When using the front panel controls, rotate the
INPUT SELECTOR knob.
• In the case of the A-70, if PHONO is selected, use
the CARTRIDGE select switch to designate the type
of cartridge used with your turntable, either MM
() or MC ().
4 Start playback of the component you
selected in step 1.
5 Adjust playback volume with
VOLUME
control.
6 Adjust the tone to your preference using
the
BASS
and
TREBLE
controls, and
LOUDNESS
button.
If the DIRECT button has been set to ON, these controls
are disabled.
3566
62
MENU
iPod
Music>
Extras>
Settings>
Shuffle Songs
Backlight
/I STANDBY/ON
STANDBY
iPod/USB
5V 2.1A
PURE AUDIO Hi-Bit 32
FUNCTION
NETWORK AUDIO PLAYER
N-50
SACD/CD player
Network audio player
Turntable
Tuner
iPod dock, etc
CD recorder or
tape deck
Playback
Playback
VOLUME
Set the power to Standby
1 Press the remote control’s
STANDBY/
ON
button.
The next time you wish to turn on the power, press the
remote control’s STANDBY/ON button.
• If the front panel’s /I STANDBY/ON button is
pressed, the power will be turned off. In this case, if
the power is off, pressing the remote control’s
STANDBY/ON button will not turn on the power.
To turn on the power again, press the front panel’s
/I STANDBY/ON button.
When using the unit as a power amplifier
When a pre-amplifier is connected to the unit’s POWER
AMP DIRECT IN terminals, the unit can be used as a
power amplifier.
1 Press the
POWER AMP DIRECT
button
on the front panel of the unit.
The POWER AMP DIRECT indicator will light.
Caution
• When the POWER AMP DIRECT indicator is
lighted, operations change as follows:
– The unit’s front-panel VOLUME, BASS, TREBLE,
and BALANCE controls are disabled. These
adjustments are controlled by the component
connected to the unit’s POWER AMP DIRECT IN
terminals.
–The LOUDNESS button and ATTENUATOR
button (A-70 only) are disabled.
– When the POWER AMP DIRECT indicator is
lighted, sound volume from the unit will
automatically be fixed at its maximum output.
When using this unit as a power amplifier,
check the output level of the component
connected to the POWER AMP DIRECT IN
terminals and set it to a low level as appropriate
before turning on the POWER AMP DIRECT
indicator. If the sound volume of the component
connected to the POWER AMP DIRECT IN
terminals is initially set to a high output level,
loud sound may suddenly be output when the
POWER AMP DIRECT indicator lights.
– Sound is not produced from the PHONES jack
and RECORDER OUT terminals.
• For more information, consult the operating
instructions for the component connected to the
unit’s POWER AMP DIRECT IN terminals.
A70_SYXE8.book 11 ページ 2012年7月27日 金曜日 午後6時53分
 Loading...