22
Sp
Español
Controles OSD (en pantalla)
Ajuste del tamaño de la pantalla para la
entrada de vídeo S1/S2
Si la señal de S-vídeo contiene información del tamaño
de la pantalla, la imagen se ajustará automáticamente para
adaptarse a la pantalla cuando S1/S2 se ponga en AUTO.
Esta característica se encuentra disponible solamente
cuando la señal de S-vídeo se introduce por el terminal
VIDEO3.
Ejemplo: Puesta de “S1/S2” en “AUTO”
Ponga “OSD AVANZADO” en “ON” en el MENU
PRINCIPAL (1/2), y luego realice las operaciones
siguientes.
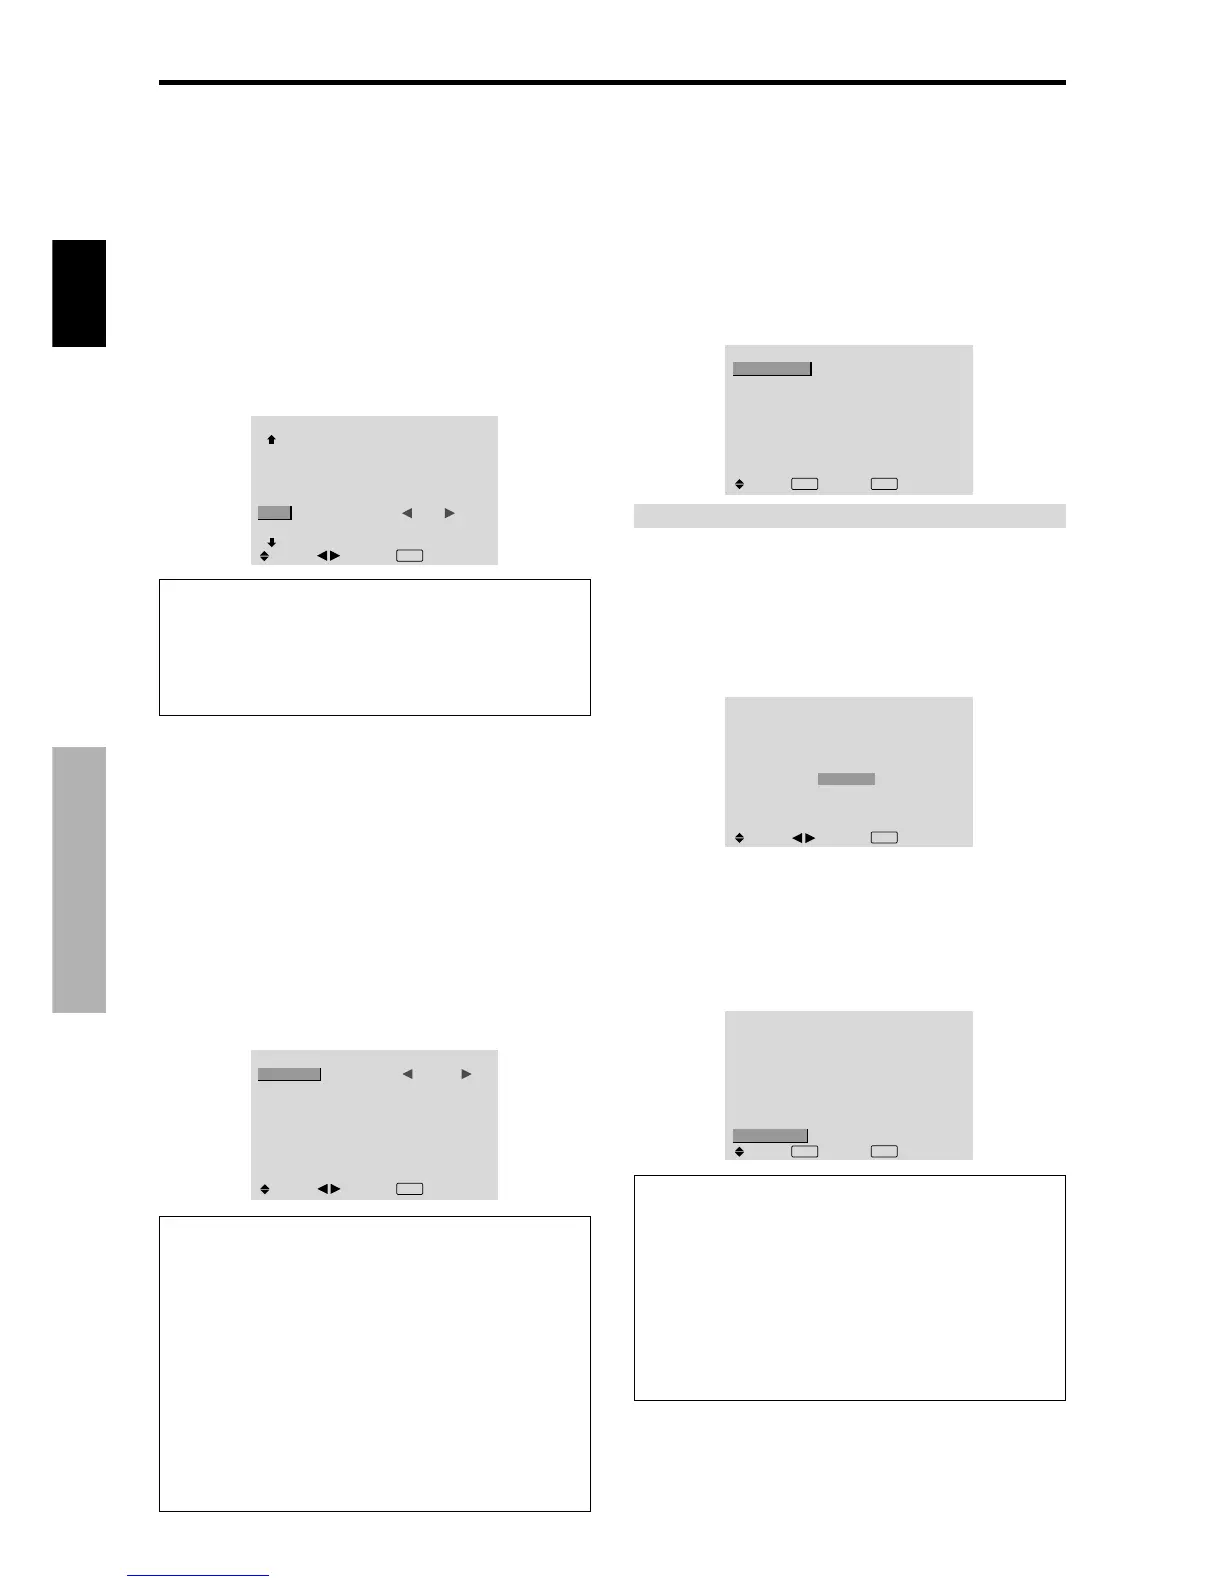
En “S1/S2” del menú “OPCION2”, seleccione “AUTO”.
OPCION2
2 / 3
PAG. ANTERIOR
AHORRO ENERG
PURECINEMA
LARGA DURAC.
MÁSC. LATERAL
S1/S2
DVI SET-UP
PAG. SIGUIEN.
: OFF
: ON
: 3
:
AUTO
SEL.
ADJ.
EXIT
RETURN
Información
Ajustes S1/S2
AUTO: Ajusta automáticamente el tamaño de la pantalla
según la señal de vídeo S1/S2.
OFF: Desactiva la función S1/S2.
Menú de ajustes OPCION3
Utilización del temporizador
Esta función prepara el monitor para que se encienda/
apague automáticamente a la hora establecida.
Ponga “OSD AVANZADO” en “ON” en el MENU
PRINCIPAL (1/2), y luego realice las operaciones
siguientes.
En el menú “OPCION3”, seleccione “TEMPORIZADOR”,
luego pulse el botón MENU/SET.
Aparecerá la pantalla “TEMPORIZADOR”.
TEMPORIZADOR
: OFF
SEL.
EXIT RETURNOK
MENU
TIEMPO PRES.
PROGRAMA
TIEMPO PRES.
Esto ajusta el día de la semana y la hora actual.
Ejemplo: Ajuste de “MIÉRCOLES”, “22:05”
En el menú “TEMPORIZADOR”, seleccione “TIEMPO
PRES.”, luego pulse el botón MENU/SET.
Aparecerá la pantalla “TIEMPO PRES.”.
Ajuste los elementos.
SEL.
TIEMPO PRES.
MIERCOLES
22 : 05 : 00
RETURN
DAYLITE SAVE
CONFIGURAR
: OFF
ADJ.
EXIT
RETURN
Seleccione “CONFIGURAR”, luego pulse el botón MENU/
SET.
Los ajustes se guardan y se regresa al menú
TEMPORIZADOR.
* Si pulsa el botón EXIT en lugar del botón MENU/SET es
posible que los ajustes no se puedan llevar a cabo.
OK
MENU
SEL.
TIEMPO PRES.
MIERCOLES
22 : 05 : 00
RETURN
DAYLITE SAVE
CONFIGURAR
: OFF
EXIT
RETURN
Información
Ajustes de TIEMPO PRES.
DAYLITE SAVE: Para ajustar DAYLITE SAVE.
ON: La ora actual + 1 hora.
OFF: No funciona.
Día: Ponga el día de la semana (ej.: Domingo).
Hora: Ponga la hora en el formato de 24 horas (de 00 a
23).
Minutos: Ponga los minutos (de 00 a 59).
Ajuste de la señal y del nivel de negros para
la señal DVI.
Seleccione la señal para el conector DVI (PC o STB/DVD)
y ajuste el nivel de negro.
Ejemplo: Ajuste el modo “PLUG/PLAY” a “STB/DVD”
Ponga “OSD AVANZADO” en “ON” en el MENU
PRINCIPAL (1/2), y luego realice las operaciones
siguientes.
En el menú “OPCION2”, seleccione “DVI SET-UP”, y luego
pulse el botón MENU/SET.
A continuación aparecerá la pantalla “DVI SET-UP“.
En “PLUG/PLAY” del menú “DVI SET-UP”, seleccione
“STB/DVD”.
DVI SET-UP
: STB/DVD
: HIGH
SEL.
ADJ.
EXIT RETURN
PLUG/PLAY
BLACK LEVEL
Información
Ajustes PLUG/PLAY
PC: Cuando se conecta a la señal PC.
BLACK LEVEL se ajusta automáticamente “LOW”.
STB/DVD: Cuando se conecta al SET TOP BOX, DVD
etc.
BLACK LEVEL se ajusta automáticamente a “HIGH”.
Ajustes BLACK LEVEL
LOW: Cuando está conectado a la señal de PC.
HIGH: Cuando está conectado al SET TOP BOX, DVD
etc. Cambie “HIGH” a “LOW” si el nivel de negro
aparece gris.
 Loading...