INSTRUCTIONS PW150/PW200
11
3.3.3 PKS-1 Key Selector
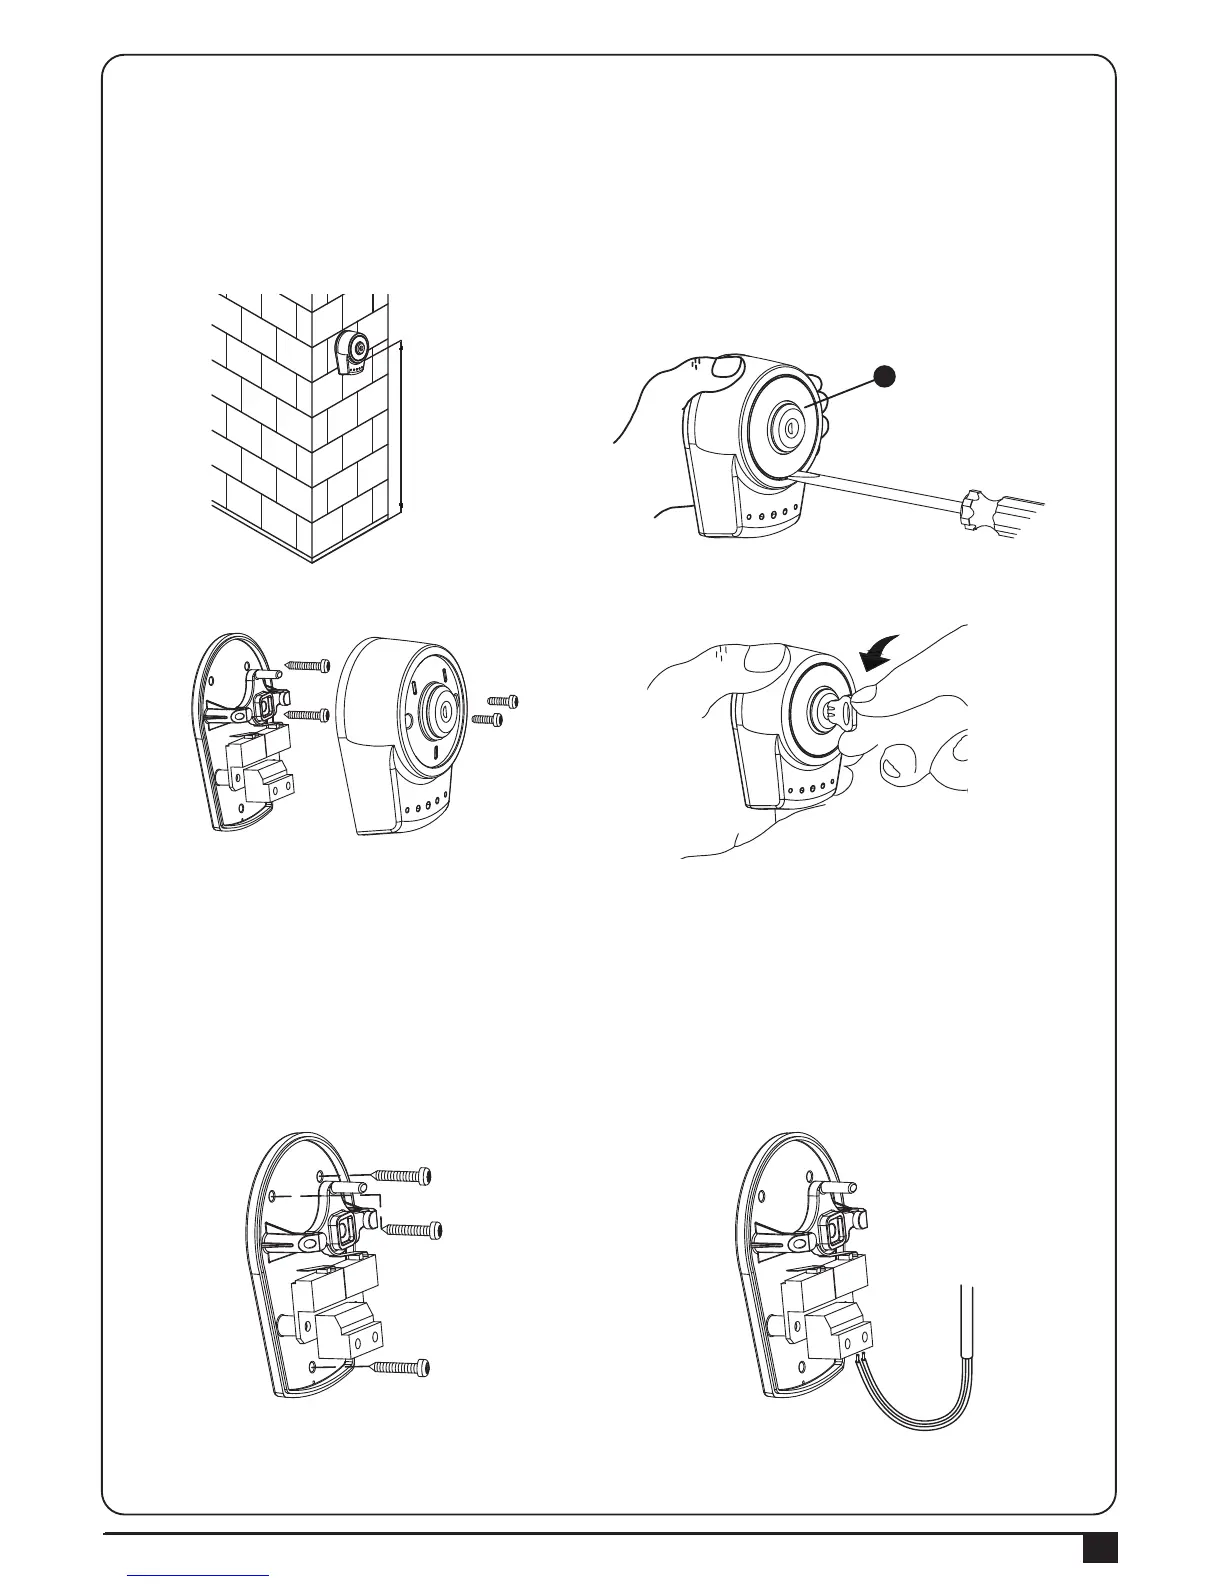
1). PKS-1 key selector is installed outside and close to the gate at the height of about 100cm, so that it could be used
by most people. Decide the installation position of PKS-1 first. See Figure 3.3.3 (1).
2). Remove the round cover (A) by prizing it out with a screwdriver. See Figure 3.3.3 (2).
3). Unscrew the two screws beside the lock body. See Figure 3.3.3 (3).
4). Turn the key and separate the bottom of the shell with the lock body. See Figure 3.3.3 (4).
5). Breach the three holes at the bottom and mark the points by the holes as reference.
6). Drill the holes in the wall and fix the bottom to the wall by three screws. See Figure 3.3.3 (5).
7). Connect the electric wires to the terminals as shown in Figure 3.3.3(6), and it’s not required to distinguish any
polarity. The terminals can be removed for connecting the wires easily.
8). Turn the key and insert the shell on the bottom. Turn the key back to the center position and the shell will be fixed
to the bottom.
9). Tighten the lock body with the two screws and insert the round cover by pressing it to attach to the whole unit.
Figure 3.3.3 (1)
Figure 3.3.3 (2)
Figure 3.3.3 (5) Figure 3.3.3 (6)
Figure 3.3.3 (3) Figure 3.3.3 (4)
1000mm
A
 Loading...