Reolink PoE NVR
User Manual
If the NVR doesn't reboot, the issue may be caused by both the NVR and the
cameras being grounded. Then please unground either the NVR or the cameras to
fix the issue.
Note: The NVR carries out the lightning protection and grounding treatment on its own and
if users also ground the cameras, it will cause a certain potential difference. And when the
potential difference is higher than 64V, it will trigger the NVR'S protection mechanism and
the NVR will power off itself.
A: Unground the cameras to fix the issue
In this case, please do not ground the cameras additionally. Check if you connect
the cameras to the ground wire of your house. If yes, please disconnect the
cameras from the ground wire. And please do not install the cameras on the metal
wall or ceiling etc. If you have to install the camera on a metal wall or ceiling in your
situation, you may add an insulator between the camera and the wall/ceiling to
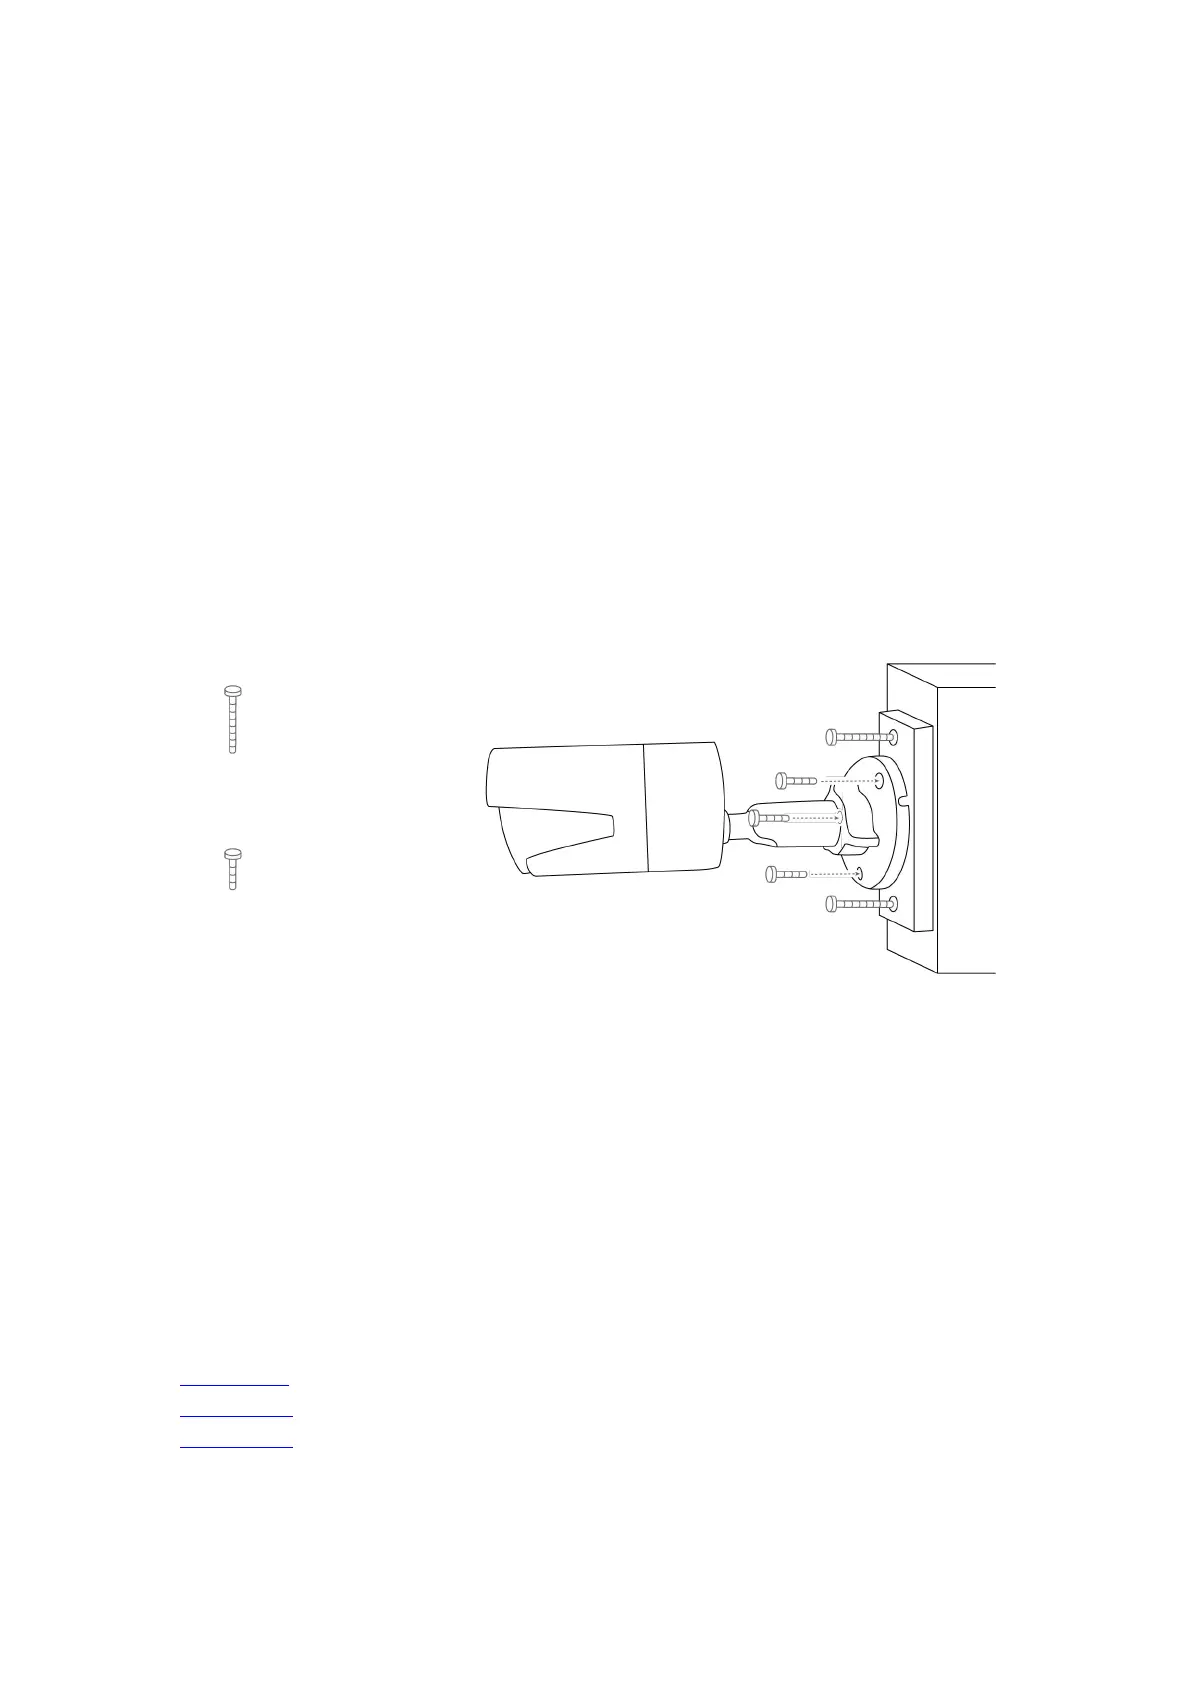
have it ungrounded. Please refer to the picture below and install the
insulator.
B: Unground the NVR to fix the issue
Please unground the NVR and the monitor connected to the NVR.
Note: In this case, please don't put either the NVR or the monitor on the metal plate/shelf.
(1) You may cut off the grounded pin on the plug on both the NVR and the monitor
to have it ungrounded.
(2) You may use a 3 pin-to-2 pin converter on both the NVR and the monitor to
have it ungrounded. And you may use the converters below to have the NVR not
grounded. Please pay attention to the version of the converter and make sure to
order the correct version. For example, If the NVR is installed in the US, please order
the US version of the converter.
converter 1
converter 2
converter 3
If you use converter 2, please do not have the third pin grounded.
Long screws fix
the wood on the
metal wall.
Short screws fix IPC
and wood. Please do
not touch the metal
plate.
 Loading...