10 Rittal CMC III online comfort handle VX
5 Installation
EN
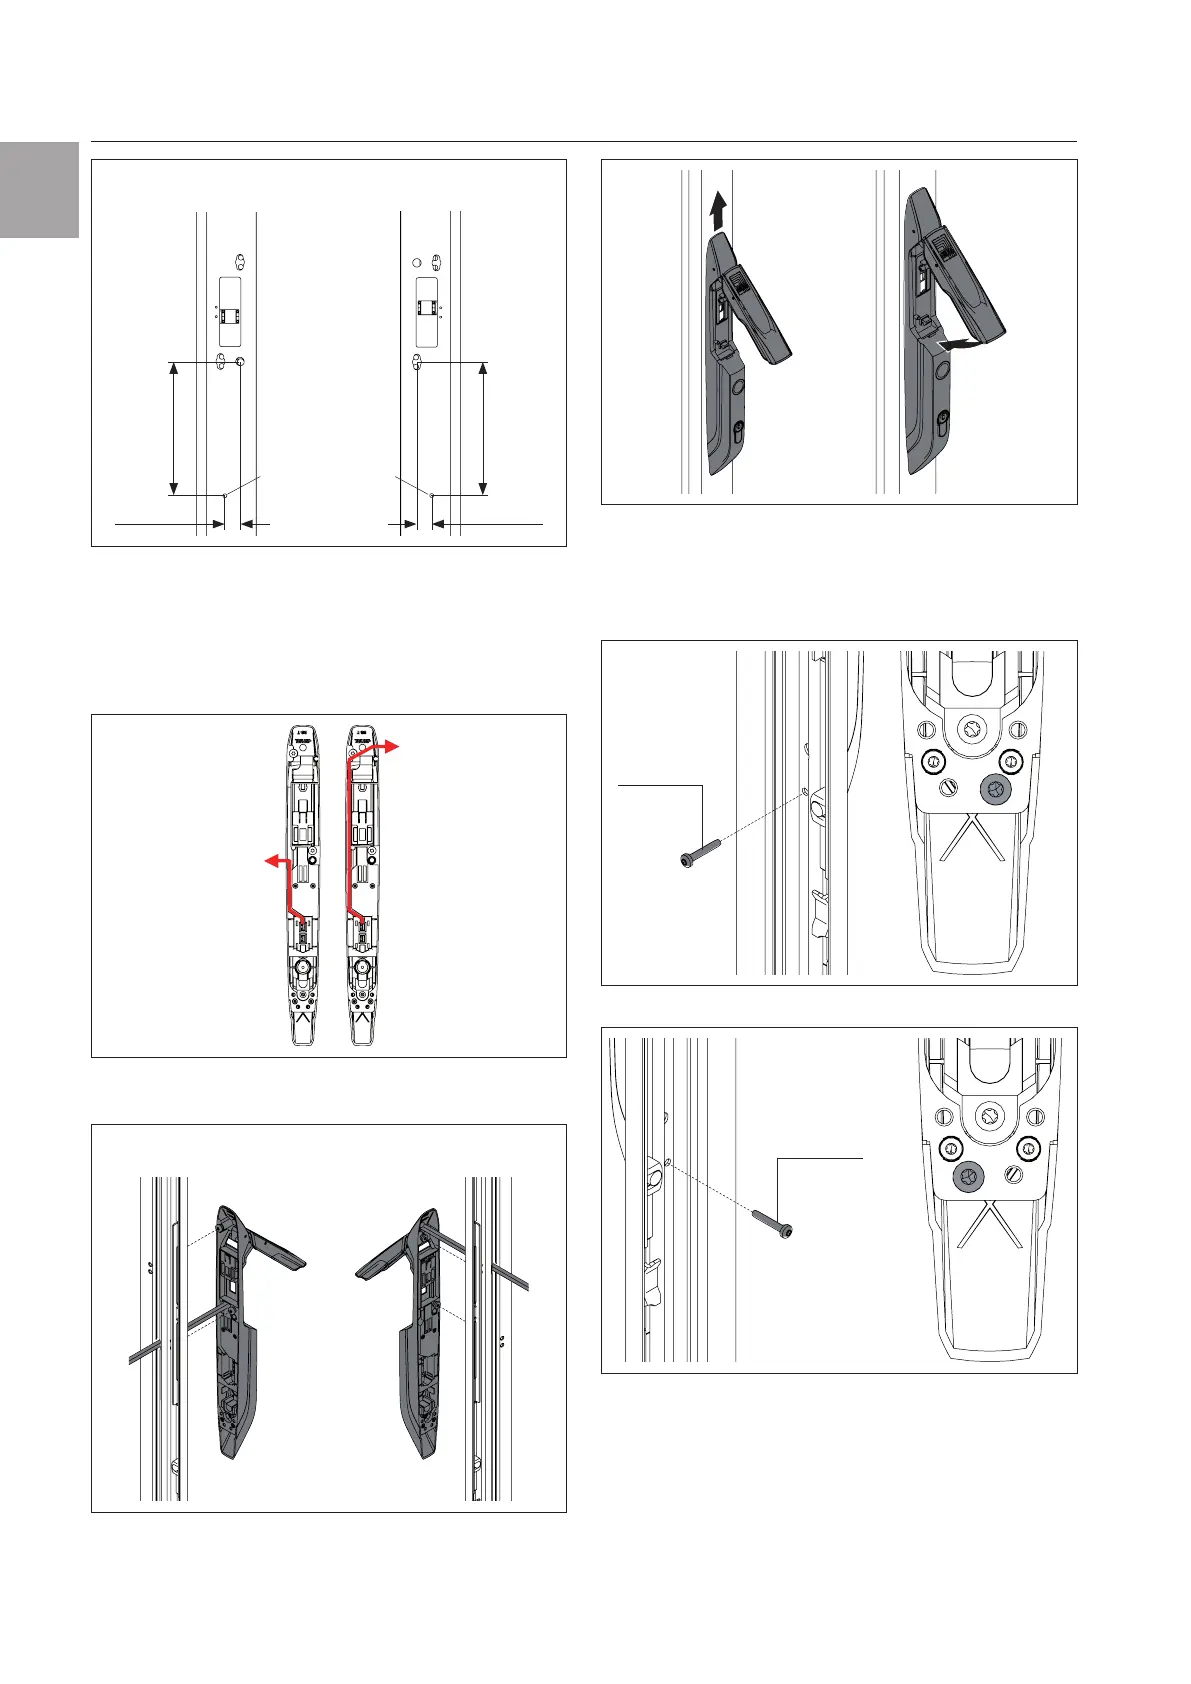
17.5mm
182.5mm
17.5mm
182.5mm
Ø4.5
Hinge on right Hinge on left
Ø4.5
Fig.11: Drilling the holes
◾ Debur all drilled holes with a 90° countersink.
◾ Remove any swarf from the attachment point of the
comfort handle.
◾ Pass the cable through the opening in the VX glazed
door, depending on the position of the hinge (fig.12).
Hinge on right Hinge on left
Fig.12: Inserting the cable
◾ Attach the handle to the VX glazed door (fig.13).
Hinge on right Hinge on left
Fig.13: Attaching the handle
◾ Push the handle upwards and lock it (fig.14).
Fig.14: Locking the handle (right-hand hinge / left-hand hinge
accordingly)
◾ Screw the comfort handle to the VX glazed door,
depending on the position of the hinge (fig.15 or
fig.16, M
A
= 1.5±1Nm).
M4x16
M
A
= 1.5 ±
0.5Nm
Fig.15: Screw-fastening the comfort handle (hinge on right)
M4x16
M
A
= 1.5 ±
0.5Nm
Fig.16: Screw-fastening the comfort handle (hinge on left)
5.4.4 Installation on a VX IT glazed door or VX IT
vented door
The installation on the frame of a VX IT glazed door
or VX IT vented door is performed with the provided
compensating panel.
 Loading...