4
7 98
°
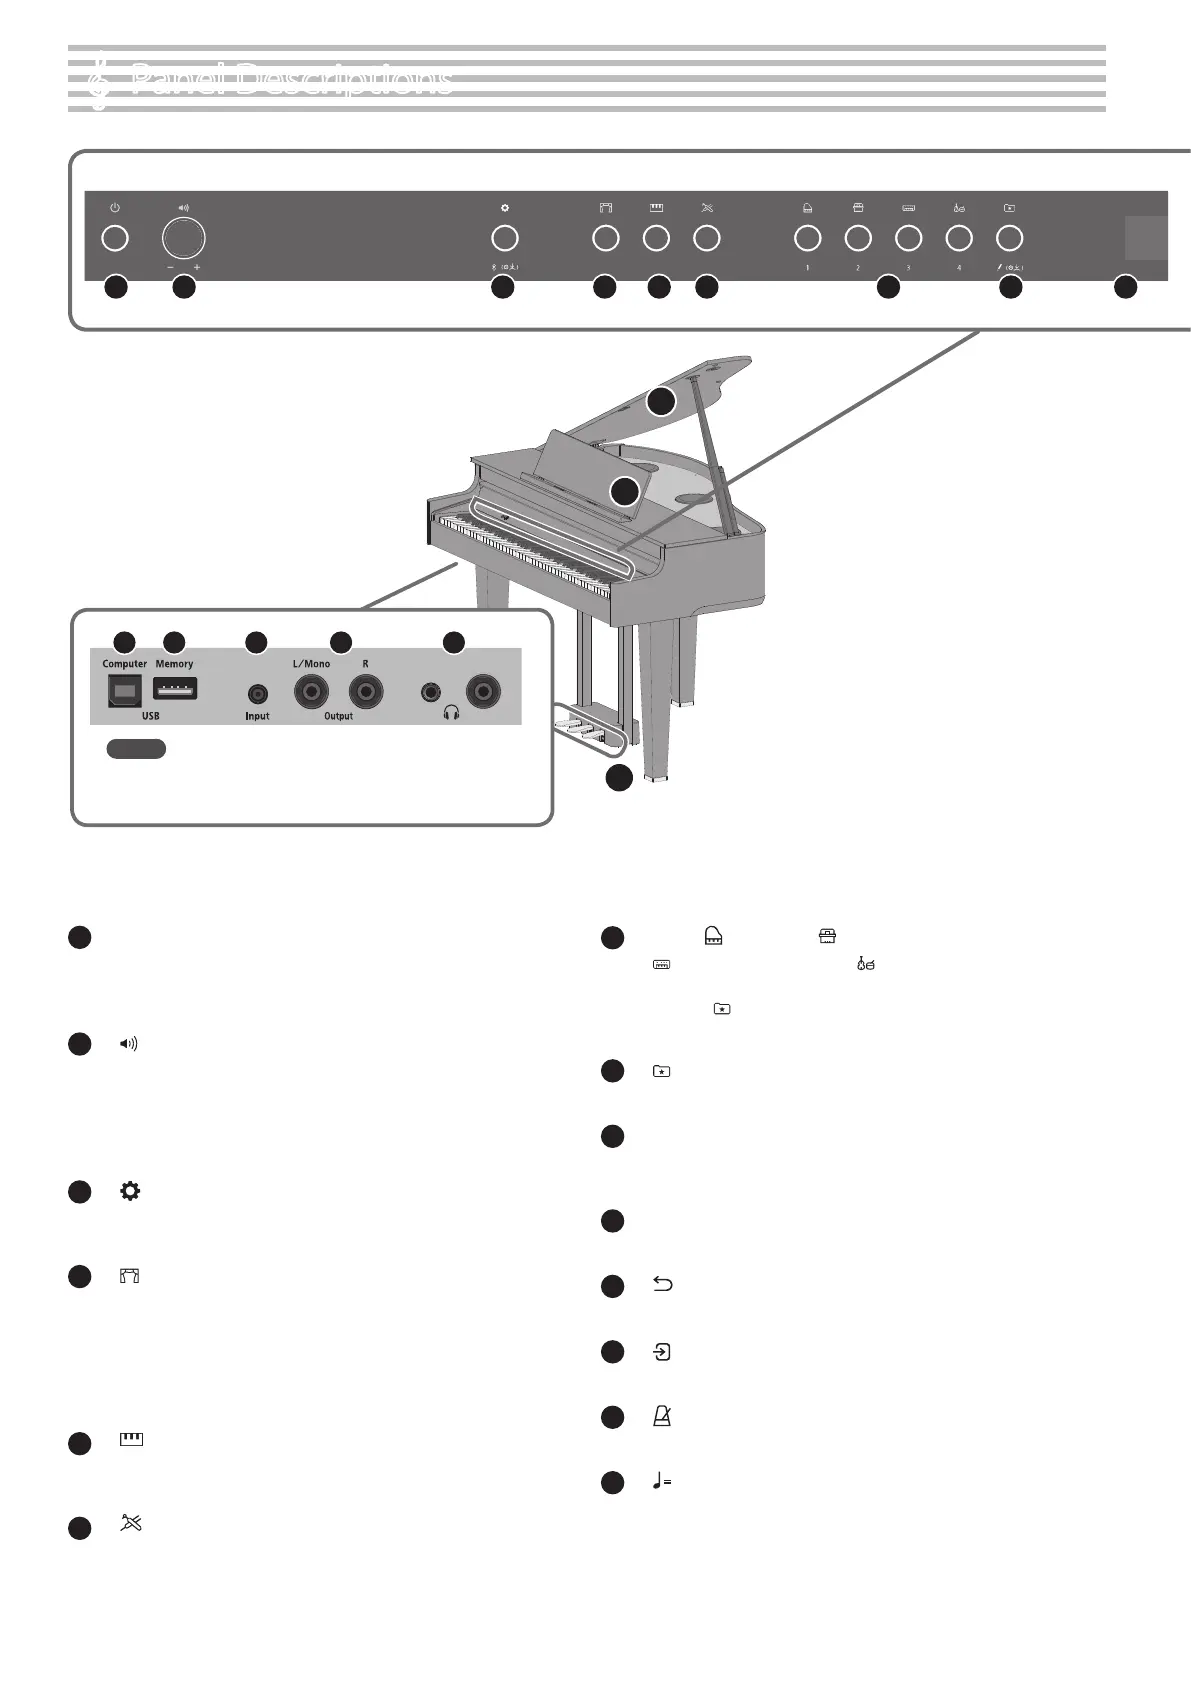
Panel Descriptions
1
[Ā] (Power) button
Turns the power on/o.
You can open and close the keyboard cover to turn the piano on/o
(p. 7).
2
[ ] (Volume) knob
Adjusts the volume of the entire piano.
This adjusts the volume for playing the piano or playing back the
songs.
If headphones are connected, it adjusts the volume of the
headphones (p. 8).
3
[ ] (Function) button
Lets you access function mode, where you can change various
settings (p. 25).
4
[ ] (Ambience) button
Adds reverberation that makes it sound like you’re playing in a
spacious place like a concert hall or a cathedral. Change the type of
reverberation to simulate the sound of playing the piano in dierent
places (p. 9).
* You can apply dierent types of reverberation eects only to the
tones in the Grand group.
5
[ ] (Keyboard Mode) button
Use this to access Keyboard mode, where you can change various
keyboard settings (p. 29).
6
[ ] (Piano Designer) button
Adjusts various elements of the piano’s sound, allowing you to
customize the sound to your preference (p. 18).
7
Tone [ ] (Grand) [ ] (Upright / Classical)
[ ] (E.Piano / Organ) [ ] (Other) buttons
Select the sound that’s played by the keyboard (p. 9).
Press the [
] (Registration) button to switch these to the [1] [2] [3]
[4] buttons.
8
[ ] (Registration) button
Use this button to select and register the Registration settings (p. 11).
9
Display
This shows information such as the tone name, song name, tempo,
and time signature.
10
[–] [+] (selection) button
Changes the item or value shown onscreen (p. 8).
11
[ ] (Exit) button
Returns to the previous screen, or exits the current screen (p. 8).
12
[ ] (Enter) button
Conrms an item or value shown in the screen (p. 8).
13
[ ] (Metronome) button
Turns the metronome on/o (p. 12).
14
[ ] (Tempo) button
Changes the tempo of the metronome or song.
¹ Changing the metronome tempo (p. 12)
¹ Changing the song tempo (p. 13)
5 6
* To prevent malfunction and equipment failure, always turn down the volume, and turn
o all the units before making any connections.
1 2 3 4
23
21
24 25 26 27 28
MEMO
The product name and serial number are printed on a label
that’s axed close to the connection jacks.
22
 Loading...