5
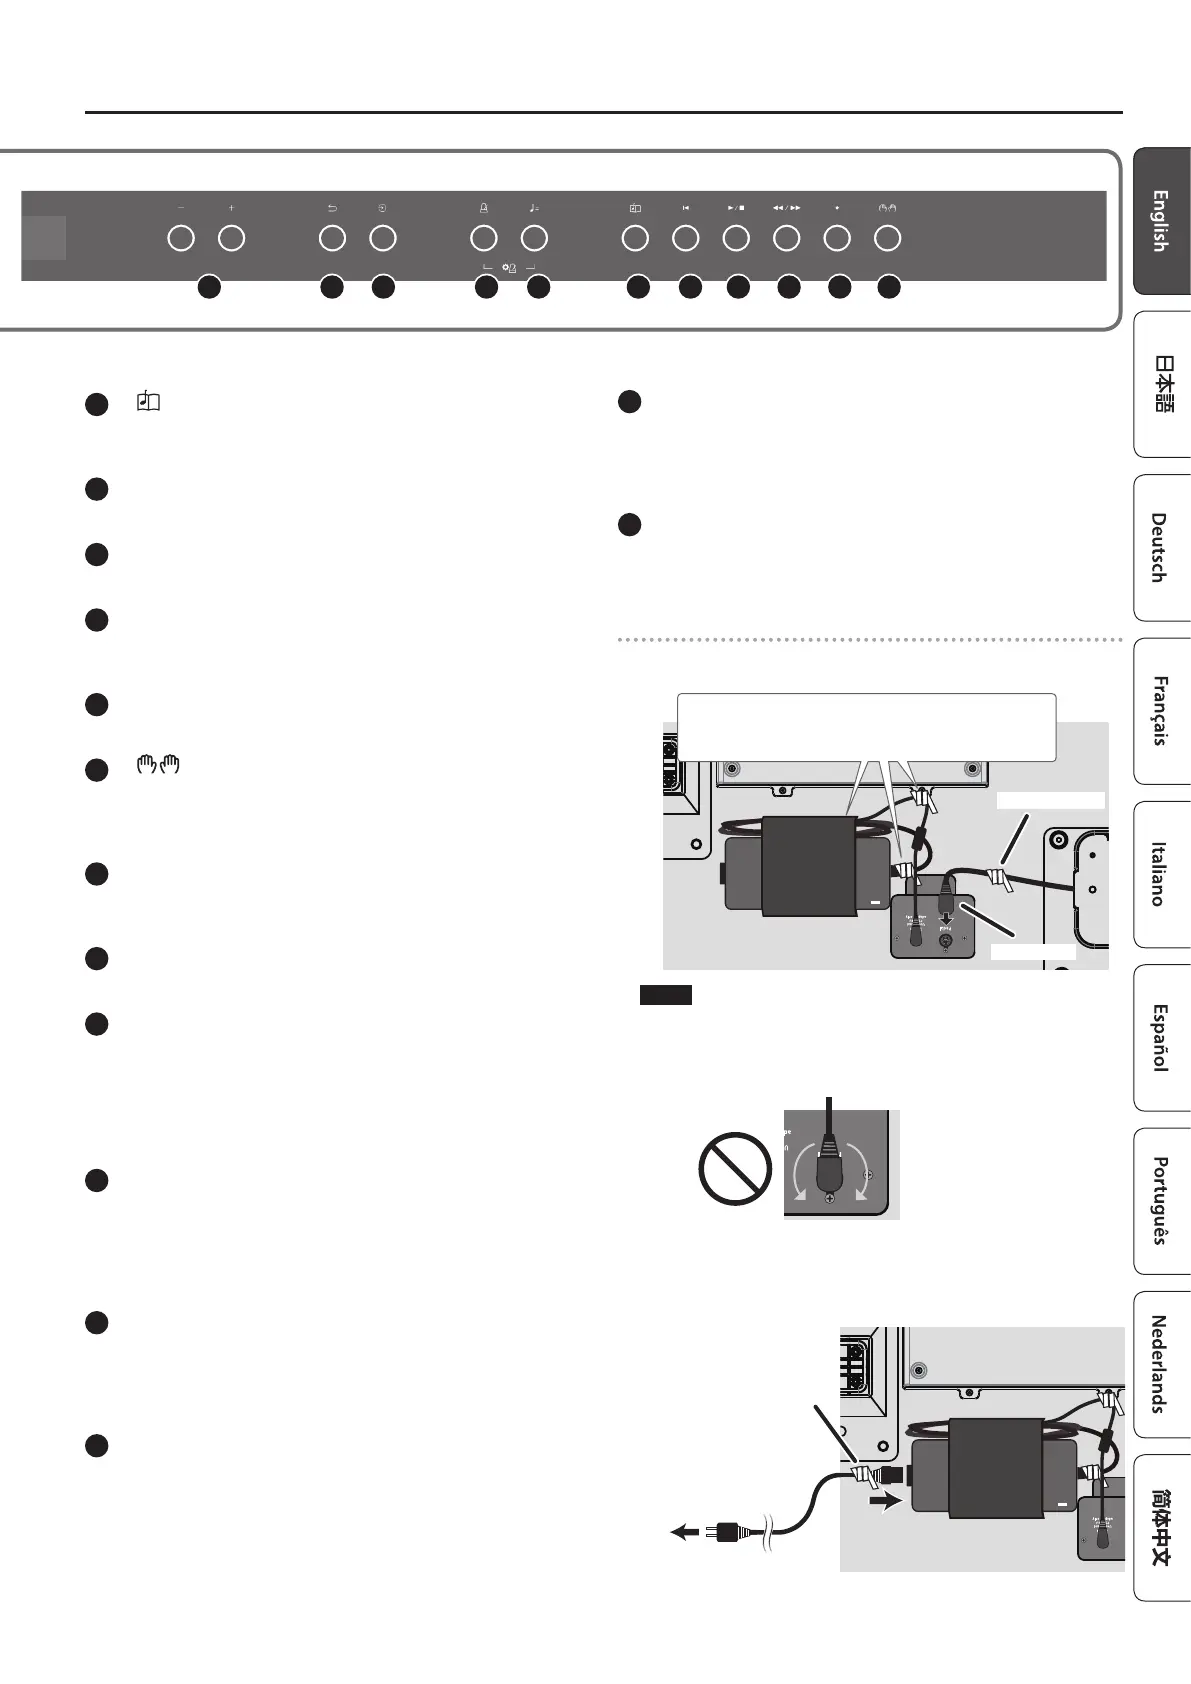
Panel Descriptions
15
[ ] (Song) button
Selects the built-in song or recorded performance that will be played
back (p. 13).
16
[ô] (Cue up) button
Selects the beginning of the song (p. 13, p. 15).
17
[ò] (Play/Stop) button
Plays/stops the song playback, or start/stops recording (p. 13, p. 15).
18
[ö/ù] (Measure) button
Moves the playback position forward or backward to a desired
measure in the song (p. 13, p. 15).
19
[ó] (Recording) button
Records the performance that you play (p. 15).
20
[ ] (part) button
Lets you select the performance part (right-hand, left-hand,
accompaniment) that will play back. This also lets you record parts
separately (p. 13, p. 16).
21
Top lid
The top lid can be opened. Opening the top lid allows the sound to
be more clearly dened; closing it produces a softer sound (p. 6).
22
Music Rest
Place printed music here (p. 6).
23
Pedal
By pressing the pedals, you can apply eects to the sound of the
piano.
You can also assign a variety of functions to the pedals.
¹ Apply eects to the sound of the piano (p. 8)
¹ Assign functions to the pedals (p. 26, p. 27)
24
USB Computer port
Here you can connect your computer via a USB cable
(sold separately). If your computer is connected, performance data
can be transferred between the piano and sequencer software
(sold separately) on your computer, allowing you to produce or edit
music.
25
USB Memory port
Here you can connect a USB ash drive. You can use it to record
your piano performance as audio, or use the piano to play back
music data (WAVE les, MIDI les, MP3 les) from the USB ash drive
(p. 14, p. 17).
26
Input jack
Here you can connect a stereo mini-plug cable (commercially
available) for connecting your audio player. The sound that’s played
back from your audio player can be heard from the piano’s speakers.
You can also play the piano along with the playback audio.
27
Output jacks (L/Mono, R)
Here you can connect external speakers via cables that are equipped
with mono 1/4” plugs (commercially available). This is useful when
you want to connect to external audio equipment and play in front
of many people.
28
Phones jacks
Here you can connect stereo headphones. This piano has two
headphone jacks, so two people can use headphones at the same
time (p. 8).
Connecting the pedal cord and the power cord
1.
Connect the pedal cord to the Pedal jack, and fasten the pedal
cord with the single cable fastener.
Cable fastener
Pedal cord
Don’t remove the two cable fasteners or the belt that holds the
AC adaptor in place.
NOTE
The pedal cord plug may be damaged if you rotate it while the plug
is only halfway inserted.
Check the illustration above to make sure that the plug faces
correctly before you insert it.
Do not rotate while plug is inserted!
2. Insert the included power cord into the AC adaptor, and use a
cable fastener to secure it (one location).
To AC outlet
Power cord
Cable fastener
3. Insert the power cord plug into an AC outlet.
10 11 12 13 14 15 16 17 18 19 20
 Loading...