HP-335 Nov. 1998
9
STAND ASSEMBLY (KS-305)
Make sure that another person is on hand to help with the
assembly and setup.
To move the piano, lift it carefully—all the while keeping it
level. Be very careful, when you assemble and move the piano,
to make sure that you do not drop it on your hands or feet.
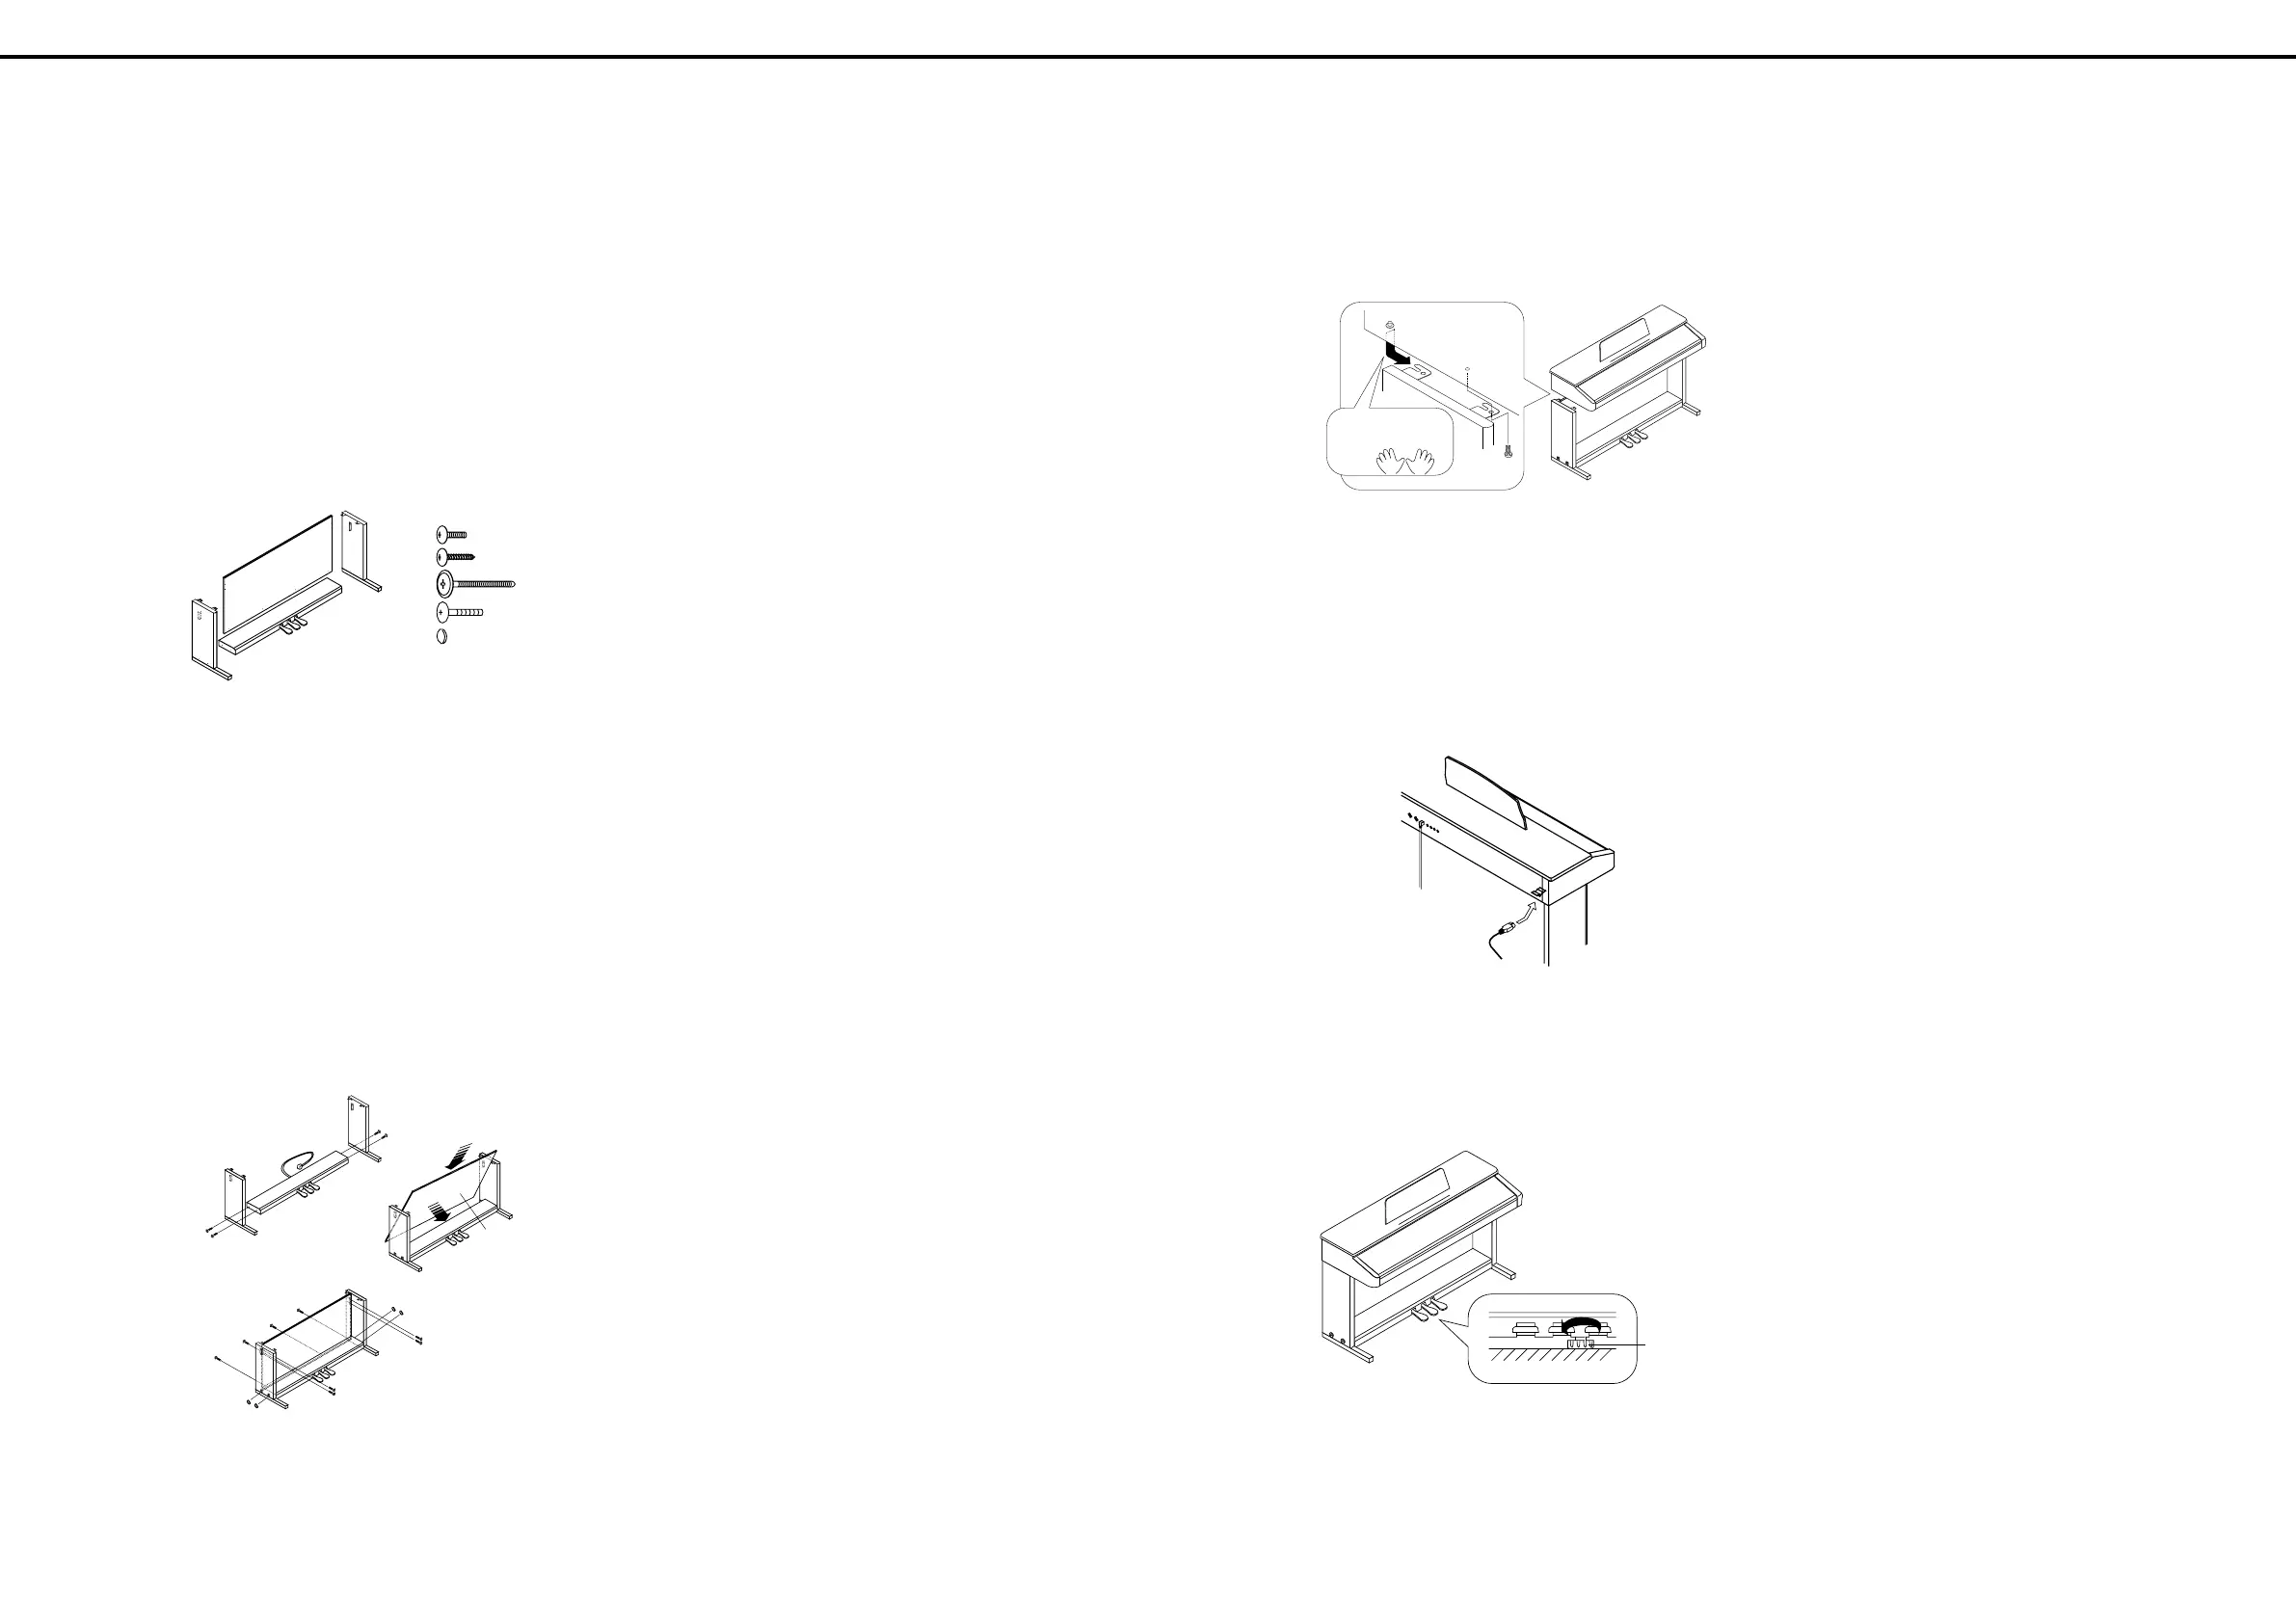
●Part Check
Before you begin assembling the stand, check that all the parts
were supplied. You will also need to have a Phillips
screwdriver.
A : Side Board ( left ) 1 : Screw a ( 4 × 16 mm ) × 4
B : Side Board ( right ) 2 : Screw b ( 4 × 25 mm ) × 4
C : Pedal Board 3 : Screw c ( M6 × 70 mm ) × 4
D : Rear Board 4 : Screw d (M5 × 20 mm ) × 2
5 : Cap × 4
●Assembly Procedure
* Fasten each screw tightly, then place the stand in a
stable and horizontal place.
* Do not allow the pedal cord or power cable to get
twisted or pinched while assembling the stand.
1. Stand Assembly
(1) Attach the side boards for the right and left sides to the pedal
board (so that the metal parts face inside) using screws “c”
(M6 × 70 mm).
(2) Place the rear board as shown below, with the wood grain
side facing inside.
(3) Attach the rear board to the metal parts on the side boards
from the front using screws “a” (4 × 16 mm). For clamping
the rear board, press each upper portion of both side boards.
Then, fasten it to the pedal board from the back using
screws “b” (4 × 25 mm) and attach the caps on screw “c.”
D
A
B
C
3
2
1
c
b
a
4
d
5
(1)
(2)
(3)
Screw b
Screw c
Screw a
Cap
Wood grain
side
2. Installing the Piano on the Stand
(4) Align the protruding screws (one each at right and left) on
the bottom of the piano with the openings in the metal
fittings on the side board, then slide the piano forward until
the screws are held in place.
(5) Fasten the piano to the stand with the screw “d” (M5 X 20
mm) (one each for the right and left).
* When handling the piano, firmly grasp it at the front and
back. Be careful, so you do not get your fingers pinched.
3. Connecting the Pedal and Power Cords
(6) Connect the pedal cord to the Pedal jack on the rear of the
piano.
(7) Connect the power cord to the power inlet on the piano, then
plug the other end into a wall socket.
4. Adjusting the Adjuster
(8) Lower the adjuster at the bottom of the pedal board (by
rotating it), so that the pedal board touches the floor. If you
have the piano placed on a carpet, lower it until it pushes
into the carpet.
(7)
(6)
(8)
Adjuster
(4)
Screw d
(5)
Please don't get
your fingers pinched
* At first, assemble the entire stand in a temporary fashion,
without really tightening the screws. Then, after checking
the overall alignment of the boards (and gently shifting
certain parts where necessary), go around and tightly fasten
each of the screws.
When Moving the Piano
Disconnect the power cord and raise the stand’s adjuster. Then
lift the piano while keeping it level, and move it with care, so
that you do not drop it on your feet, or get your hands caught.
 Loading...