R5 Series
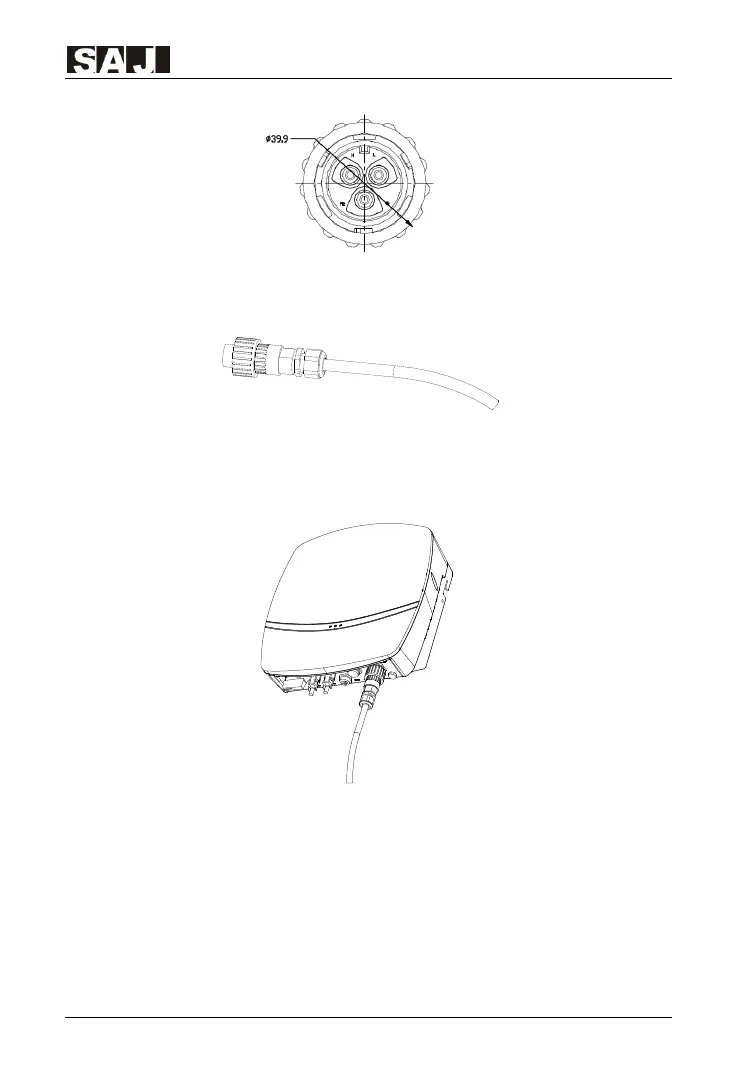
Figure 5.6 Connect cable
③ Screw all parts of the AC connector.
Figure 5.7 Screw the connector
④ Connect the AC connector to the equipment securely, ensuring the pins are
connected directly. Then the connection of AC cable is completed.
Figure 5.8 Connect the inverter
5.3.3 R5-7K/8K-S2AC Side Electrical Connection
① Screw off the screws at the AC output wire cover and take out the cover.
Penetrate the AC cable of which the insulation layers has been peeled off through
the AC waterproof locking screw hole of the cover. Lock L wire, N wire and PE
wire tightly as per the marked connection positions on the interface board.
 Loading...