18 S&C Instruction Sheet 716-504
Installation
Installing the Interrupters
NOTICE
Interrupters and disconnect pole-units are
numbered "Pole1", "Pole 2", and "Pole 3".
Make sure to install the interrupter to its
corresponding pole-unit.
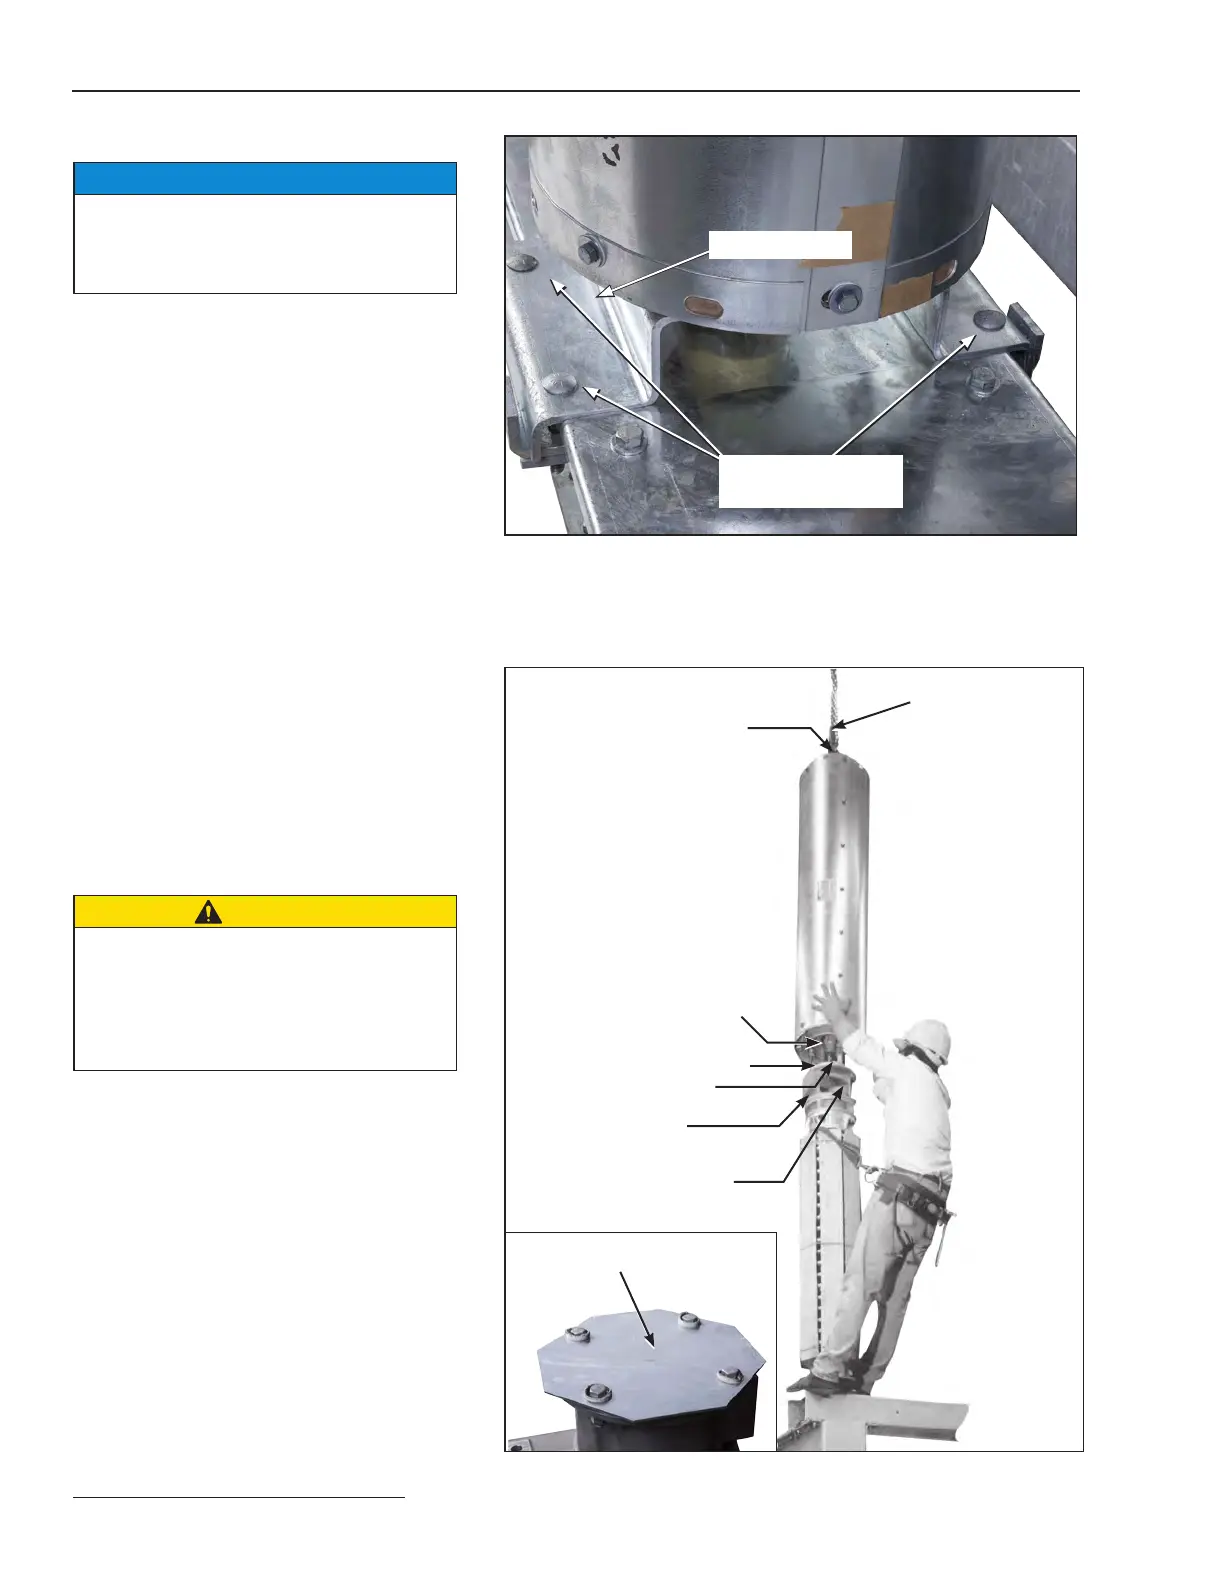
Step 13
Attach a lifting sling to the lifting bracket on
one of the interrupters. Remove and discard the
clamps and associated ½-inch galvanized steel
hardware that fasten the interrupter shipping
bracket to the high-speed base, then carefully
lift the interrupter slightly higher than the top
of the transition box of its associated insulating
support column. See Figure13. Remove the four
½–13-inch stainless-steel hex nuts and Belleville
washers used to attach the interrupter shipping
bracket to the threaded studs on the interrupter.
See Figure12. Discard the shipping bracket but
retain the Belleville washers and nuts for re-use
in Step16(f).
Step 14
Prepare the interrupter for attachment to its
insulating support column as follows:
(a) Remove and discard the two #10–32
screws that connect the operating-rod
holding bracket (marked with a black/
yellow striped label) for shipment. See
Figure14 on page 19.
CAUTION
The operating rod is under pressure. Removal
of the bracket may result in the operating rod
quickly moving down approximately ⅜
-inch.
Keep hands clear of the operating rod
when removing the shipping bracket.
Injury to hands may result.
(b) Pull the holding bracket to move the
operating rod to its fully open position.
See Figure14 on page 19.
(c) Remove the connecting pin used to
attach the holding bracket to the
coupling. Retain the connecting pin for
re-use in Step16(h). Discard the holding
bracket. See Figure14 on page 19.
Figure 13. Attach the interrupter to the insulating support column.
Interrupter lifting bracket
Access cover (removed)
Shipping cover (removed)
Positioning marks
½-inch –13
stainless steel
studs, Belleville washers, and
stainless-steel hex-head nuts
Transition box
Shipping cover
Lifting sling
Figure 12. Remove the hardware securing the shipping clamps to the
base. Lift the interrupter off of the base. Remove the hardware securing
the clamp to the interrupter. Retain the hardware. Discard the shipping
bracket.
Shipping clamp
Shipping hardware
(1) not shown
 Loading...

