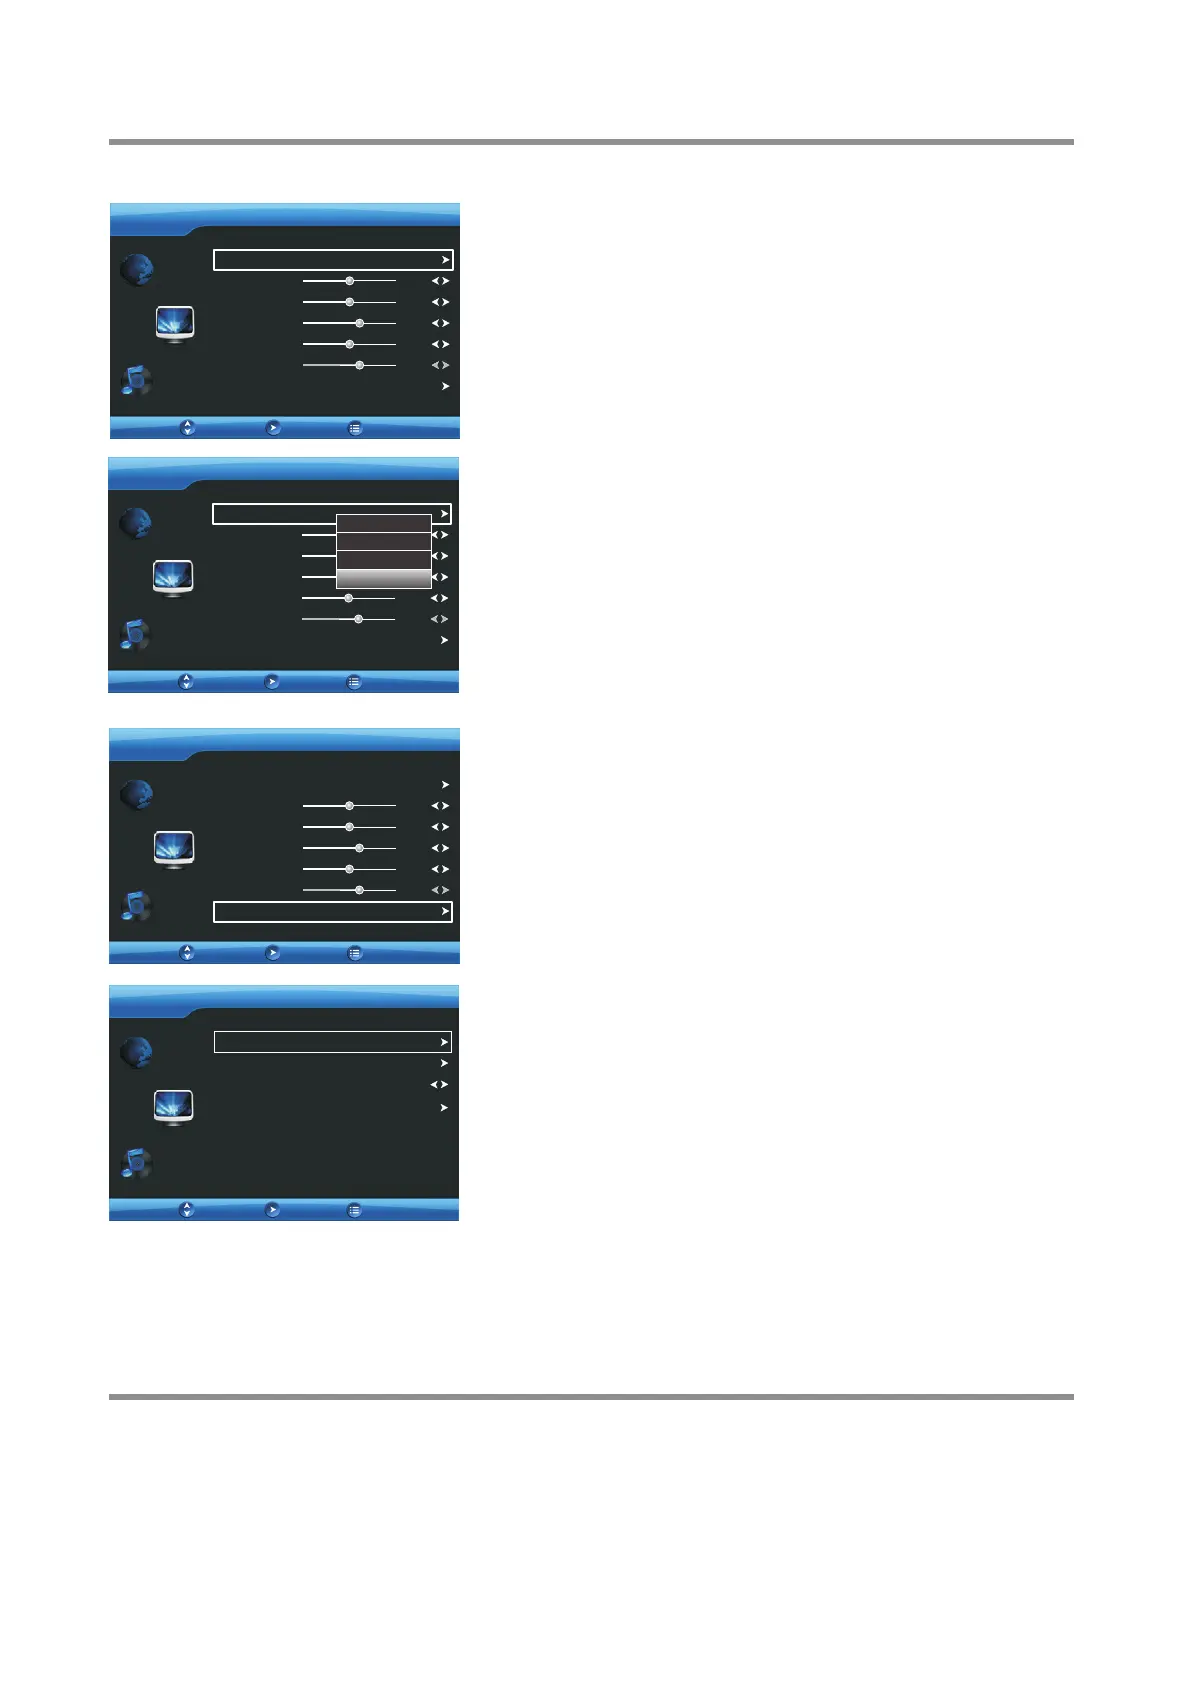
Adjusting the Picture
Adjusting the picture
To adjust the picture:
1
Press 6 or 5 to highlight an option, press 3or4to adjust the
option; If a sub-menu exits, press ENTER to access the option, then
press 3465 to operate and press ENTER to confirm. You can
select:
2
5
To close the menu, press EXIT button.
Press MENU. The on-screen menu opens with the VIDEO menu
displayed, then press ENTER to access.
! Picture Mode — Selects the picture mode. You can select:
. Vivid (a bright and vivid picture)
. Standard (a standard picture)
. Gentle (a soft picture)
. User (user customized picture).
Note: You can also press PICTURE on the remote control to select
the picture mode.
! Contrast — Adjusts the contrast.
! Brightness — Adjusts the brightness.
! Color — Adjusts the color saturation.
! Sharpness — Adjusts the sharpness.
! Hue — Adjusts the image tint(only for NTSC system).
To adjust advanced video settings, in VIDEO menu press 6 or 5 to
highlight Advanced, press ENTER to access the sub-menu.
3
Press 6 or 5 to highlight an option, press ENTER to access the
option. Press 6 or 5 to select the setting and press ENTER to
confirm, or press 3or4to adjust the option. You can select:
4
! Color Temp — Selects the color temperature. You can select
Warm (to enhance the reds), Cool (to enhance the blues), or
Normal.
!
picture noise (snow). You can select Low, Middle, High, or OFF.
Noise Reduction — Selects the noise reduction mode to reduce
! Display Mode — Selects the aspect ratio of the picture. You can
select:
. 4:3 — Shows picture in 4:3 display mode.
. 16:9 — Shows a full-screen picture in 16:9 mode.
. Zoom1 — Enlarges the picture vertically. The top and bottom
may be cropped.
. Zoom2 — Enlarges the picture both horizontally and vertically.
The edges may be cropped.
. Panorama — Stretches the picture at the edges, but maintains a
good aspect ratio at the center of the screen.
Note: You can also press ZOOM on the remote control repeatedly
to select the display mode.
Freezing the picture
Press the FREEZE button to freeze the image on the screen (the video
sources still run). Press again to restore.
Note:
! If a fixed image is displayed on the screen for a long time, that fixed
image may become imprinted on the screen and remain visible.
Therefore do not freeze the picture for a long time.
! In some mode, the FREEZE function can not work.
To freeze the picture:
Noise Reduction
Display Mode
Color Temp
Normal
Middle
16:9
VIDEO
Move
Enter
Return
Move
VIDEO
OK
Contrast
Brightness
Sharpness
Color
Hue
Advanced
Picture Mode
User
50
50
49
60
61
Vivid
Standard
Gentle
User
Move
VIDEO
Enter
Contrast
Brightness
Sharpness
Color
Hue
Advanced
Picture Mode
User
49
49
49
62
61
Return
Return
Move
VIDEO
Enter
Contrast
Brightness
Sharpness
Color
Hue
Advanced
Picture Mode
User
49
49
49
62
61
Return
Over Scan
ON
! Over Scan — Turns this ON to adjust the picture’s reproduction
rate when receiving HDMI signal in VIDEO format.(Depending on
versions, in some model this function is not available)
16
 Loading...