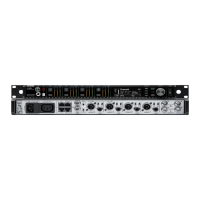
Hardware
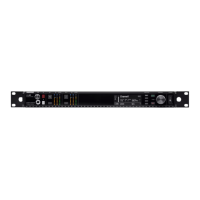
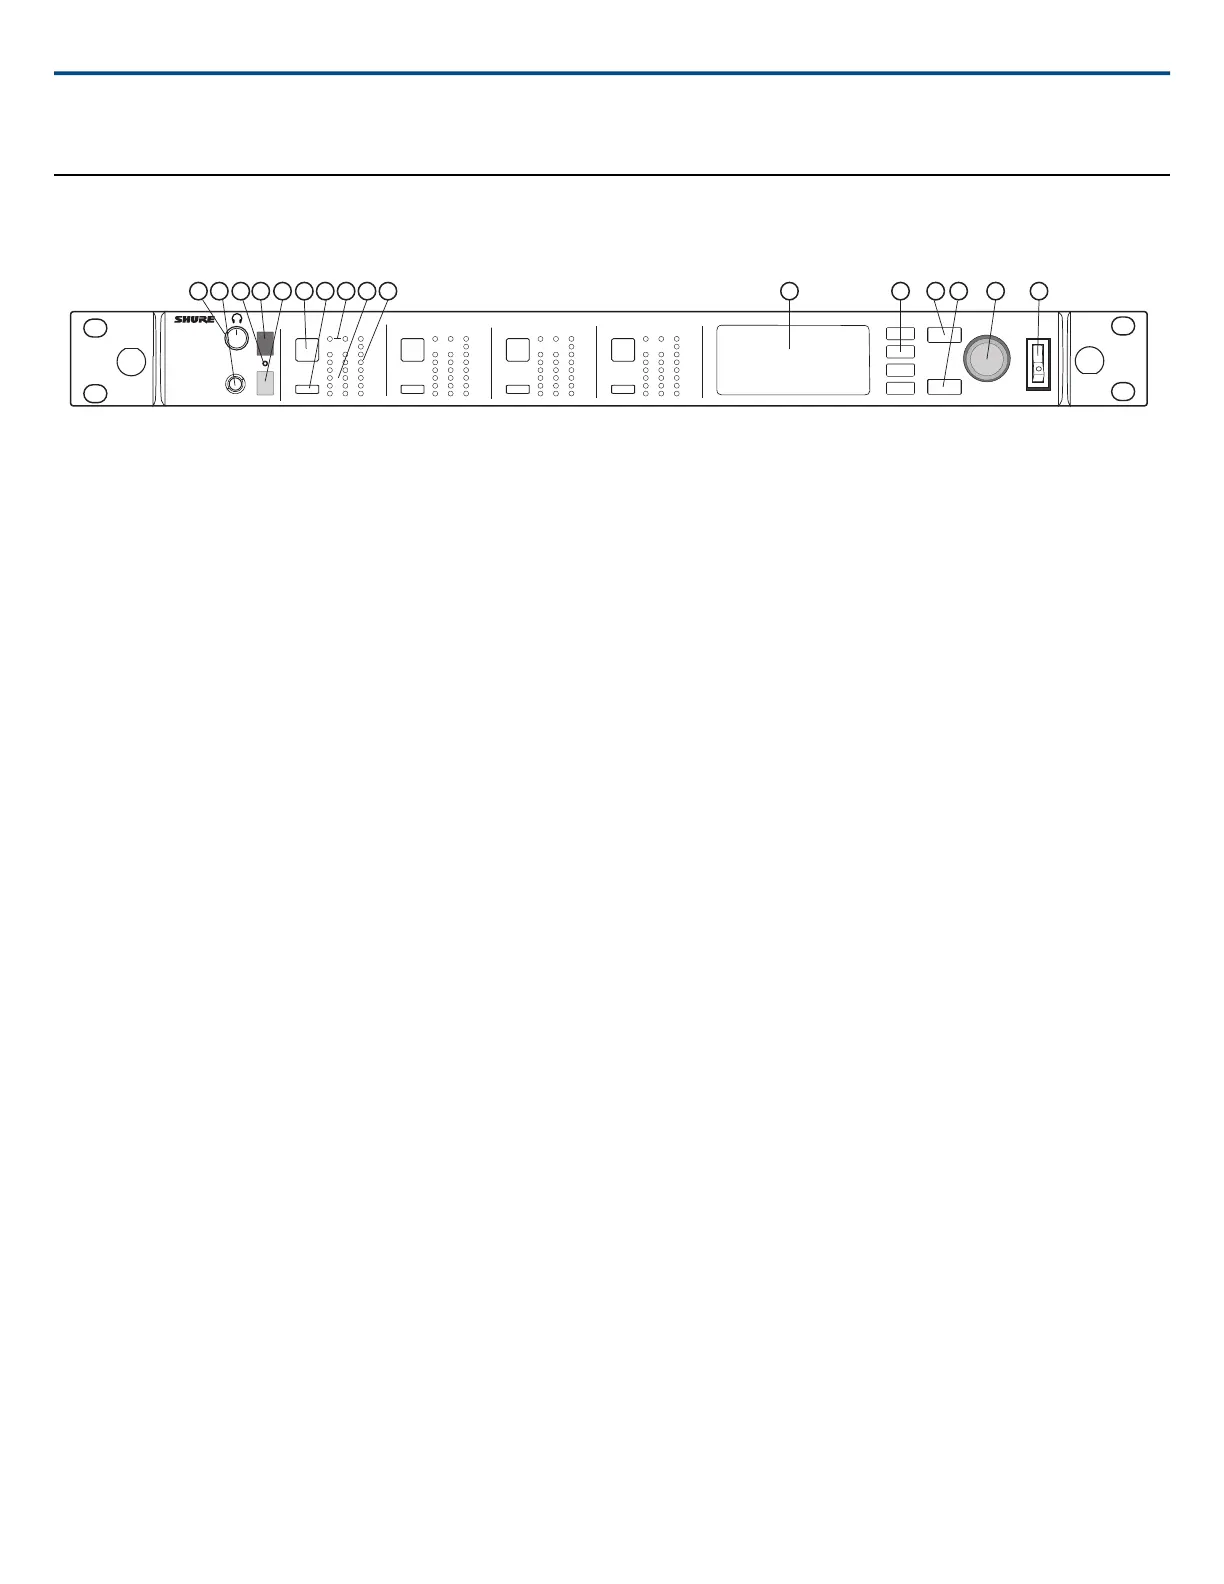
Receiver Front Panel
AD4Q
Axient Digital
Wireless Receiver
POWER
PUSH
ENTER
EXIT
CONTROL
NAVIGATE
IR
RF
A B
OL
AUDIO
SYNC
4
RX 4RF
A B
OL
AUDIO
SYNC
3
RX 3RF
A B
OL
AUDIO
SYNC
2
RX 2RF
A B
OL
AUDIO
SYNC
1
RX 1
1
9
1110
15 16
12
13
14
4 52 3
7 8
6
① Headphone Volume Knob
Controls headphone volume for the selected channel. Clip indicator warns of signal overload or limiter engagement.
Press knob to access Dante options and headphone settings.
② Monitor Jack
¼" (6.3 mm) output jack.
③ Infrared (IR) Sync LED
The LED will turn red when the transmitter and receiver are correctly aligned for IR sync.
④ Infrared (IR) Sync Window
Align with IR window on transmitter to sync.
⑤ Ambient Light Sensor
Automatically detects external lighting conditions.
⑥ Channel Select Button
Press to select channel.
⑦ Sync Button
Press to sync when transmitter and receiver are aligned. The IR Sync LED changes to red to indicate correct alignment.
⑧ Antenna Status LEDs
Indicates status for both antennas:
• Blue = Normal RF signal between the receiver and transmitter
• Red = Interference detected
• Off = No RF connection between the receiver and transmitter
Note: The receiver will not output audio unless one blue LED is illuminated.
⑨ RF Signal Strength LEDs
Indicate the RF signal strength from the transmitter:
• Orange = Normal (-90 to -70 dBm in 5 dBm increments)
• Red = Overload (greater than -20 dBm)
⑩ Audio LEDs
Red, yellow, and green LEDs indicate average and peak audio levels.
The LED will turn red when the limiter is engaged.
⑪ Display
Displays information for the selected channel.
⑫ Function Buttons
Press to access editing and configuration options. The buttons are named F1, F2, F3, F4 (from top to bottom) and illuminate to when editing options are available.
⑬ ENTER Button
Press to save changes.
⑭ EXIT Button
Press to cancel changes and return to main menus.
Shure IncorporatedAD4Q Digital Quad Receiver
2017/10/252/21
 Loading...