3
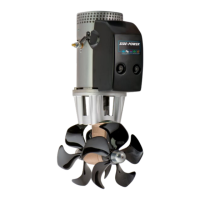
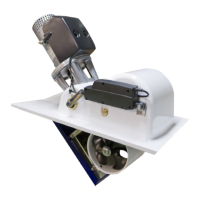
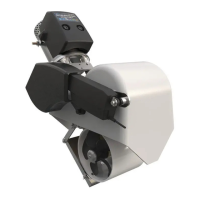
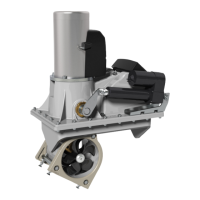
SE80/185T & SE100/185T Ignition Protected thruster assembly 1.0 - 2007
Prior to installation, it is important that the installer reads this guide to ensure necessary acquaintance with this product.
The electromotor assembly must be handled carefully. Do not lift it by the internal connections or put it down on the driveshaft.
Beware to keep installation within adviced measurements.
We advice to paint the gearhouse and propellers with antifouling. PS! Do not paint the zinc anodes, sealings or propellershafts.
Do not nish the inside of the tunnel with a layer of gelcoat / topcoat or similiar. It is only room for a thin layer of primer and two layers
of anti-fouling between the tunnel and the props.
With the boat on land, only run the thruster for a fraction of a second, as without resistance it will accelerate very fast to a damaging
rpm. Also, while the thruster is in air, make sure that the propellers have come to a complete stop before performing a direction
change of the thruster, as it does cause damage to the thruster.
This manual is intended to support educated / experienced staff and is therefore not sufcient in all details for the correct installation.
The thruster IP assembly has been tested to be fully ignition protected so that it can be installed in an area with the possibility of
explosive gases in accordance to ISO 8846.
Do not install the thruster in a position where you need to cut a stiffener/stringer/support for the hull integrity without checking with the
boatbuilder that this can be safely done.
When installed in boats approved or classied according to international or special national rules, the installer is responsible for
following the demands in accordance with these regulations / classication rules. The instructions in this guide can not be guaranteed
to comply with all different regulations / classication rules.
NB ! Faulty installation of the tunnel, thruster or panel will render all warranty given by Sleipner Motor AS void.
Planning and important precautions
To achieve maximum effect, reliability and durability from your Sidepower stern thruster, a correct installation is very important.
Please follow the instructions carefully, and make sure that all checkpoints are carefully controlled.
Additional considerations for positioning of the stern thruster
Make sure that the stern-tunnel does not disturb the waterow under the hull
Ensure that when installed the thruster does not foul exisiting equipment inside the boat like steerage links etc.
Make sure that the water ow from the thruster are not intereferred to much by sterndrives, trimtabs etc. as this will reduce the thrust
considerably.
It is possible to mount the tunnel off the boat’s centre line if necessary.
If the stern thickness is to much for the thruster in question you can easily remove hull material in the necessary area to t the
thruster. You only have to reduce the stern thickness down to the max. thickness measurement in the drawing.
Stern thruster installation considerations