11 GB/CY
Operation
Preparation: Grease the upper and lower
exchangeable plates
11
,
12
,
13
with suitable
cooking oil.
Turning the product on: Connect the power plug
4
to a suitable wall outlet. The red indicator
2
lights up.
Turning the product off: Disconnect the power
plug from the wall outlet. The red indicator
2
goes off.
Keep the product locked while preheating.
Preheat until the green indicator
3
lights up.
Light indicator Status
Red indicator
2
on
Product on.
Red indicator
2
off
Product off.
Green indicator
3
off
Product is preheating/
reheating.
Green indicator
3
on
The baking temperature
has been reached.
NOTE: During operation, the green indicator
3
goes on and off from time to time. This indicates
that the product is reheating up to the baking
temperature.
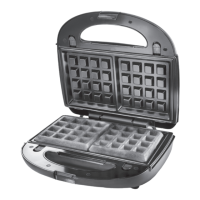
This product is designed for making waffles,
sandwiches, and for grilling food (see the
following sections).
Suggested baking/grilling times
Sandwiches 3 to 4 minutes
Grilling 4 to 9 minutes
(check the degree of
browning from time
to time)
Waffles (sweet/savoury) 5 minutes
For reference only (see the “Recipes” section for
estimated cooking times)
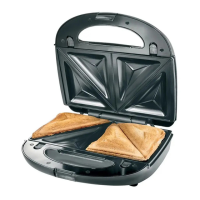
Grilling sandwiches
Suitable for: Sandwich pockets with sweet or savoury
filling
Plates:
Sandwich plates (upper and lower plate)
11
Open the lock
1
. Open the product.
Place 2 prepared sandwiches onto the lower
sandwich plate
11
.
Close the product. Close the lock
1
. The
sandwiches are grilled now.
NOTE: Grilling takes approx. 3 to 4 minutes.
Depending on how crunchy you want your
sandwiches to be, the baking time may be
shortened or increased.
Removing sandwiches: Use a plastic/wooden
spatula (or other suitable non-metallic tools) to
avoid damaging the product's non-stick coating.
While the sandwiches are being grilled, the green
indicator
3
will turn off and on again. This is to
regulate the required operating temperature.
When you are done with grilling: Disconnect the
power plug
4
from the wall outlet.
Grilling
Suitable for: Grilling smaller meat chunks, sausages,
or vegetables
Plates:
Grill plates (upper and lower plate)
12
Open the lock
1
. Open the product.
Place the food to be grilled onto the lower grill
plate
12
.
Close the product. Close the lock
1
. The food is
grilled now.
mCAUTION! Danger of splashes. Do not
use wet food for grilling. Fat splashes and rising
steam will occur when opening the product.
 Loading...