Regent / 500 / 2500 / LT Series
TP 300-4218-04-RG-SMAN 1/200616
Gauge Wheels (Select Models)
The mower gauge wheels can be placed in several
positions depending on the height of cut. When using
higher cutting heights, set the wheels in the lower
position. When using lower cutting heights, set the
wheels in the upper position. To adjust:
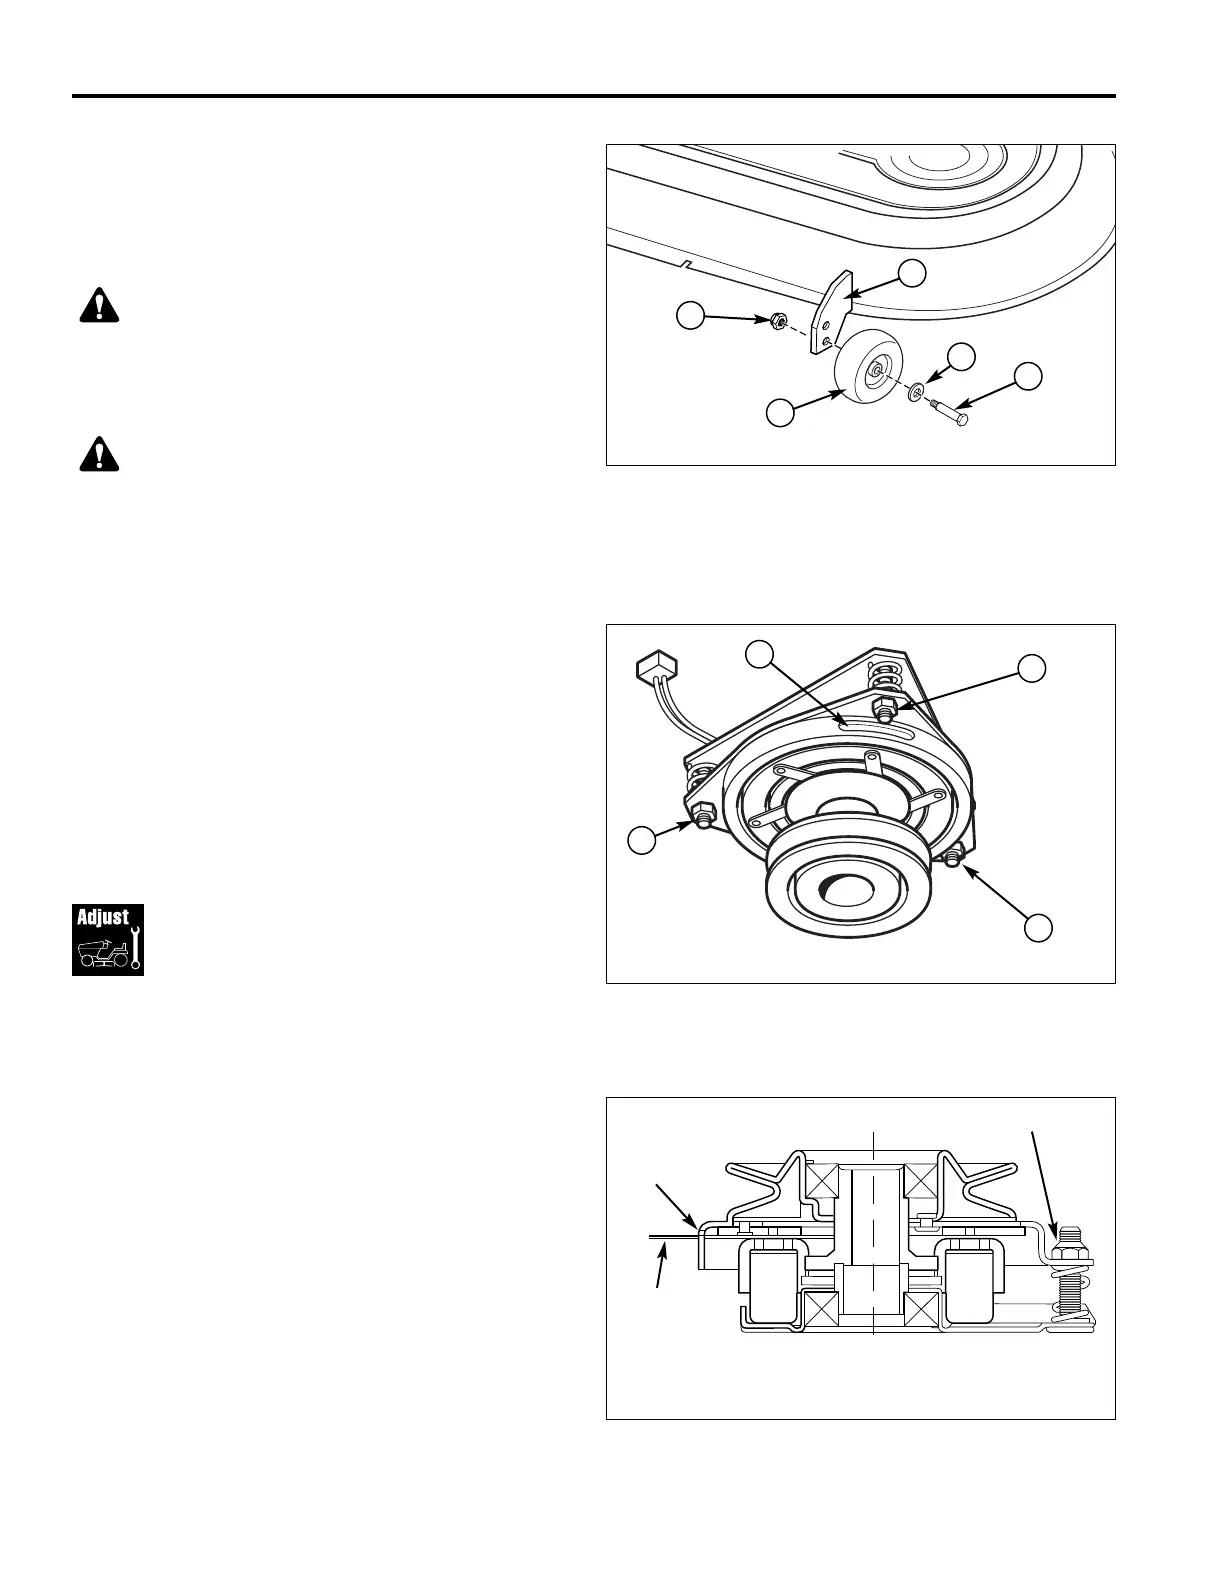
1. Remove the locknut (B, Figure 28), gauge wheel (C),
washer (D), and shoulder bolt (E). Change position of
gauge wheel to desired height.
2. Insert shoulder bolt (E) through washers (D) gauge
wheel (C), and gauge wheel bracket (A). Secure with
locknut (B). Repeat steps 1 & 2 for all gauge wheels.
Electric PTO Clutch
Adjustment
Check the PTO clutch adjustment after 250 hours of
operation. Also perform the following procedure if the
clutch is slipping or will not engage.
1. Remove key from ignition switch and disconnect
spark plug wires to prevent the possibility of
accidental starting while the PTO is being adjusted.
2. See Figure 29. Note the position of the 3 adjustment
windows (A) in the side of the brake plate and the
nylock adjustment nuts (B).
3. Insert a .012” feeler gauge through each window,
positioning the gauge between the rotor face and the
armature face as shown in Figure 30.
4. Alternately tighten the adjustment nuts (B, Figure 29)
until the rotor face and armature face just contacts the
gauge.
5. Check the windows for an equal amount of tension
when the gauge is inserted and removed, and make
any necessary adjustments by tightening or loosening
the adjustment nuts.
Figure 29. PTO Clutch Adjustment
A. Adjustment Window (Qty. 3, one shown)
B. Adjustment Nuts
Window
Adjustment
Nut
Figure 30. Feeler Gauge Position
.012”
Feeler
Gauge
(3) Places
Required
A
B
B
B
Adjustment
Procedures
WARNING
Before checking mower, shut off PTO and engine,
remove the key, and allow all moving parts to
stop.
NOTICE
DO NOT remove the mower deck baffles. The
baffles help prevent grass clippings from
becoming airborne and plugging up the engine
cooling fins.
Figure 28. Fixed Bracket Gauge Wheel Adjustment
A. Gauge Wheel Bracket D. Washer
B. Locknut E. Shoulder Bolt
C. Gauge Wheel
A
B
C
E
D
 Loading...