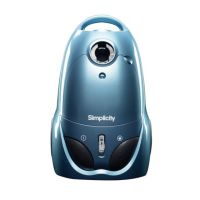
II� Full Size Canister Troubleshooting Guide07�03�07
8
B� Step 11.
1� Replace the PC connection board assembly (See Figure G. Cover Assembly )
2� Re-assemble the top cover, tool plate, etc�
3� Check for proper operation�
4� If the LED is still blinking at fast rate? (0�5 second intervals) skip to Step 13.
5� If the LED is blinking at normal rate – 2 second intervals, re-test the canister and re-assemble if good�
B� Step 12.
1� LED is Blinking slowly at 2 (two) second intervals and canister will not power up�
2� Test the motor – (Dis-connect the motor from the PC board and connect it to 110 VOLTS) MAKE SURE MOTOR IS SECURE
BEFORE CONNECTING�
3� If the motor runs go to Step 13.
4� If the motor does not run, check wires on motor�
5� If the wires are good, replace the motor and re-test the canister� Re-assemble if canister is good�
6� If the wires are bad, connect wires if able� If wires are broken off motor, replace motor and re-test� Re-assemble if canister is
good�
NOTE: If motor runs when hooked up direct but not when installed, and power nozzle runs –Model is KV040525 or below. Replace
thermal protector and re-test canister.
B� Step 13.
1� LED blinking fast at 0�5 second intervals OR LED blinking at 2 second intervals and canister will not power up�
2� Replace PC Board and re-test canister� Re-assemble if good�
B. Canister Shuts Off or Will Not Power Up - Continued
C. Canister Power Switch Fails to Power Up Unit; Hose Works Normally
If the foot pedal On/Off switch:
1� Does not operate, or
2� Turns the unit On, but not Off, or
3� Turns the unit Off, but not On
Although the hose seems to be working normally, the handle PC board in the hose may be interfering with the operation of the main switch�
Attach the original hose to a functional test canister and verify that the On/Off switch works� If the test canister foot switch does not work,
the original hose if faulty and needs to be replaced�
 Loading...
