8
071807 II. Maintenance Procedures
C. Replacing the Belt
C. Step 1.
1. Remove the base plate by removing the 2 (two) screws.
2. Remove the agitator/brushroll.
3. Remove the 5 (ve) mounting screws on the underside of the nozzle base tray. (See Figure C. Location of Nozzle Cover
Screws)
C. Step 2.
Discard the broken belt.
C. Step 3.
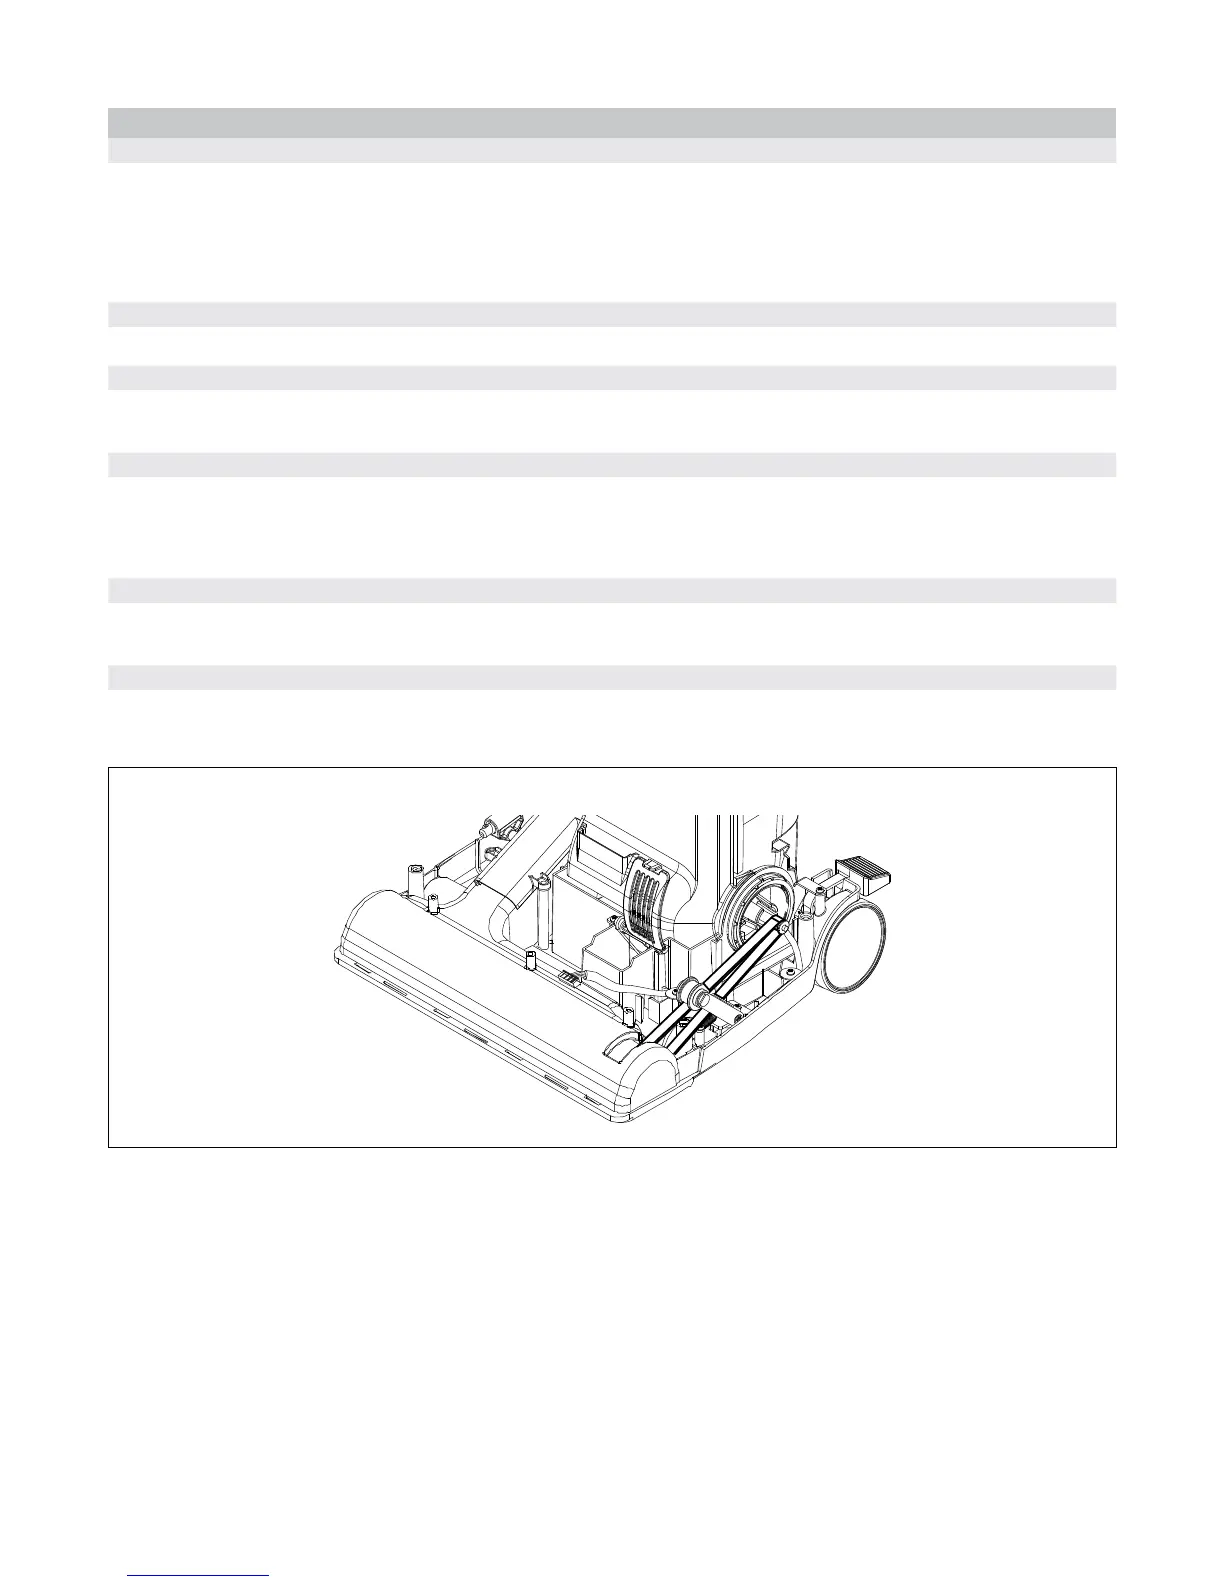
Note the layout of the idler assembly and the motor drive pulley. (See Figure E. Belt Placement) Loop the new belt over the
motor drive pulley then continue directing the belt under the idler pulley. Insert the belt into the nozzle base tray.
C. Step 4.
Turn the vacuum over and pull the belt into the nozzle base tray. Loop belt around the agitator/brushroll making sure the ribs
of the belt line up with the ribs on the agitator/brushroll.
NOTE: Ensure the felt seals are installed in the nozzle base tray.
C. Step 5.
Insert the agitator/brushroll into the nozzle base tray making sure the rubber end cap covers t precisely into the ribbed mounts
on the nozzle base tray. Rotate the agitator/brushroll a few times to ensure the belt is mounted correctly.
C. Step 6.
Reinstall the base plate and the nozzle cover.
NOTE: If the agitator/brushroll runs backwards, check the belt to ensure it is not twisted.
Figure E. Belt Placement
 Loading...