Bobbin Thread
3.7
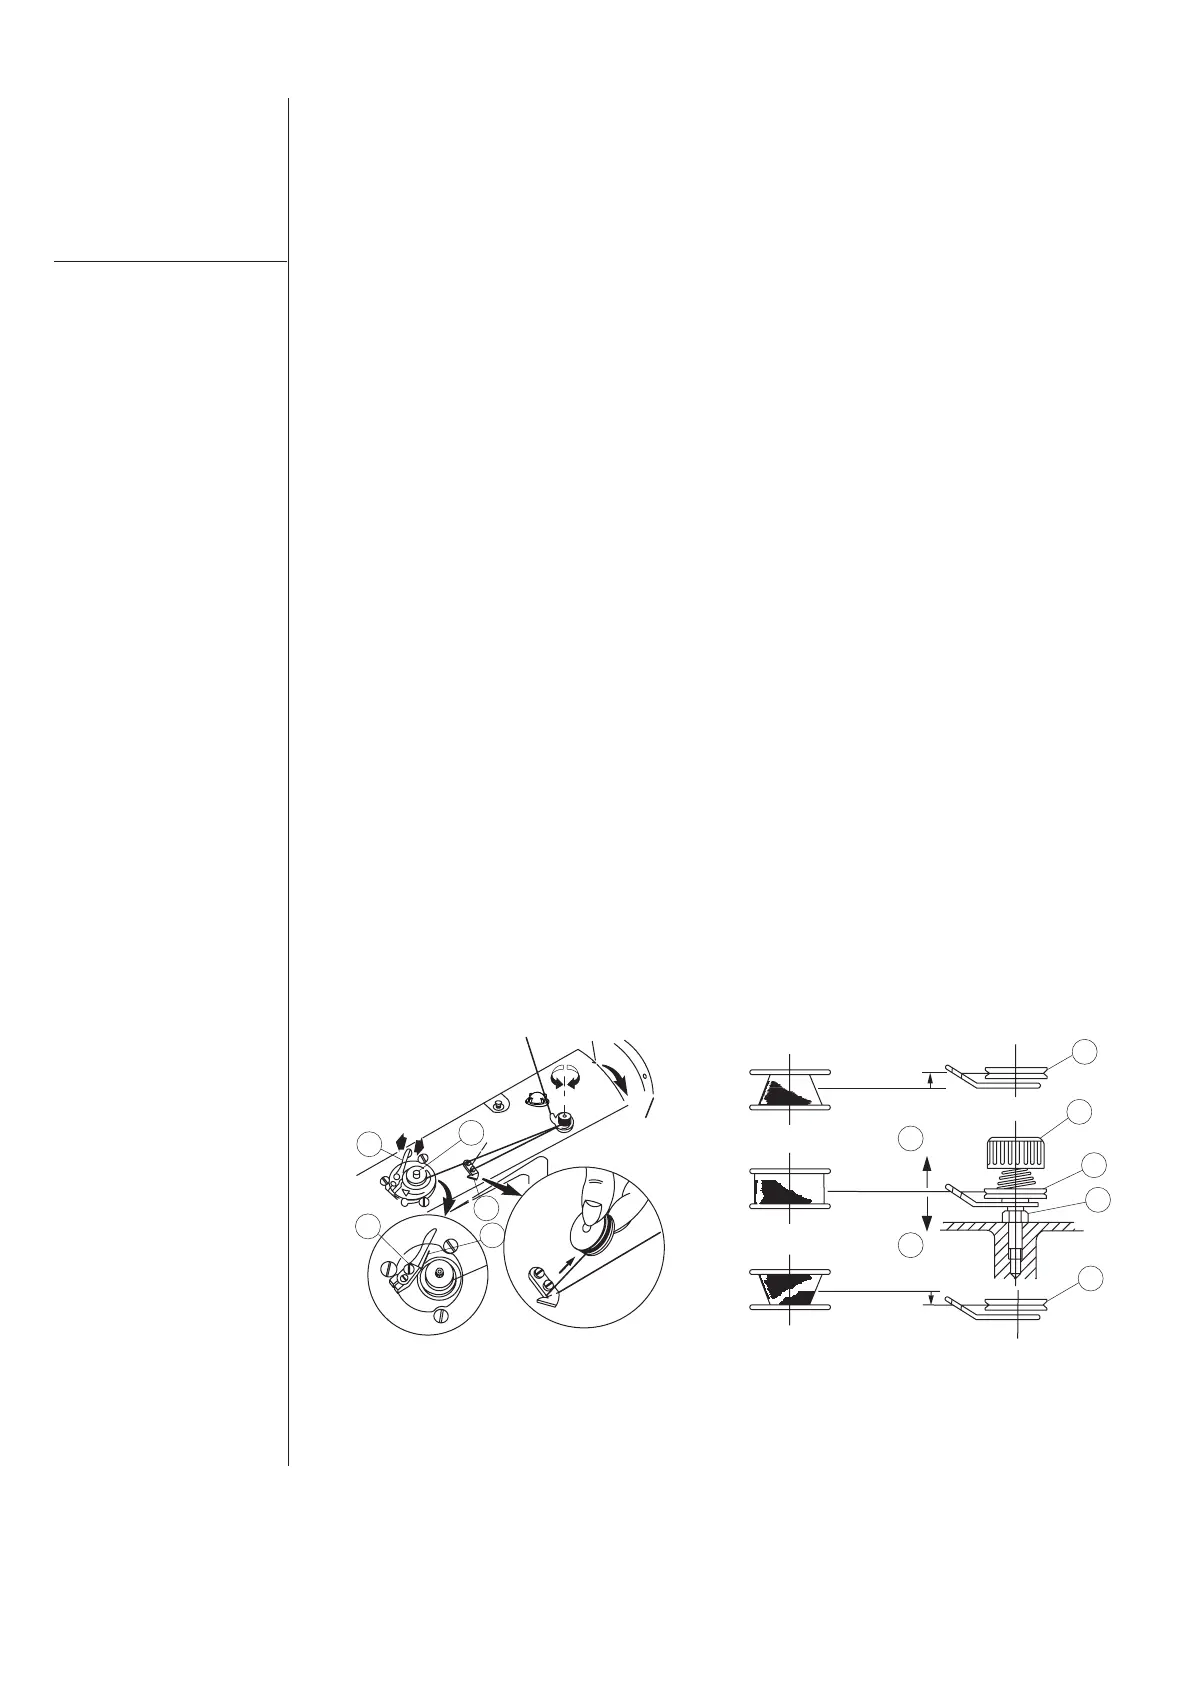
1. The bobbin is pushed into the
bobbin winder spindle ‘1’ until it
will go no further.
2. Pass the bobbin thread pulled out
from the spool rested out the right
side of the thread stand following
the order as shown in the figure on
the left. Then, wind clockwise the
end of the bobbin thread on the
bobbin several times. (In case of the
aluminum bobbin, after winding
clockwise the end of the bobbin
thread, wind counterclockwise the
thread coming from the bobbin
thread tension several times to
winding the bobbin thread with
ease.)
3. Press the bobbin winder lever ‘2’
in the direction ‘A’ and start the
sewing machine. The bobbin
rotates in the direction of ‘C’ and
the bobbin thread is wound up. The
bobbin winder spindle ‘1’ automati-
cally as soon as the winding is
finished.
4. Remove the bobbin and cut the
bobbin thread with the thread cut
retainer ‘3’.
5. To adjust the winding amount of
the bobbin thread, loosen the
Cautions
Figure 12
When winding the
bobbin thread, start the
winding in the state
that the thread
between the bobbin
and thread tension disk
'7' is tense.
When winding the
bobbin threa
d in the
state that sew
ing is not
performed, remove the
needle thread from the
thread path of thread
take-up and remove
the bobbin from the
hook.
setscrew ‘4’ and move the bobbin
winder adjusting plate ‘5’ to the
direction of ‘A’ (Decrease) or ‘B’
(increase). Then, tighten the
setscrew ‘4’.
6. In case that the bobbin thread is
not wound evenly on the bobbin,
loosen the nut ‘6’ and turn the
bobbin thread tension to adjust the
height of the thread tension disk ‘7’.
• It is the standard that the center of
the bobbin is as high as the center
of the thread tension disk ‘7’.
• Move the position of the thread
tension disk ‘7’ to the direction of
‘A’ as shown in the figure on the left
when the winding amount of the
bobbin thread on the lower part of
the bobbin is excessive and to the
direction orb as shown in the figure
on the left when the winding
amount of the bobbin thread on the
upper part of the bobbin is exces-
sive.
• After the adjustment, tighten the
nut ‘6’.
7. To adjust the tension of the
bobbin winder, turn the thread
tension nut ‘8’.
7
8
7
6
7
A
B
4
2
1
3
5
B
A
10
| Instruction Manual and Parts List
Winding the
Integrated Energy Saving Direct Drive Motor Lockstitch Sewing Machine
 Loading...