11
|
Instruction Manual and Parts List
Bobbin Case
Attachment
3.8
Fix the bobbin into bobbin case
with that the thread open end is
directed to the left as observed
from you.
Pass the thread through thread slit
‘A’, and pulls it in direction ‘B’. By
doing so, the thread will pass under
the tension spring and come out
from notch ‘B’.
When pulling the thread ‘C’, the
bobbin should rotate in the direc-
tion of the arrow.
Stitch Length
Adjustment
3.9
‘2’
direction of the arrow, and align
the desired number to marker dot
‘A’ on the machine arm.
The indication of the dial is in milli-
meters.
When you want to decrease the
stitch length, press reverse lever ‘1’
while turn stitch dial ‘2’ in the direc-
tion of the arrow.
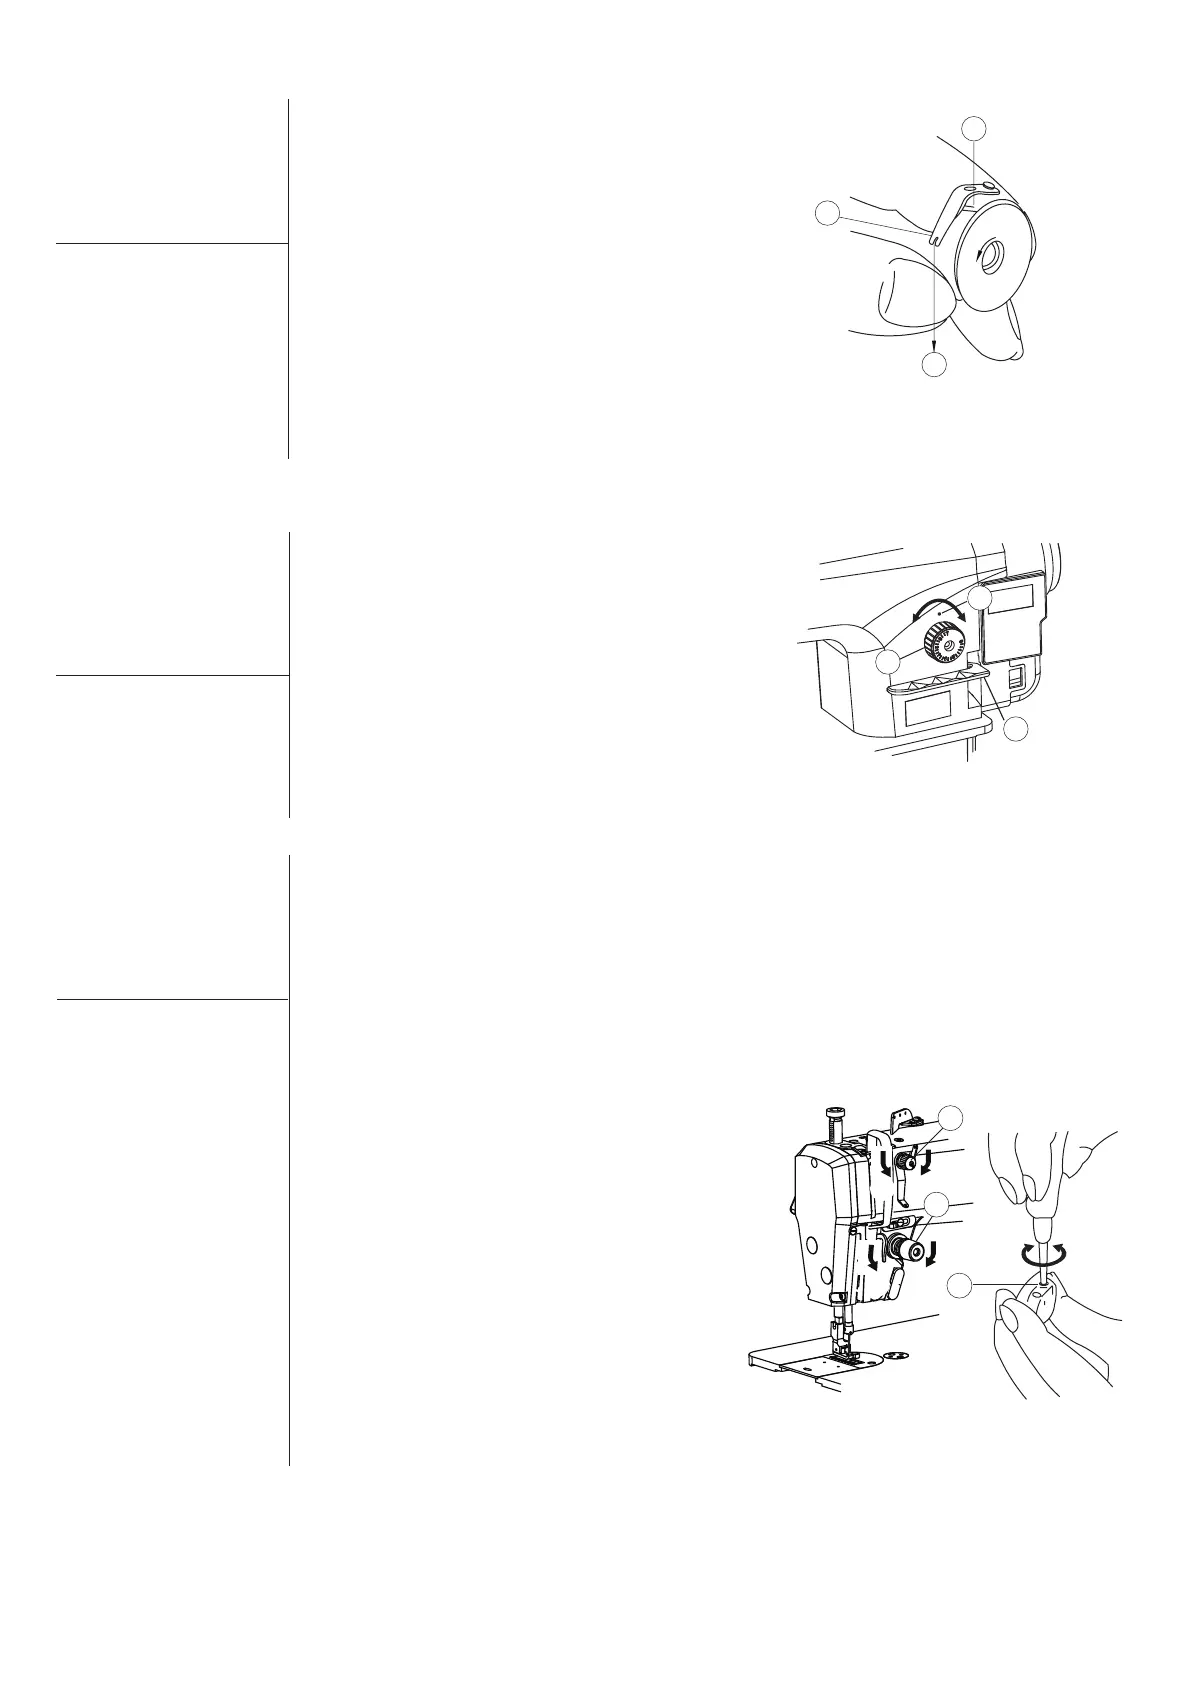
Thread Tension
Adjustment
3.10
Adjusting the needle thread tension
The tension nut ‘1’ can be adjusted
for the needle thread lengths after
trimming.
Turn the nut ‘1’ clockwise (in direc-
tion A), the length of the needle
thread will be shorter.
Turn the nut ‘1’ counter-clockwise
(in direction B), the length of the
needle thread will be longer.
Adjust the tension of needle thread
by tension nut ‘2’ according to
different sewing conditions.
Turn the nut ‘2’ clockwise (in direc-
tion C), the needle thread tension
will be increased.
Turn nut ‘2’ counter-clockwise (in
direction D), the needle thread
tension will be decreased.
Figure 15
Figure 13
Adjusting the bobbin thread tension
Turn the screw ‘3’ clockwise (in
direction E), the bobbin thread
tension will be increased.
Turn the screw ‘3’ counter-
clockwise (in direction F), the
bobbin thread tension will be
decreased.
Figure 14
A
3
E F
C
A
B
C
1
Press revrese lever ‘1’, turn stitch dial
1
B
D
2
2
A
Integrated Energy Saving Direct Drive Motor Lockstitch Sewing Machine
 Loading...