11
5. The LED lights will light up when switch is turned on.
6. The harder you press the foot control, the faster the
machine will sew. The machine will stop when foot control
is released.
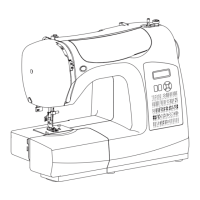
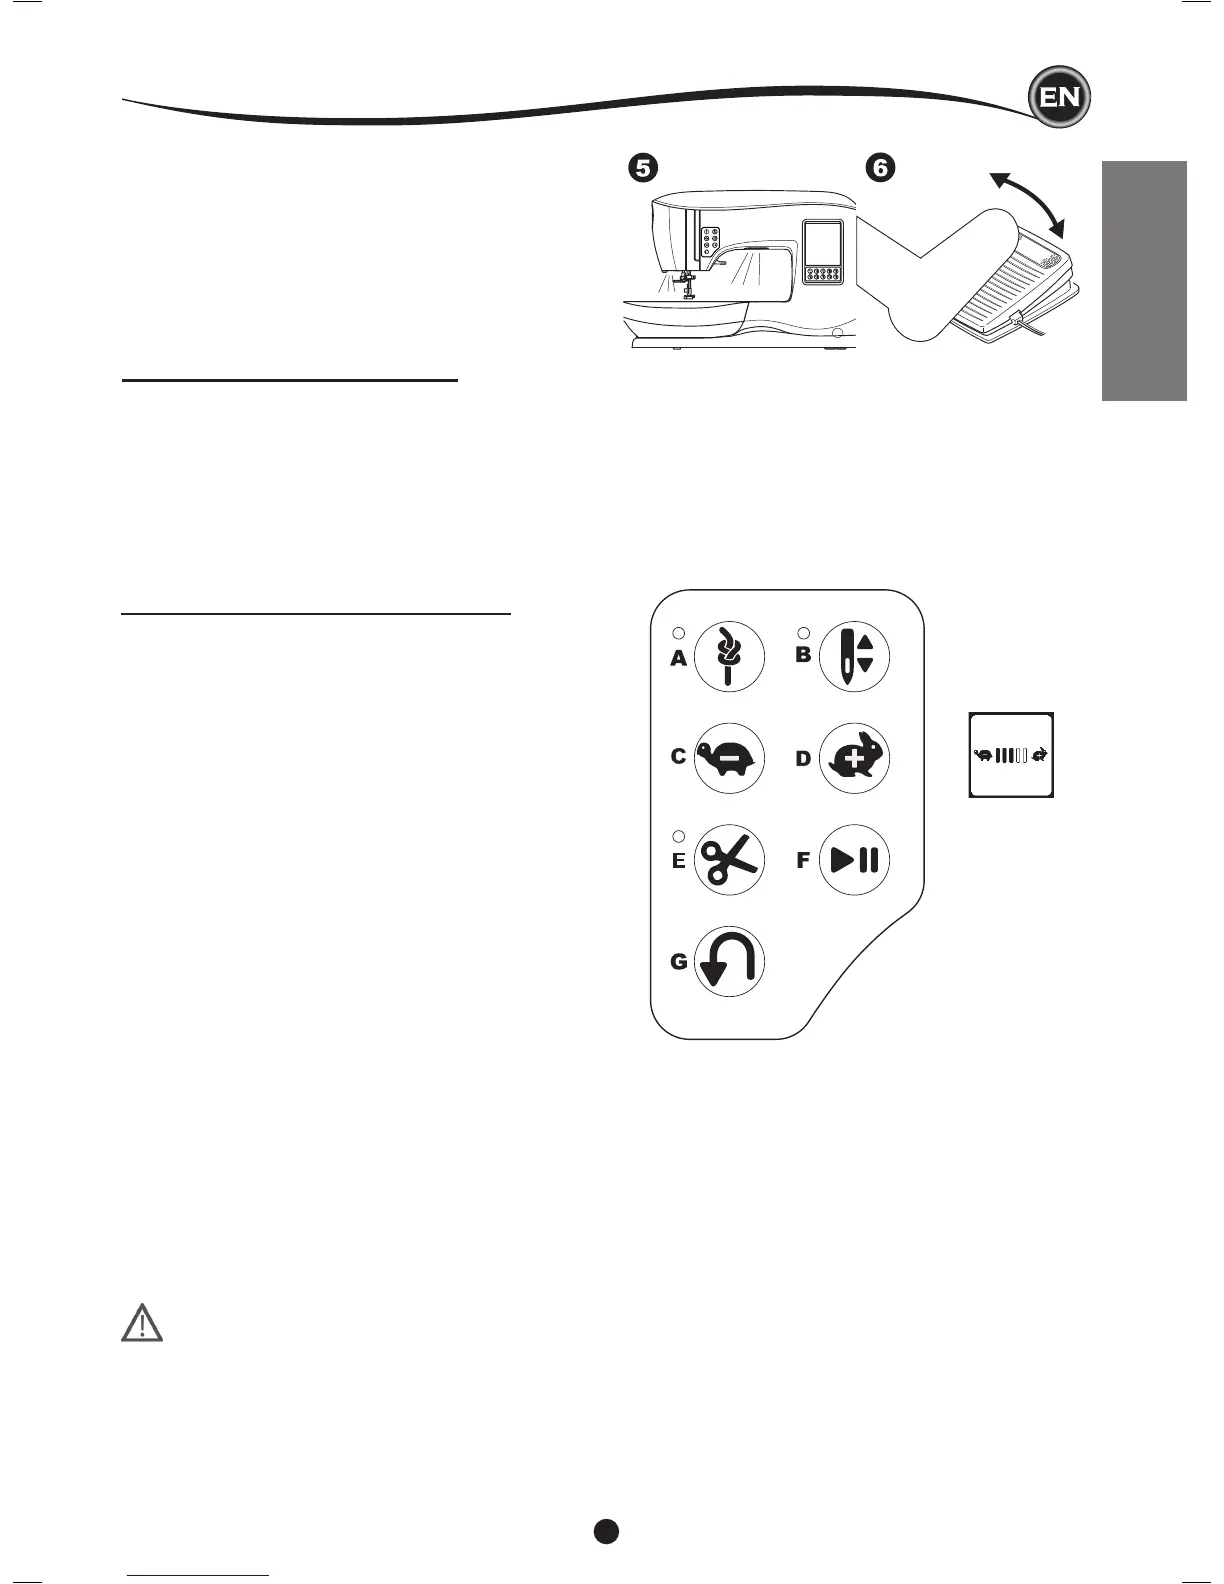
MACHINE CONTROL FUNCTIONS
TackButtonwithLEDIndicator(A)
Press the tack button while sewing and your machine
sews a few tack stitches and stops automatically. When
pressed while not sewing, machine will sew a tack and
stop automatically at the beginning of next sewing.
The LED indicator will be lit until tack stitch has completed.
NeedleStopPositionUp/DownButtonwith
LEDIndicator(B)
Press this button to move the needle up or down. The
setting of the needle stop position is changed at the same
time. When needle position is set to down, the LED indicator
will be lit. You can also tap the foot control to raise or lower the
needle.
SpeedControlButton(C,D)
The speed control buttons allow you to incrementally increase
or decrease the sewing speed. When either button (C or D)
is pressed, a pop-up message appears showing the range of
speed settings available.
NOTE: When the foot control is connected, these buttons
decrease and increase the speed limit.
ThreadCutterButtonwithLEDIndicator(E)
Press this button after sewing to cut the upper and bobbin
threads.
The LED will turn on and cut both threads automatically. To cut
before the needle moves to the start position of the next stitch,
press the thread cutter button while sewing. The LEDs (A & E)
will be lit and the machine will cut the threads after the stitch or
sequence has completed.
•
Donotpressthisbuttonwhenthereisnofabricunderthe
presserfootornoneedtocutthethreads.Thethreadmay
tangle,resultingindamage.
• Donotusethisbuttonwhencuttingthreadthickerthan
#30,nylonthreadorotherspecialitythreads.Inthis
case,usethethreadcutter(I).
•
Donotusethethreadcutterbuttonwhensewingwitha
twinneedleorahemstitching(wing)needle.
SettingUptheMachine
Start/StopButton(F)
The machine will start running when start/stop button is
pressed and will stop when pressed the second time. The
machine will rotate slowly at start of sewing.
ReverseButton(G)
The machine will sew in reverse while this button is pressed.
When released, machine will sew forward.
SETTING UP THE MACHINE
PACK AWAY AFTER SEWING
1. Switch the main switch off.
2. Unplug the cord from the wall socket and then from the
machine.
3. Unplug the foot control cord from the machine. Wind the
cord around the foot control for easy storage.
4. Place all accessories in the accessory tray. Slide the tray
on to the machine around the free arm.
5. Place the foot control in the space above the free arm.
 Loading...