3
2
PART I : SETTING UP THE EQ8 MOUNT
PART II : POLAR ALIGNMENT
PART III : ELECTRONIC CONTROL INTERFACE
PART IV : OTHER FEATURES OF THE EQ8 MOUNT
APPENDIX I : SPECIFICATIONS
CONTENT
1.1 Setting Up the Tripod ...............................................................................................3
1.2 Putting On the EQ8 Mount .......................................................................................5
1.3 Installing the Counterweights ..................................................................................6
1.4 Installing the Telescope ...........................................................................................6
1.5 Balancing the Mount Load .......................................................................................7
2.1 Prepare the Mount for Polar Alignment ................................................................. 8
2.2 Polar Alignment Using the SynScan Hand Controller ............................................ 9
2.3 Polar Alignment with the Optional Polar Scope .................................................... 9
2.4 The Orientation of the Polaris in Polar Scope .......................................................11
2.5 Align the Polar Scope ...........................................................................................12
3.1 Control Panel ........................................................................................................14
3.2 Panel Interface Components ................................................................................14
3.3 Pinout of the Interfaces .........................................................................................15
3.4 Power Supply Requirements .................................................................................15
4.1 Freedom Find Function .........................................................................................16
4.2 Permanent Periodic Error Correction ....................................................................16
4.3 Batch Exposures Function ....................................................................................16
4.4 Auto-Home Function ............................................................................................16
Dimensions ..................................................................................................................17
Specications ...............................................................................................................18
PART I : SETTING UP THE EQ8 MOUNT
1. Fully expand the tripod legs on level ground.
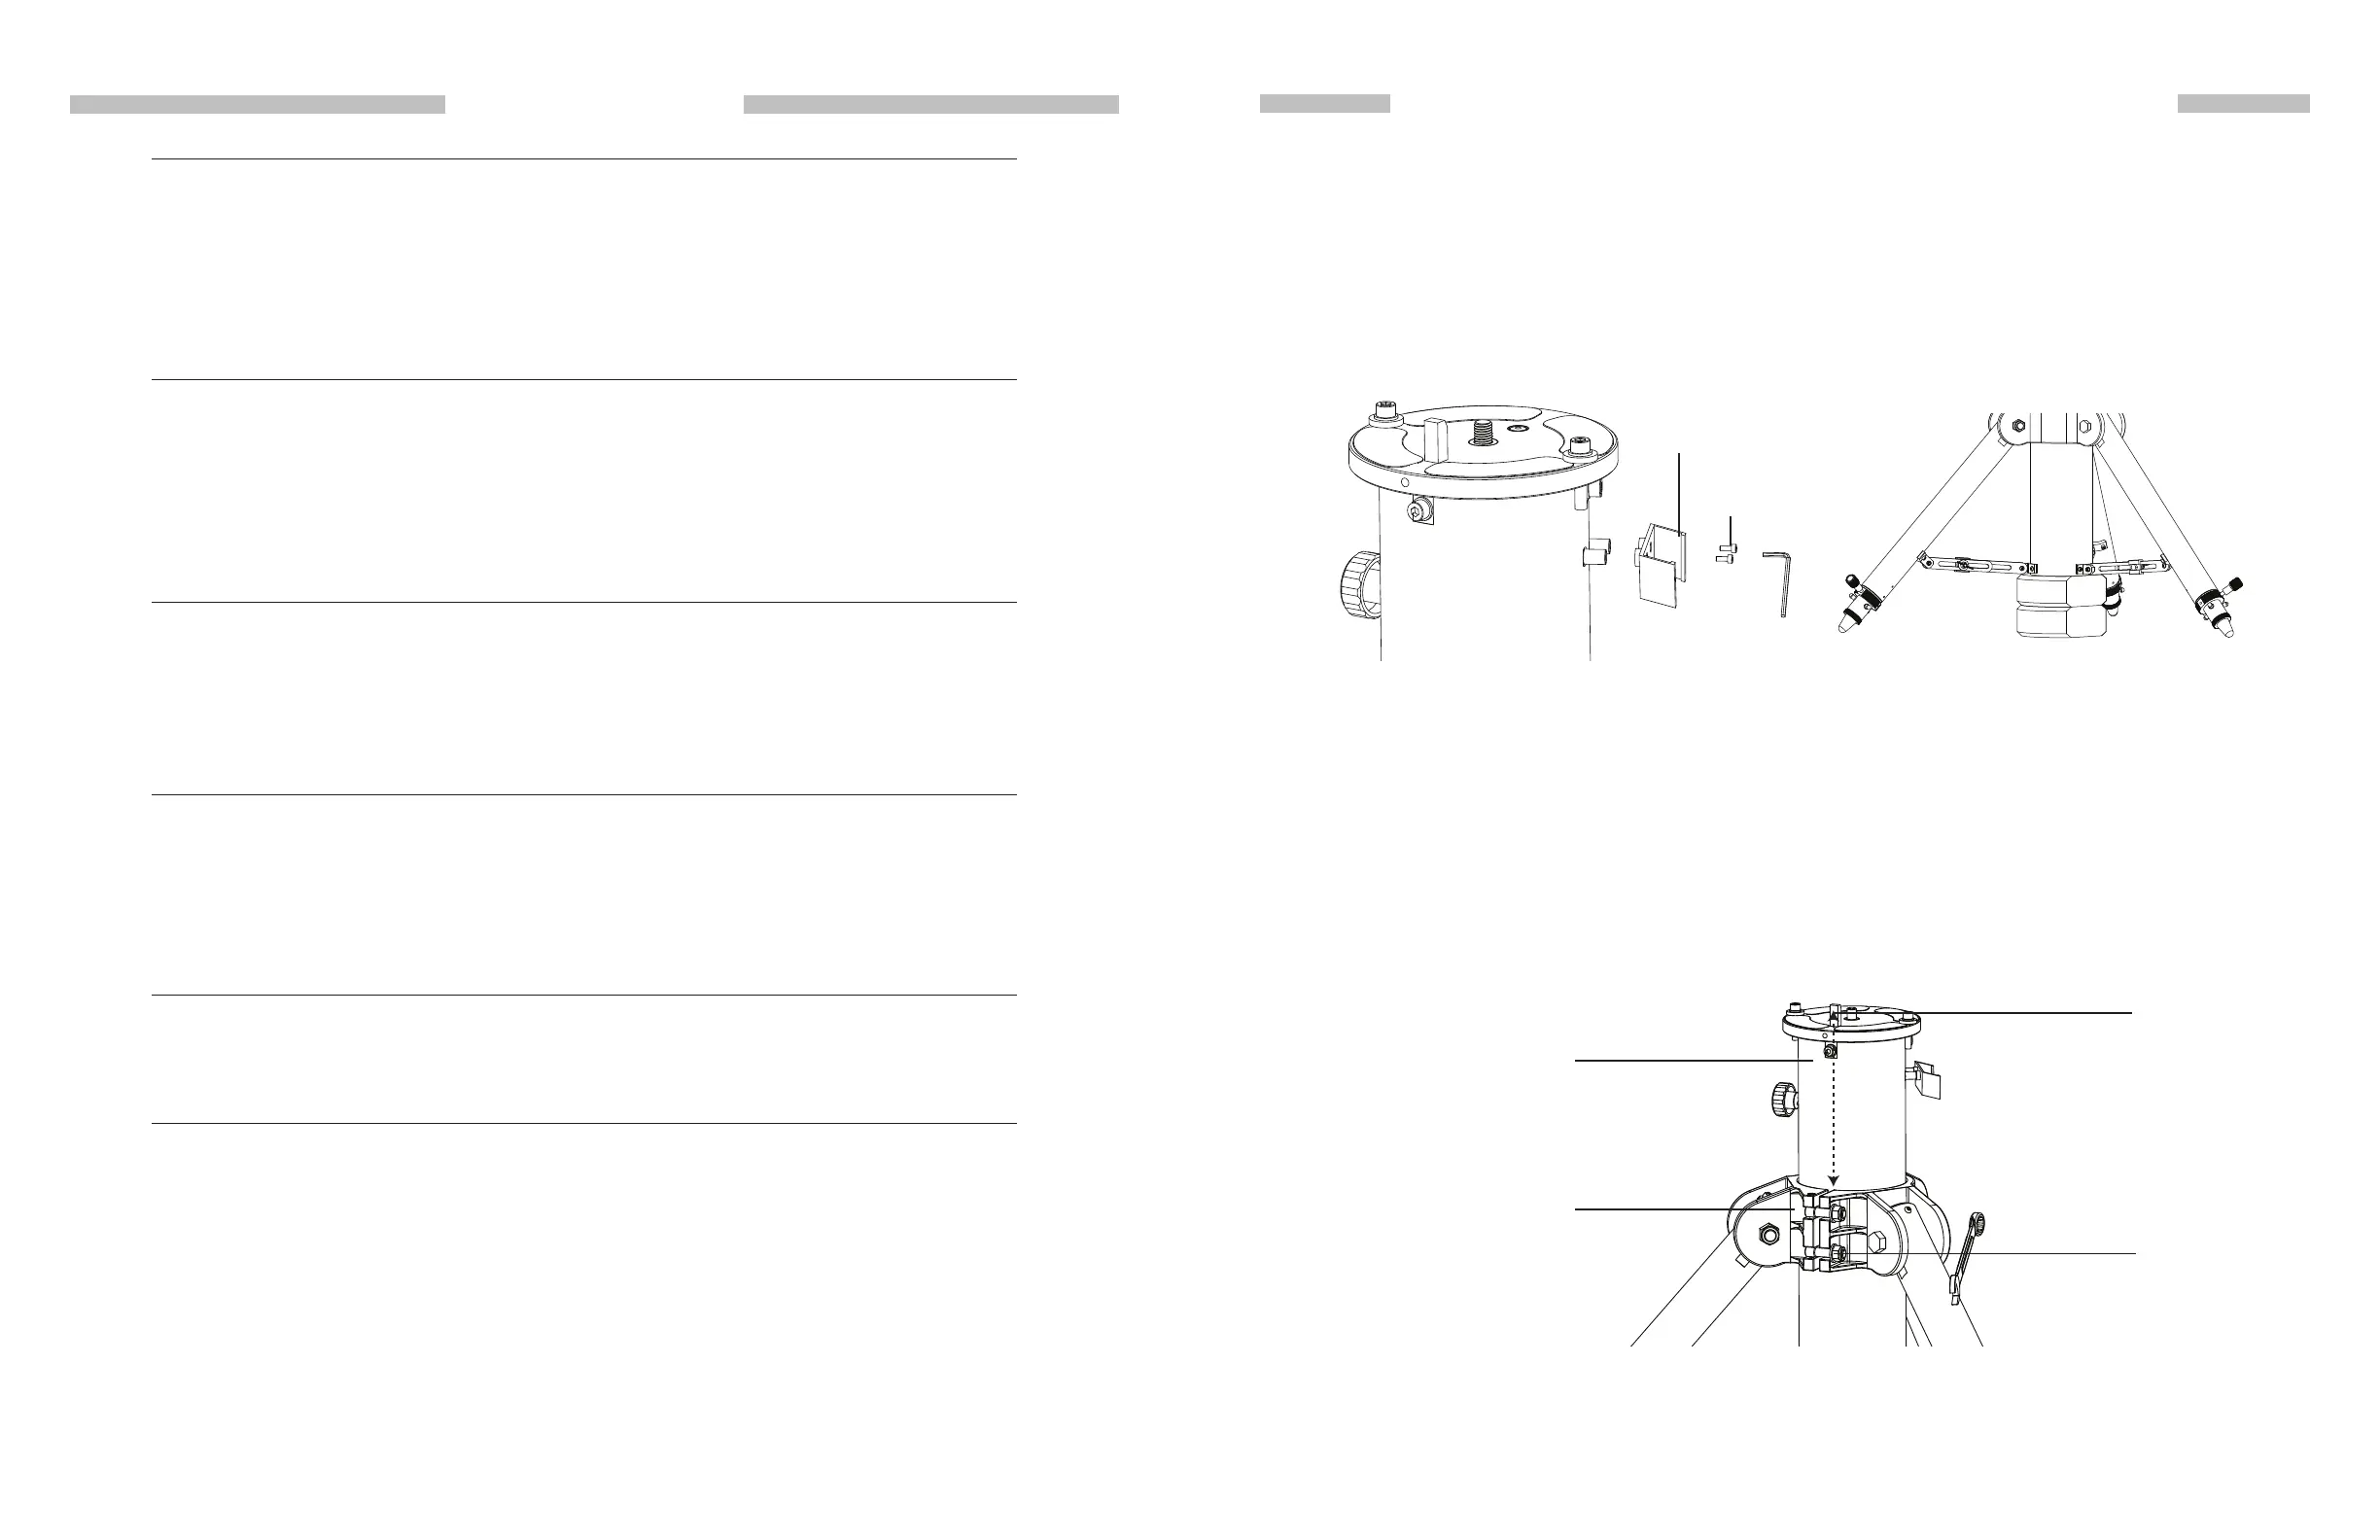
2. Install the hand control bracket on the tripod. (Fig 1.1a)
3. Place one or two counterweight(s) just between the bottom of the central post and the
ground if there is enough space between them. This is a critical safety effort because the
counter weight(s) will prevent users from putting their feet under the central post uncon-
sciously. (Fig. 1.1b)
3. Fully release the clamp of the central post by loosening the two hex nuts on it with a 19mm
hex wrench (Fig 1.1c).
1.1 Setting Up the Tripod
Fig. 1.1bFig. 1.1a
• The central post might fall freely when the two nuts are loosened. The counterweight(s),
which is (are) placed between the bottom of the central post and the ground earlier, will
support the central post and prevent any potential damages in such case.
• While loosening the two clamp nuts, to reduce the possible impact of the falling of the
central post, it is recommended to hold the tripod top, or to ll the gap between the top
of the counter weight and the bottom of central post with some soft material.
• User should loosen the two hex nuts alternately to make sure both of them are fully
loosened.
4. After the clamp is fully released, rotate the central post in the clamp to roughly align the
dowel on the tripod top with the gap of the clamp. (Fig 1.1c)
Align
Fig. 1.1c
Dowel
Central Post
Nuts
Clamp
Hand Control
Bracket
M3X10
Screws
 Loading...