6 7
PART I: SETTING UP THE EQ8 MOUNT
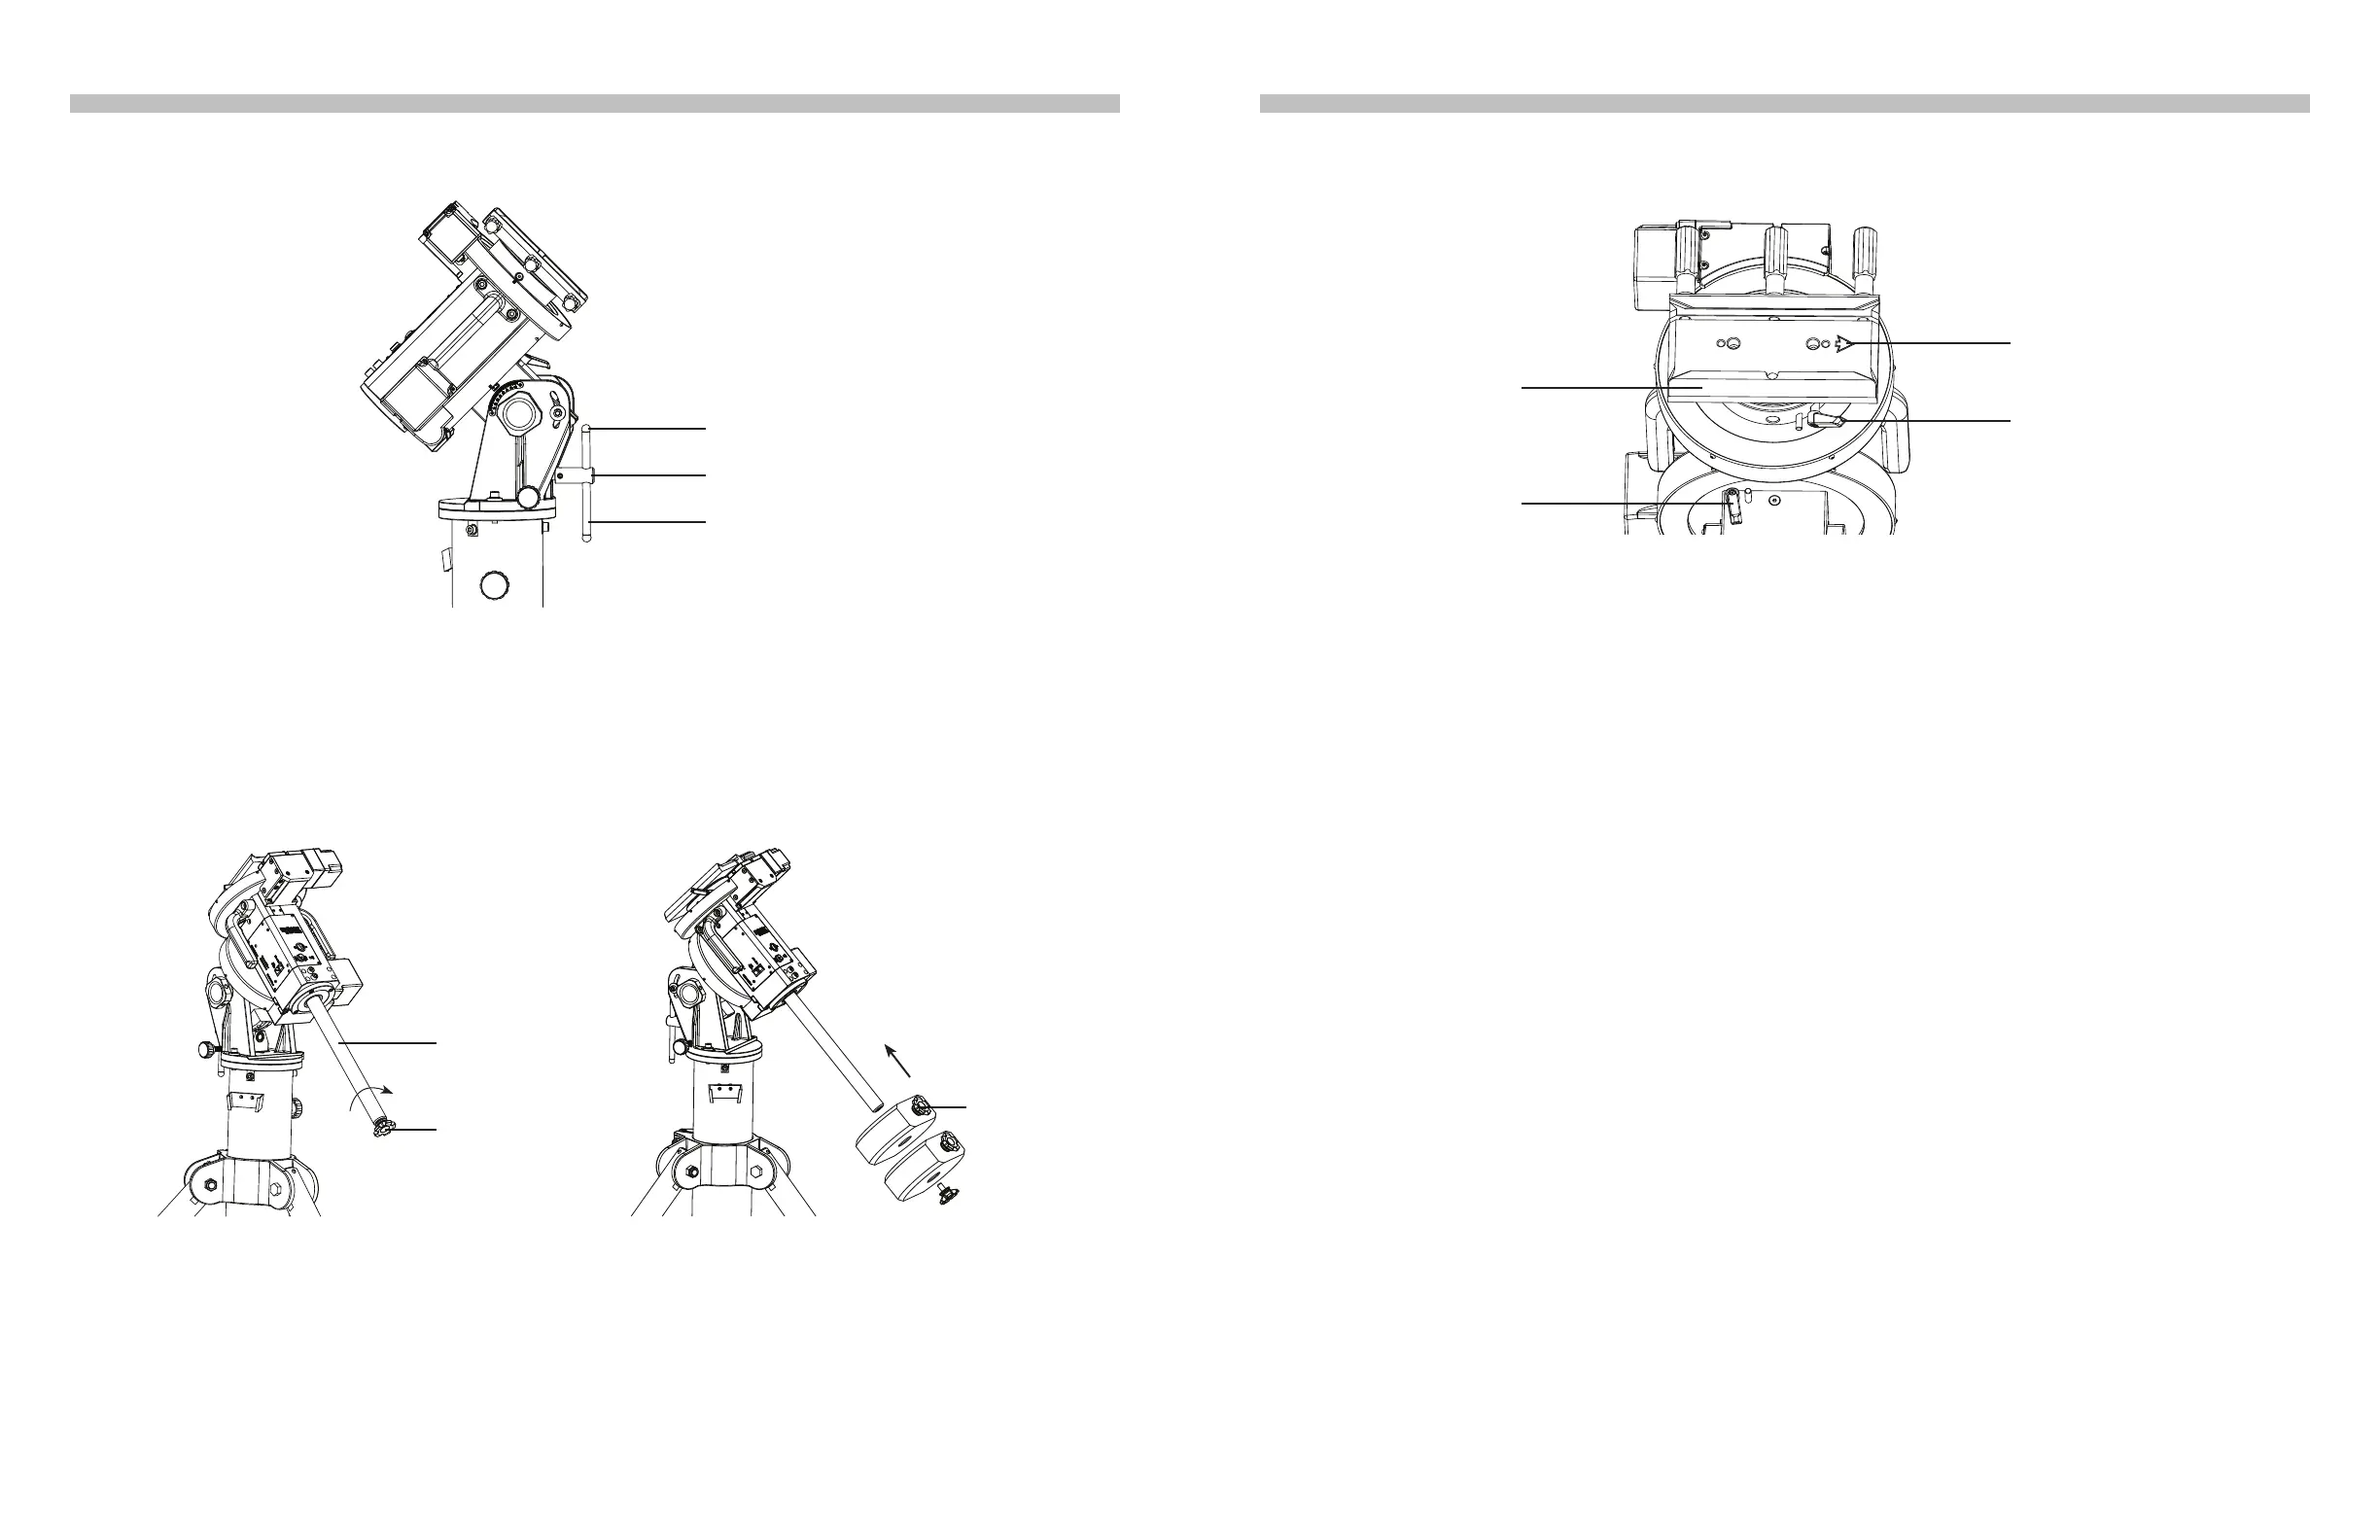
6. Slide the jackscrew handle in the hole at the end of the jackscrew shaft. Apply two ball
head screws on the handle. (Fig. 1.2d)
Fig. 1.2d
1.3 Installing the Counterweights
1. Screw the counterweight rod into the mount as shown in Fig. 1.3a.
2. Remove the stopper cap at the end of the counterweight rod.
3. Loosen the counterweight’s thumb screw and slide the counterweight onto the counter-
weight rod. Retighten the thumb screw to secure the counterweight on the rod. (Fig. 1.3b)
4. Replace the stopper cap to the end of the counterweight rod.
1.4 Installing the Telescope
1. Before installing a telescope, ensure:
• The counterweight rod is pointing towards the ground.
• All counterweights have been moved to the end of the counterweight rod.
• The R.A. Axis is secured by tightening the R.A. Clutch. (Fig. 1.4)
Fig. 1.4
3. Loosen the three knobs on the saddle alternately until the width of groove is slightly wider
than the width of the dovetail bar on the telescope.
4. While holding the telescope horizontally, seat or slide the dovetail bar of the telescope to
the groove of the saddle. The pointing direction of the telescope should match the arrow
sign on the saddle (Fig 1.4).
5. Tighten the three knobs alternately to secure the dovetail bar in the groove.
Warning: Keep supporting the telescope until you are sure that it has been rmly at-
tached to the saddle.
PART I: SETTING UP THE EQ8 MOUNT
Once the counterweight and the telescope have been installed, the mount should be balanced
to reduce stress on the motor drive system, as well as to ensure smooth and accurate oper-
ation.
1. Loosen the R.A. clutch and rotate the R.A. axis until the counterweight rod is parallel to the
ground. Tighten the R.A. clutch.
2. Loosen the Dec. clutch and rotate the Dec. axis until the telescope is parallel to the ground.
Tighten the Dec. clutch.
3. Loosen the thumb screws on the counterweights.
4. Hold the counterweight rod with one hand, release the R.A. clutch and adjust the counter-
weights along the rod until the mount is able to remain stationary without support. Tighten
the thumb screws on the counterweights again.
5. Rotate the R.A. axis; the mount should remain relatively balanced along different angles.
Once this is conrmed, return the mount to its original position described in Step 1 and
tighten the R.A. clutch again.
6. Hold the telescope with one hand and release the Dec. clutch.
7. Slowly let go of the telescope and check for any rotational movements. If there is a
movement, slide the dovetail bar in the saddle to nd a balancing position at which the
telescope can remain stationary without support.
1.5 Balancing the Mount
2. Release the Dec. clutch knob (Fig 1.4) and rotate the Dec. axis until the three knobs on
the saddle are facing upward and the dovetail groove is leveled (Fig 1.4). Tighten the
Dec. clutch again.
Jackscrew Shaft
Counterweight Shaft
Ball-head Screw
Stopper Cap
Lock
Counterweight
Rod
Thumb Screw
Fig. 1.3a
Fig. 1.3b
R.A. Clutch
Saddle
Dec. Clutch
Arrow Sign
 Loading...