4 5
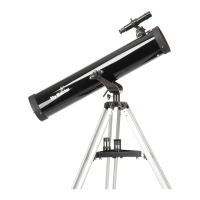
5. Assemble the 3 adjustable spider trusses as shown in Fig 1.1d and Fig 1.1e. Do not tighten
the thumb screws at this moment.
6. Slide the central post up/down in the clamp (Fig. 1.1c) to the proper height and then tighten
the 3 thumb screws on the spider trusses to prevent the central post from falling.
7. Tighten both hex nuts on the clamp to secure the central post in the clamp. The two nuts
MUST be tightened in an alternate manner to avoid damage to the clamp. Do not over
tighten the two nuts.
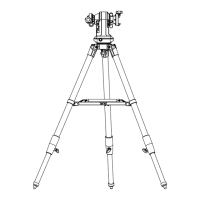
8. Level the plate located on top of the tripod by adjusting the three threaded tripod toes. Use
the bubble level on the plate to assist with the adjustment.
• Loosen the locking rings.
• Screw the threaded toes in or screw out to to adjust its length. Lift the leg a little to make
the adjustment easier.
• Tighten the locking screw as close to the edge (where the thread goes into the leg) of
the leg as possible.
Fig. 1.1d
Fig. 1.1e
PART I: SETTING UP THE EQ8 MOUNT
1.2 Putting On the EQ8 Mount
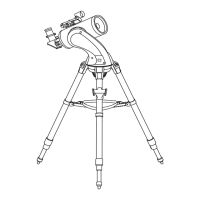
1. Loosen the two azimuth adjustment knobs on the EQ8 mount until there is sufcient space
between the two knob screws (Fig. 1.2a). Remove the two azimuth locking screws and
washers on the tripod top.
2. Align the metal dowel on the tripod top with the gap between the two azimuth adjustment
knobs; and then put the mount on the tripod top. (Fig 1.2b)
3. Apply the two azimuth locking screws with washers to slightly x the mount on the tripod
top. (Fig. 1.2c). Do not tighten these screws yet.
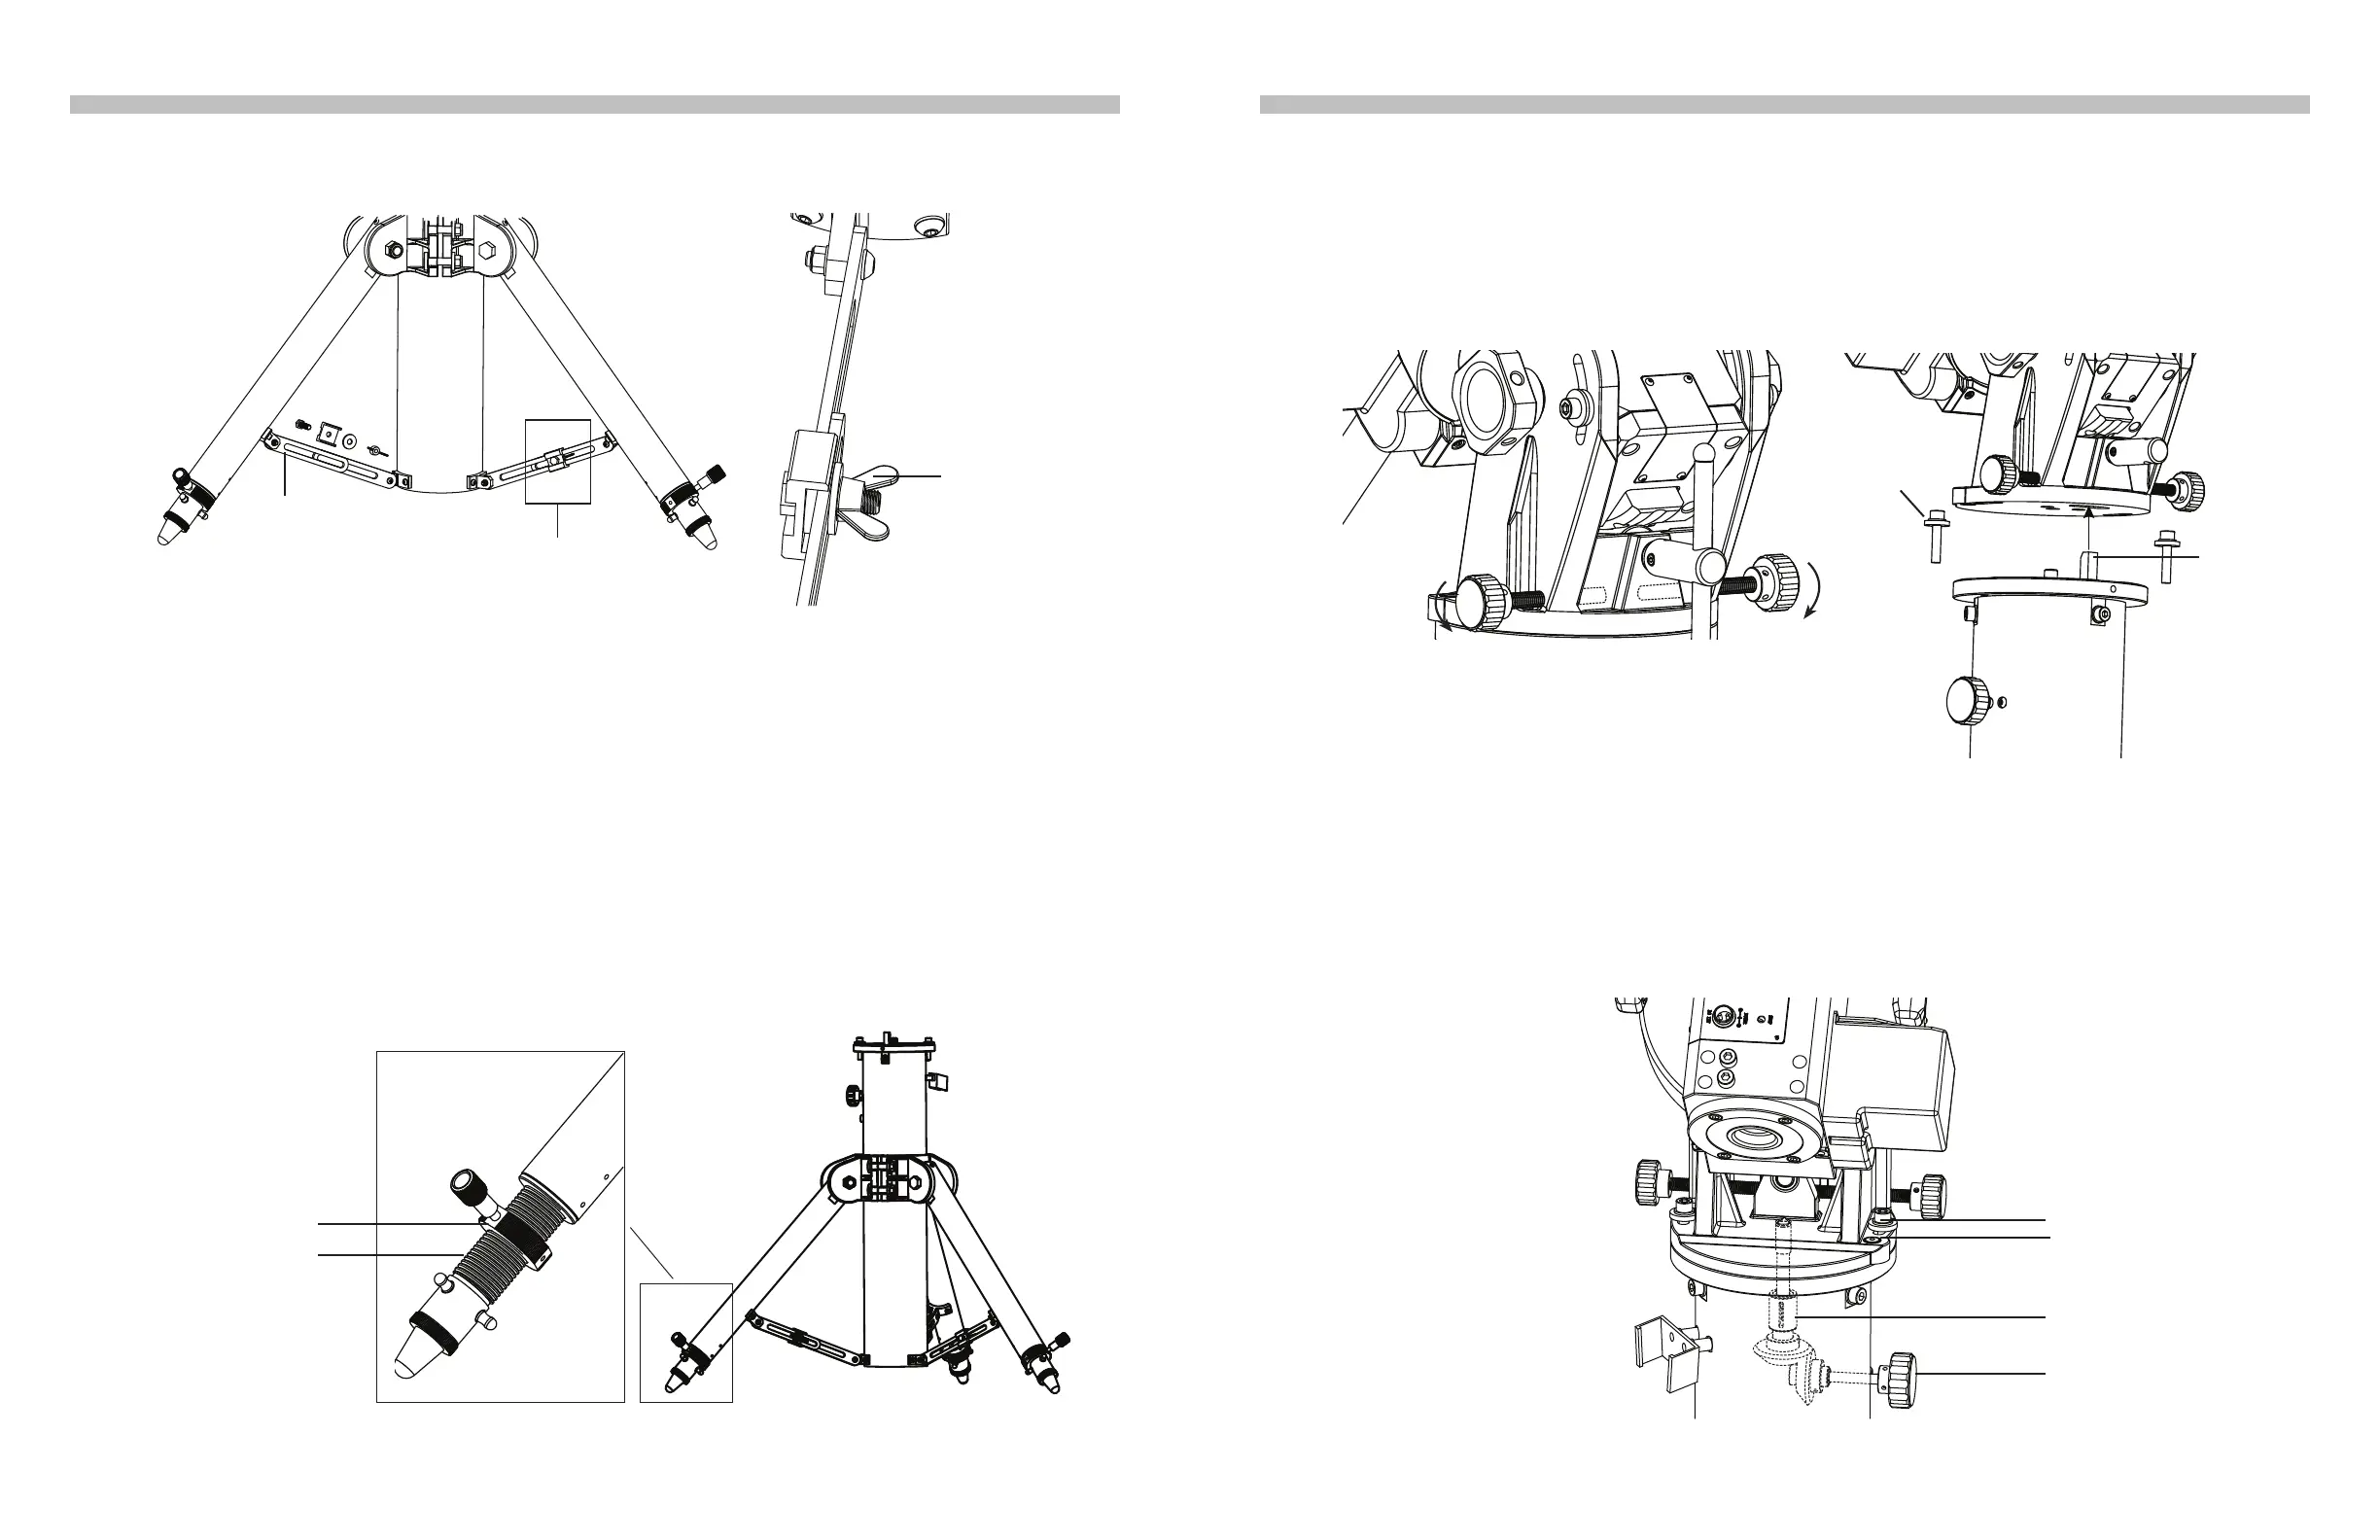
4. Turn the primary locking knob in clockwise direction to engage the primary locking shaft to
the threaded hole at the center of the mount’s bottom. Turn the knob until it is tightened.
(Fig 1.2c) If necessary, re-adjust the toes using the bubble level on the mount as a refer-
ence.
Fig. 1.2a
Fig. 1.2b
PART I: SETTING UP THE EQ8 MOUNT
Level Bubble
Thumb Screw
Spider Truss
See Fig. 1.4
Fig. 1.1f
Fig. 1.2c
Primary Locking shaft
Primary Locking Knob
Azimuth Locking Screw
Threaded Toe
Locking Ring
Azimuth Adjustment Knobs
*
*
*
Dowel
Azimuth
Locking
Screw
Loosen
Loosen
 Loading...