8 9
2.1 Prepare the Mount for Polar Alignment
Prior to operating the EQ8 mount, it must be polar-aligned.
1. Set up the EQ8 mount, counterweights, and telescope as described in PART I. It is recom-
mended to polar-align the EQ8 mount with all equipments installed.
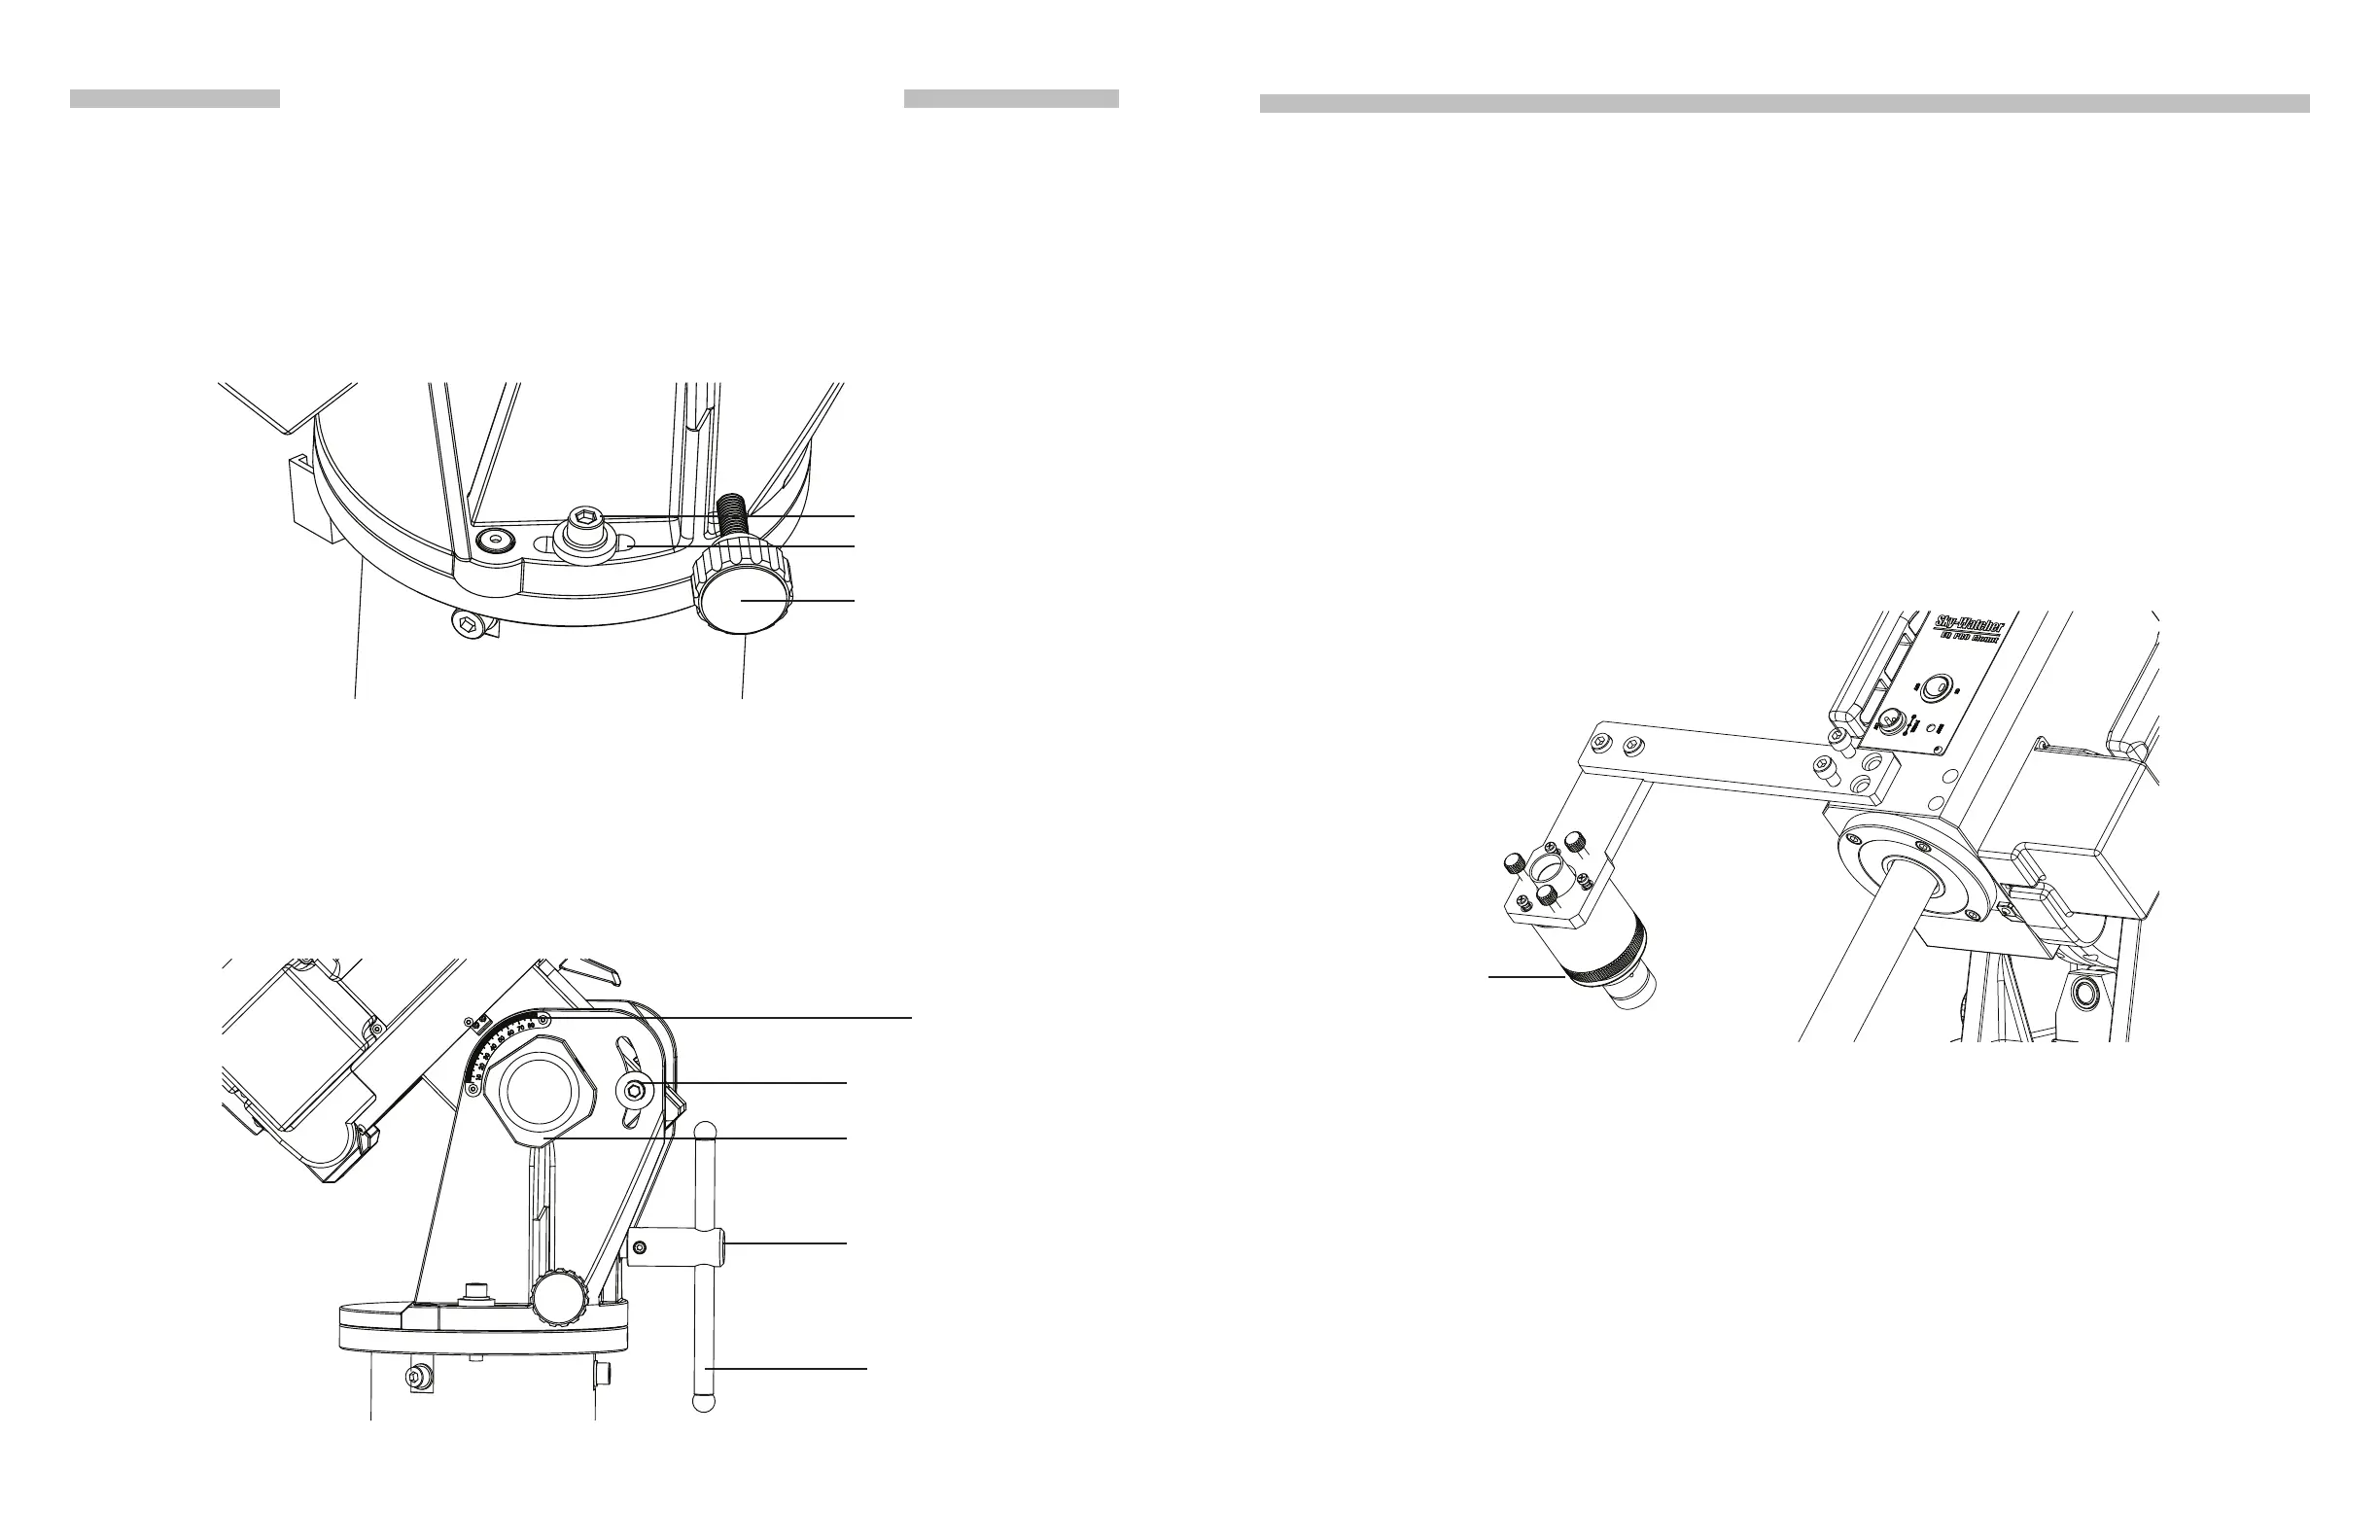
2. Loosen the primary locking knob and both azimuth locking screws; and then use the az-
imuth adjustment knobs to put the azimuth locking screws to the middle of the slots (Fig
2.1a). Tighten the azimuth locking screws slightly.
PART II : POLAR ALIGNMENT
Fig. 2.1a
3. Loosen the fork gripping knobs and screws (Fig 2.1b) on both sides of the EQ8 mount, and
then tighten them slightly.
4. Tighten the primary locking knob and then release it for 1/4 turn.
5. Move the tripod to align the R.A. axis to true north or south (for observing in southern hemi-
sphere) roughly.
6. Install the handle on the jackscrew and use the altitude jackscrew to set the latitude dial
reading local latitude (Fig 2.1b).
Fig. 2.1b
Fork Gripping Knob
Latitude Jackscrew
Latitude Dial
Jackscrew Handle
Fork Gripping Screw
2.2 Polar Alignment Using the SynScan Hand Controller
2.3 Polar Alignment with the Optional Polar Scope
PART II: POLAR ALIGNMENT
1. Choose 2-Star alignment or 3-Star alignment to align the mount, and then perform the po-
lar-alignment routine. Repeat these operations several times until the SynScan hand con-
troller reports small polar alignment error after the 2-Star alignment or 3-Star alignment.
Refer to SynScan hand controller’s manual for detail operation instruction.
2. At the end of the polar-alignment routine, tighten the primary locking knob, and then tight-
en the azimuth locking screws, the fork gripping knobs and screws. User should observe
the alignment star in the eyepiece while alternately tightening these symmetric knobs and
screws; try to minimize the movement of the alignment star in the eyepiece.
3. It is recommended to remove the jackscrew handle after the polar-alignment has nished.
It can prevent unexpected changes to the polar-alignment.
1. Install the polar scope assembly on the EQ8 mount as shown in Fig 2.3a.
2. Verify whether the polar scope is aligned with the R.A. Axis. (Refer to the upcoming sec-
tion “Align the Polar Scope”).
3. Find the orientation of Polaris in Polar Scope. (Refer to the upcoming section “Orientation
of Polaris in Polar Scope”).
4. Use the latitude jackscrew and the azimuth adjustment knobs to polar-align the mount:
Fig. 2.3a
• Fig 2.3b shows the pattern in the eld of view (FOV) of the polar scope. If the image
appears blurred, rotate the knurled ring of the polar scope’s eyepiece to focus.
Large knurled
ring
Azimuth adjustment
knob
Slot
Azimuth locking screw
 Loading...