Product description
In the “System Control” menu navigate to the “Settings” menu
item and select it by pressing
T. The “Settings” menu is
displayed.
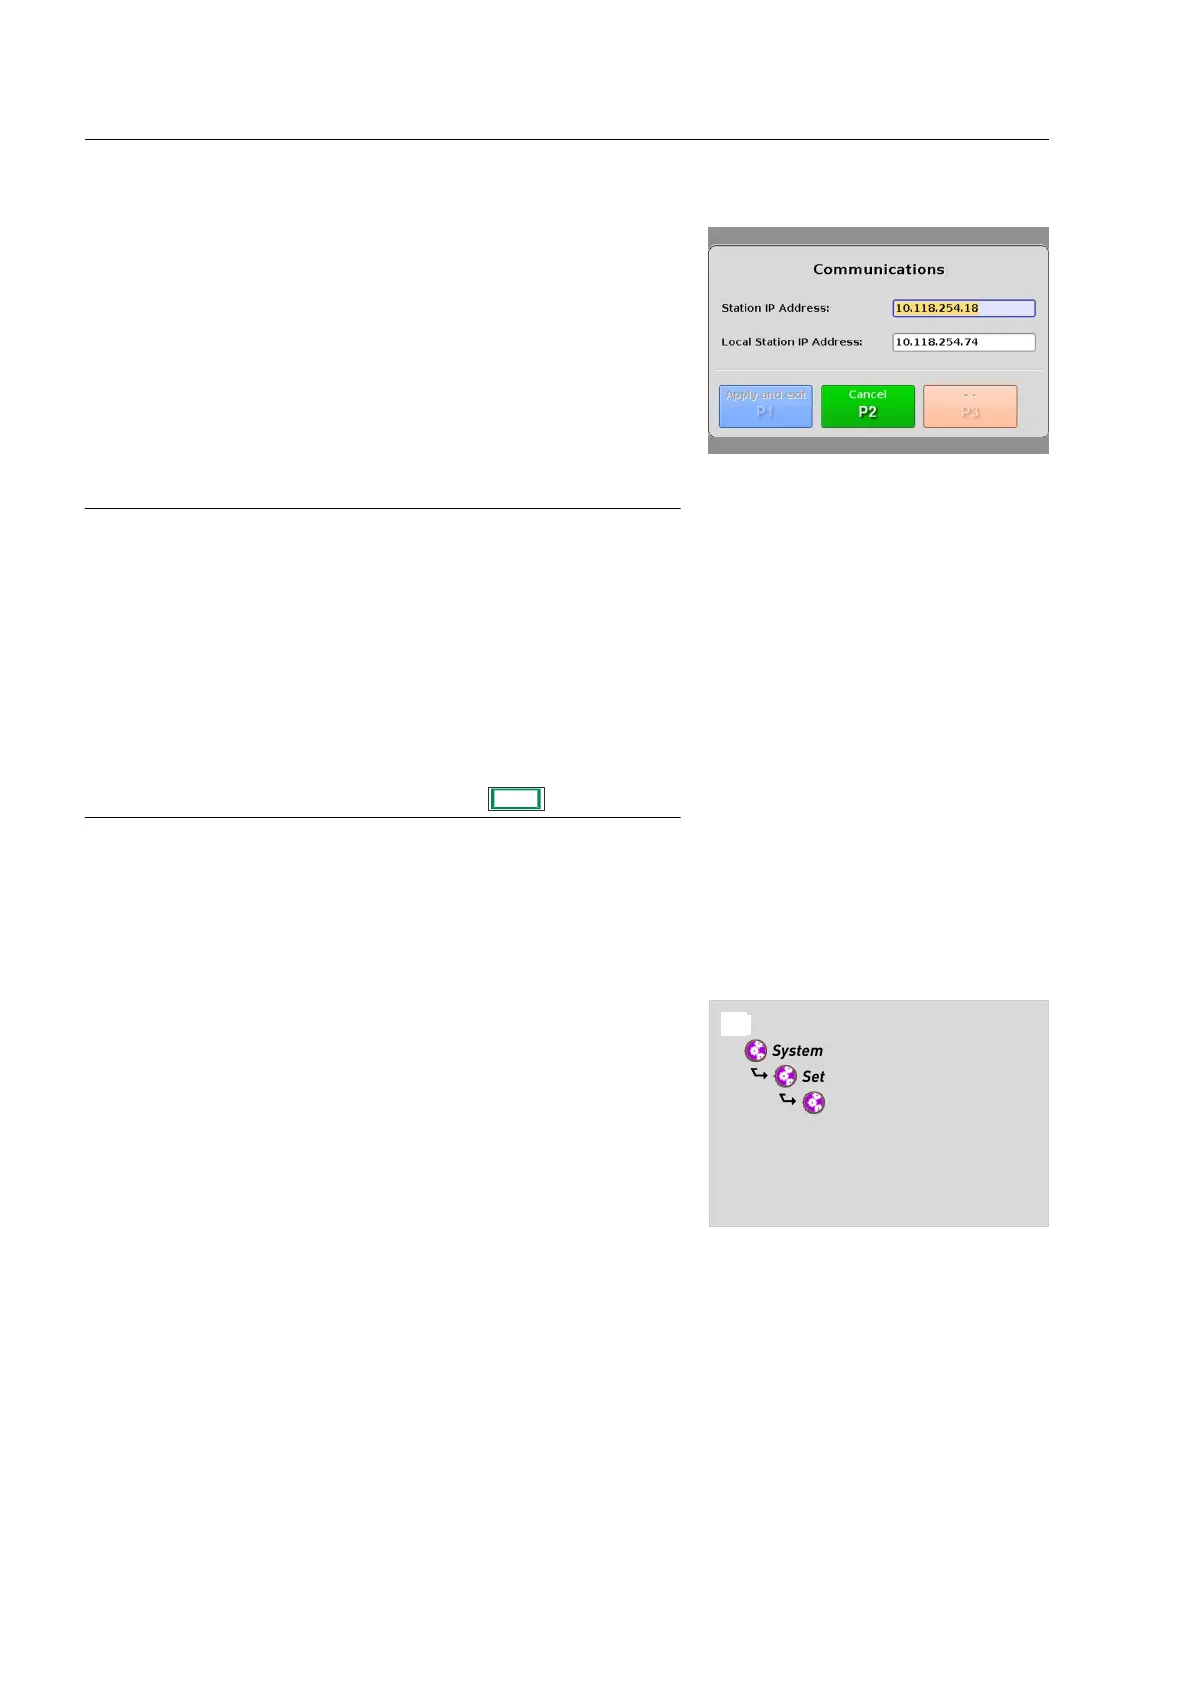
In the “Settings” menu navigate to the “Communications” menu
item and select it by pressing
T. The “Communications”
dialog is displayed. Fig. 37 shows the “Communications” dialog
at the remote station. If the system is configured only with a loc-
al station the “Communications” dialog will only show the local
station IP address input field.
Important!
Move between adjacent items in screen menus or win-
dows by directing the navigator up or down.
If you direct the navigator to the right or to the left, you
change the entries or call up a selected menu item or
function.
Enter numbers or letters inside an input field using the
function keys. The lower-case numbers and letters [1
abc] ... [0 _.] written above each function key are active.
The numbers are used by default. To switch between the
entry of letters and numbers press
./ Q.
Contact your local network administrator to obtain a valid IP ad-
dresses. Enter the IP address of your local station and press
T to apply the changes or U to discard them.
Software
The “Software Settings” dialog gathers information about the soft-
ware configurations of your local station, such as: Gender configur-
ation, face detection, etc..
Depending on your access rights you are allowed to view only or
modify them. By default the local operator has got read-access
only.
The navigation tree in Fig. 38 shows a quick overview how to navig-
ate to the “General Settings” dialog.
Press the
8 key to open the main menu (see Fig. 22).
Navigate to the “System Control” menu item using the navigator
control on the keyboard ( 13) and select it by pressing
T.
95591706 11/02/2010 © smiths detection proprietary information
Fig. 38: Navigation tree to the “Software
Settings” dialog
8 Main Menu
$ System Control
$ Settings
$ Software
$ Software Settings
Fig. 37: “Communications” dialog
30

 Loading...