Removing the Inverter Cover
To remove the inverter cover
1. Switch off the AC circuit breaker on the main distribution panel.
2. Switch off the inverter ON/OFF/P switch and wait 5 minutes for the internal
capacitors to discharge.
3. Turn the DC Safety Unit (if applicable) to OFF.
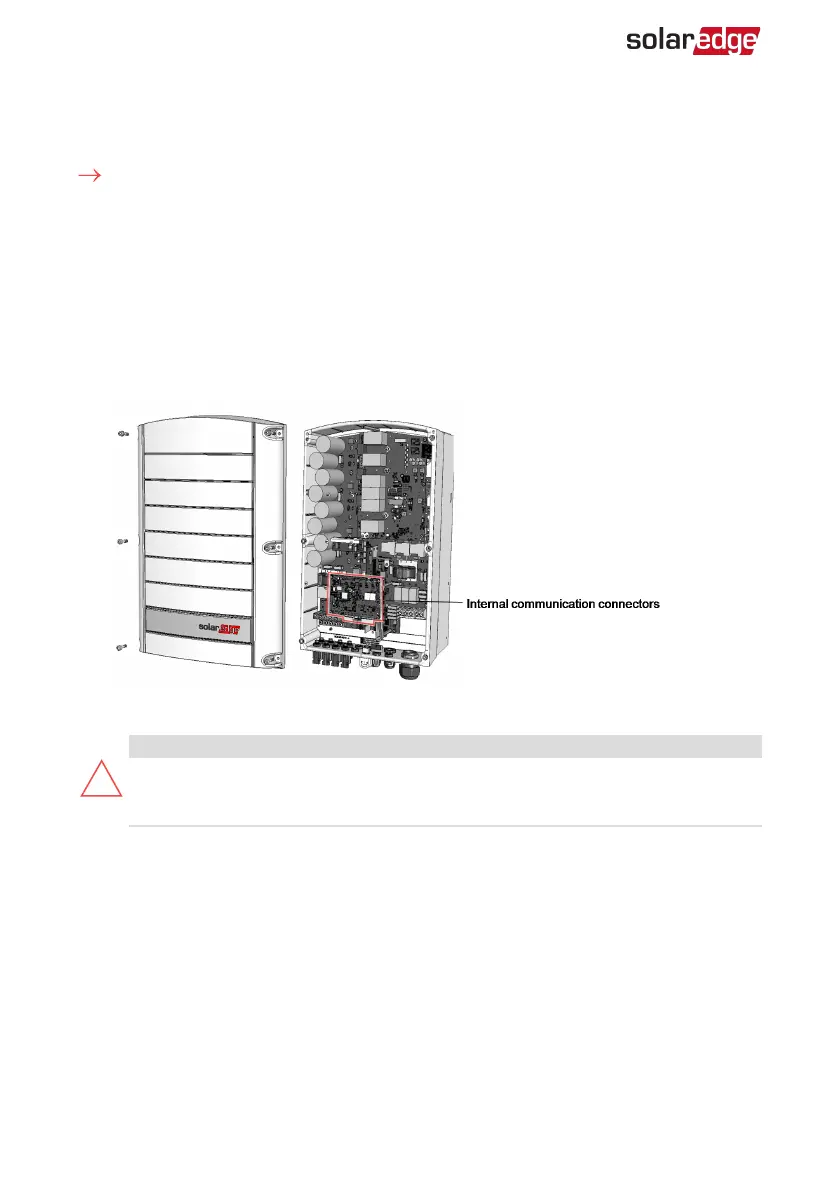
4. Open the Allen screws of the inverter cover and carefully pull the cover horizontally
before lowering it.
5.
Open the inverter cover (see
Figure 21
).
Figure 21: Accessing the Internal communication connectors
CAUTION!
When removing the inverter cover, make sure not to damage the internal
components. SolarEdge will not be held responsible for any components
damaged as a result of incautious cover removal.
Removing the DC Safety Unit Cover (if applicable)
1. Switch off the AC circuit breaker on the main distribution panel and the safety
switch (if applicable).
2. Open the DC Safety Unit cover: Release the four Allen screws and remove the cover.
Three Phase Inverter with SetApp Configuration PN: SEXXK-XXXXIXXXX
49 Removing the Inverter Cover
 Loading...