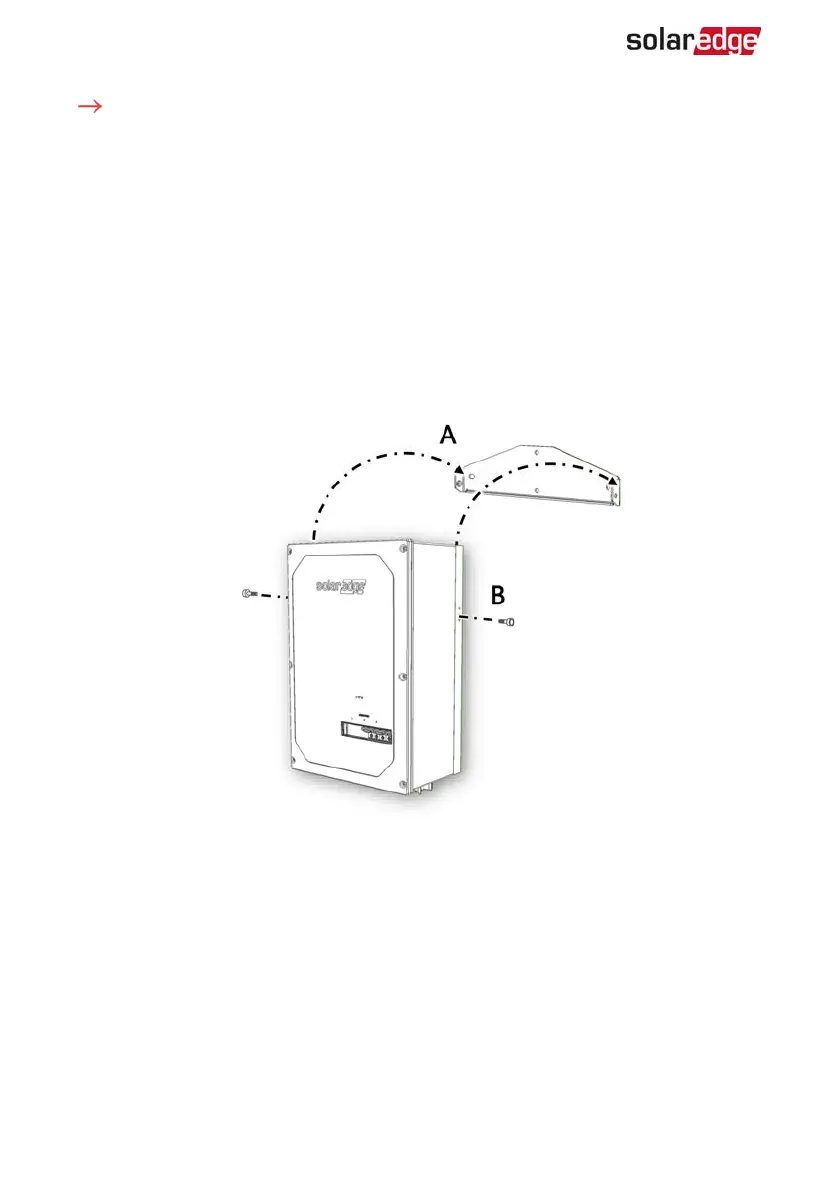
To mount the Backup Interface:
1. Determine the Backup Interface mounting location, on a wall, stud framing or pole.
It is recommended to mount the Backup Interface in a location protected from
direct sunlight.
2. To allow proper heat dissipation, maintain at least a 4" clearance between the
Backup Interface and other objects.
3. Position the mounting bracket against the wall/pole and mark the drilling hole
locations.
4. Drill the holes and mount the bracket. Verify that the bracket is firmly attached to
the mounting surface.
5.
Hang the Backup Interface on the bracket.
Figure 2: Mounting the Backup Interface
6. Insert the two supplied screws through the outer heat sink fin on both sides of the
Backup Interface and into the bracket. Tighten the screws with a torque of 2.9 lb.*ft
/ 4.0 N*m.
Installing the Conduit Holder
To ensure the Grid and AC Loads conduits are firmly secured in their place, a conduit
holder is supplied with the Backup Interface.
Install the conduit holder only after mounting the Backup Interface.
Backup Interface Installation Guide MAN-01-00728-1.0
10 Installing the Conduit Holder
 Loading...