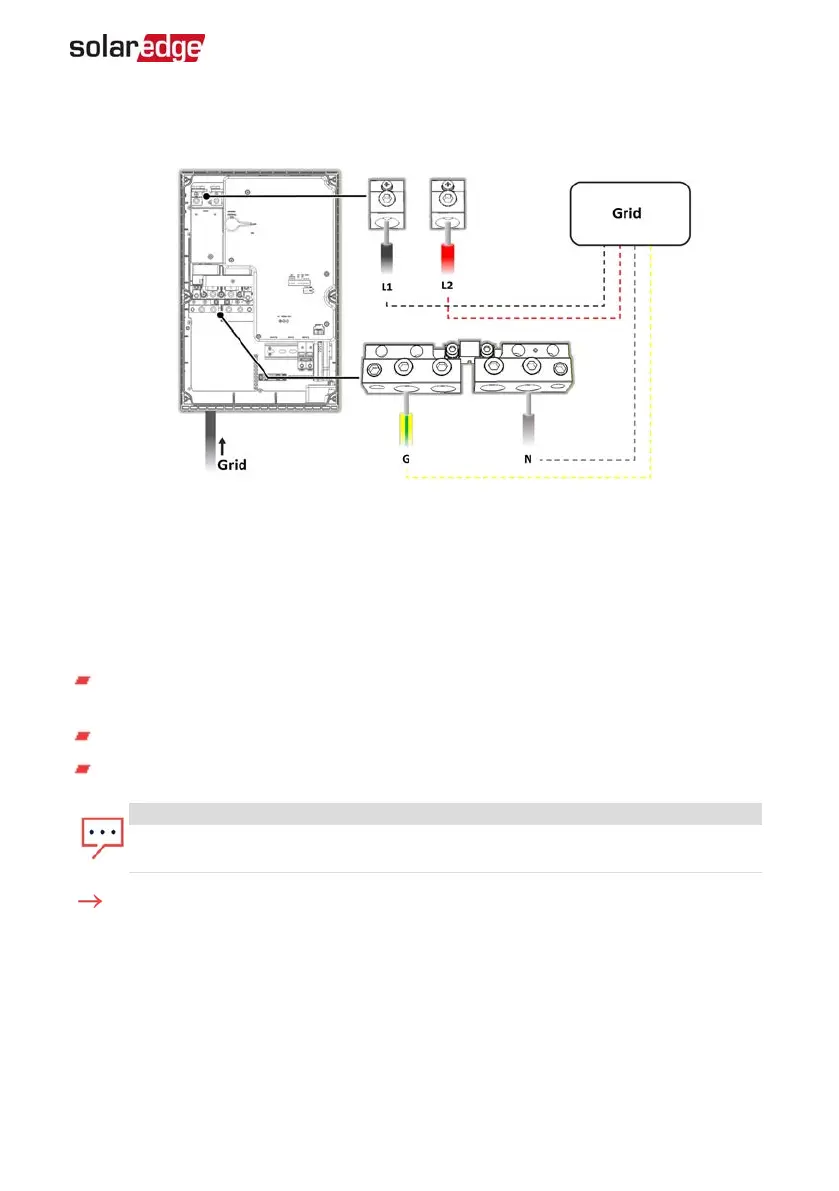
10.
Connect the Line 1 and Line 2 wires to the grid's line terminal. Tighten the terminal
screws with a torque of 200 lb*in / 22.5 N*.
Figure 9: Connection to the Grid
11. Reinstall the plastic covers onto the loads terminals.
Connecting the Backup Interface to the Inverter
When connecting the Backup Interface to the Single phase energy hub inverter with
prism technology, use the following cable types:
Communication - 5-wire shielded twisted pair cable, 24 AWG (16-24 AWG), 600V
insulated or CAT5)
12V power - 16 AWG cable
ACpower - 6 AWG (4-20 AWG), 600V insulated cable
NOTE
If an auto-transformer is connected to the inverter, make sure to disconnect it
before connecting the Backup Interface.
To connect to the communication cable and 12V cable
1. Install a conduit of the required diameter into the Com 1 conduit entry.
2.
Connect the cabels to the Connection Unit of the inverter:
a. Open Communication 1 gland.
b. Pass the cables through the gland.
c. Remove the 7-pin connector from the slot labeled Backup Interface on the
communication board.
Chapter 2: Installing and Connecting the Backup Interface 15
Backup Interface Installation Guide MAN-01-00728-1.0