2. Install a conduit of the required diameter into the Backup Interface's Inv1 conduit
entry.
3.
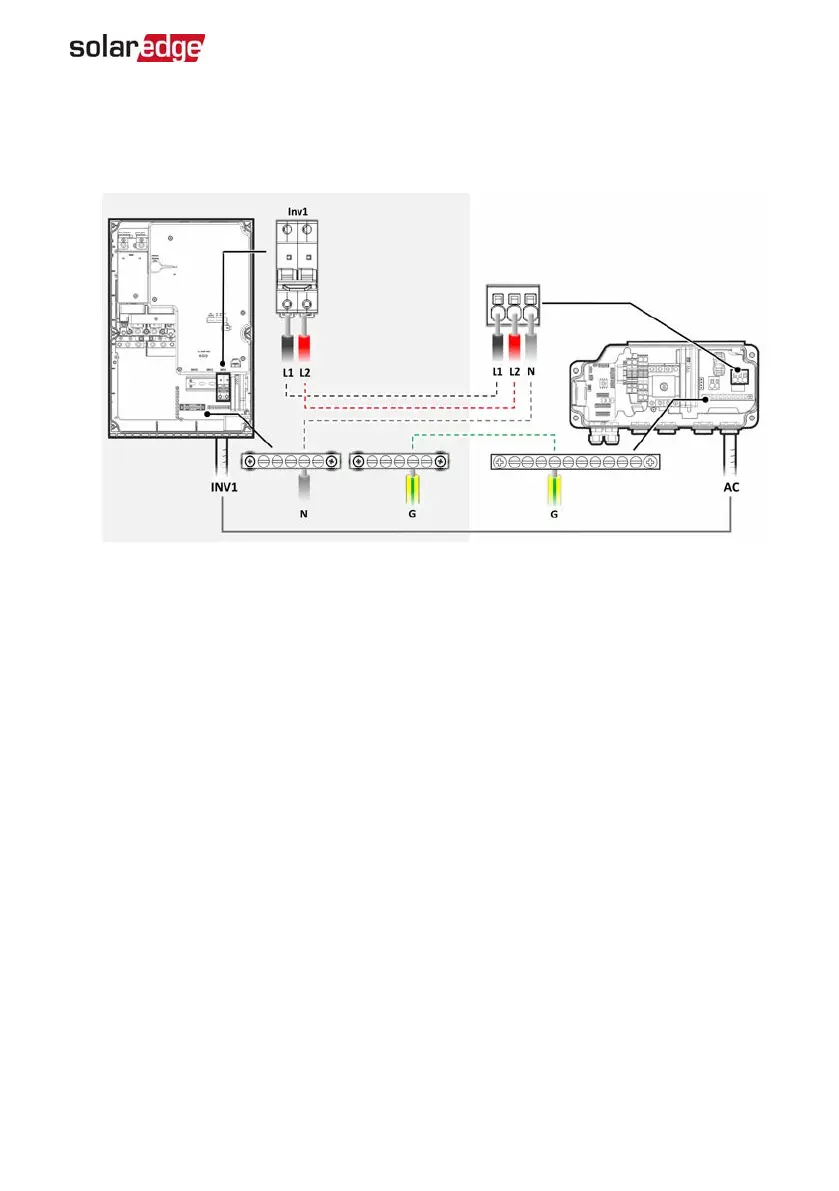
Pass the other end of the AC cable through the Inv1 conduit.
Figure 12: AC connection between the Backup Interface and Inverter
4. Connect the L1 and L2 wires of the ACcable to the Inv1 terminal block, as shown
above. Apply a torque of 22 in*lb (2 N*m).
5. Connect the Neutral wire to the Neutral bar.
6. Connect the Grounding wire to the Grounding bar.
Connecting the Backup Interface to an External Rapid
Shutdown Switch
In accordance with regulation requirements, an external shutdown switch must be
installed. The switch (not supplied by SolarEdge) shuts down the Backup Interface in
case of emergency.
Chapter 2: Installing and Connecting the Backup Interface 17
Backup Interface Installation Guide MAN-01-00728-1.0
 Loading...