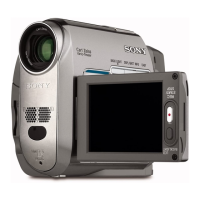
DCR-HC39E/HC41/HC42/HC42E/HC43/HC43E
HELP
HELP
2-1 2-2
The following flow chart shows the disassembly procedure.
2-1. DISASSEMBLY
2. DISASSEMBLY
1 Tape (A)
x1
2 P2 tapping screw
x2
3 Hinge blind
4 FP-187 flexible board
5 Tapping screw
x2
6 P2 tapping screw
x2
7 Claw
x6
8 P cabinet (C (106))
9 FP-185 flexible board: CN601
0 FP-186 flexible board: CN609
qa Flexible board: CN608
qs Control key block (SB10600):
CN602
qd Flexible board: CN605
qf Tape (W)
x1
qg Flexible board: CN603
qh P2 tapping screw
x1
qj PD-238 board
1 Slide the CF retainer
in the direction of arrow.
2 D901
3 LCD901
4 Panel cushion (106)
1 P2 lock ace screw (M1.7)
x1
2 Cpc lid
3 Screw (M1.7)
x7
4 Claw
x8
5 Flexible flat cable (FFC-038): CN603
6 F panel block
7 FP-190 flexible board: CN1003
8 FP-185 flexible board: CN1006
9 FP-187 flexible board: CN1002
0 Cabinet (R) block
1 P2 lock ace screw (M1.7)
x1
2 P2 lock ace screw (M1.7)
x1
3 Slide the EVF block.
4 P2 tappping screw
x1
5 Tape (A)
x2
6 Open the cabinet (G) block.
7 FP-180 flexible board: CN2001
8 FP-181 flexible board: CN7001
9 FP-184 flexible board: CN1005
0 BAT EVF block
1 Screw (M1.7)
x1
2 BT panel block
1
4
4
1
3
4
6
0
5
7
8
9
2
1
5
2
3
4
6
6
7
1
1
2
3
4
2
3
3
3
9
7
8
0
5
6
1
7
7
8
qa
qf
qg
qh
qj
qs
9
0
qd
5
6
2
3
4
2
to Page 2-3
HELP
1 Cushion (F2)
2 Tape (W)
x1
3 Flexible board: CN 3801
4 FP-179 flexible board: CN3201
5 P2 lock ace screw (M1.7)
x1
6 Boss
x2
7 Lens block
 Loading...