EasyManua.ls Logo

Sony DSR-400L User Manual

Sony DSR-400L
140 pages
To Next Page IconTo Next Page
To Previous Page IconTo Previous Page
Page #35 background imageLoading...
Page #35 background image
35
Preparing Audio Input System
Chapter 2 Preparation
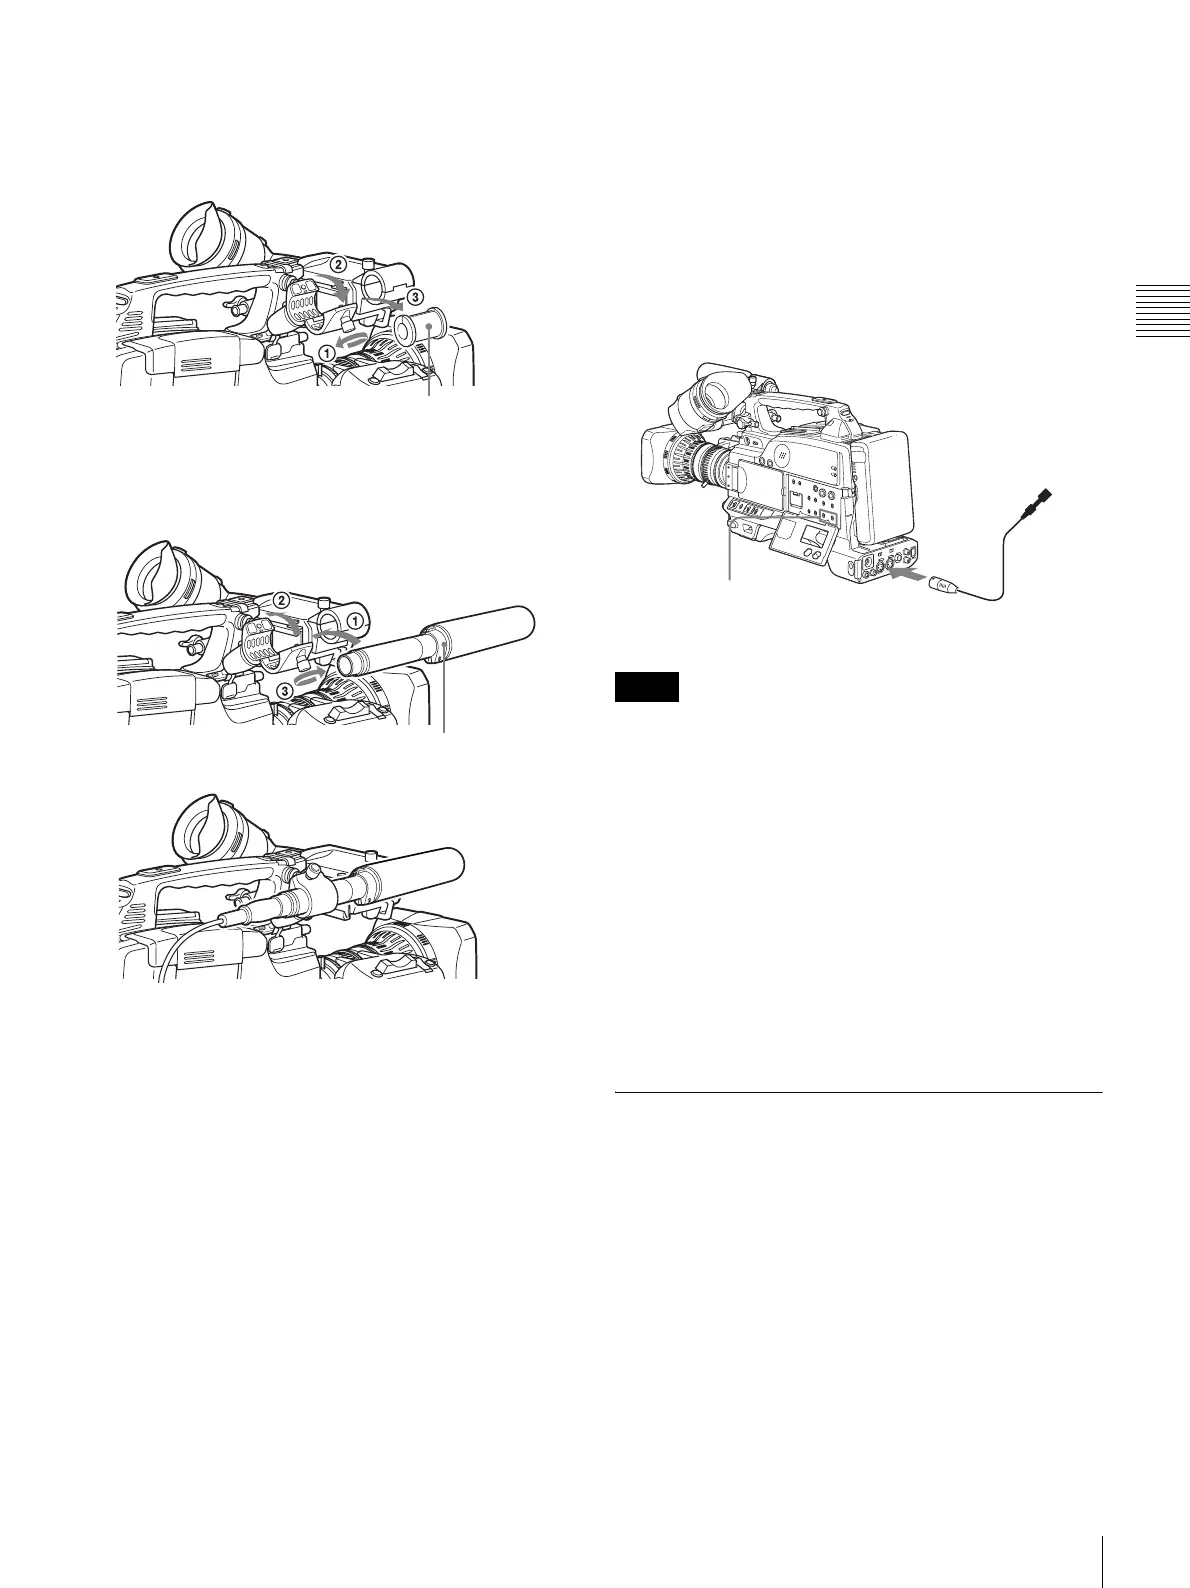
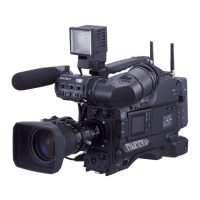
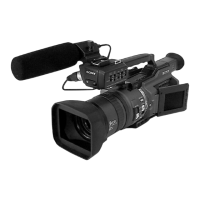
Use the microphone adaptor when using a small-
diameter external microphone. When attaching an
ECM-670, use the microphone adaptor supplied with
these microphone.
4
Place an external microphone (ECM-670/672/etc.
Electret Condenser Microphone or similar
microphone) in the CAC-12.
5
Connect the microphone cable to the AUDIO IN CH-
1 or CH-2 connector.
6
Set the switches as follows.
Set the AUDIO IN input selection switch as
indicated below, depending on the type of
microphone used.
- When using a microphone with an internal power
supply, set it to MIC (center).
- When using a microphone with an external power
supply, set it to MIC +48V ON (right).
Set the AUDIO IN (CH-1/CH-2) switch of the
channel that the microphone is connected to REAR.
The camcorder can use a microphone with an input level
of – 60 dB. Other microphones may not be suitable for
use with this camcorder due to differences in the input
level.
In order for the AUDIO IN CH-1 and CH-2 connectors
on the camcorder to be able to provide a phantom 48 V
power supply, female XLR connectors (3-pin) are fitted.
If the microphone cable has a female connector, use an
adaptor.
When you detach a CAC-12 Microphone Holder once
you have attached to the camcorder, be careful not to
lose the two screws fixing the CAC-12. After detaching
the CAC-12, be sure to put the two screws back into their
original places.
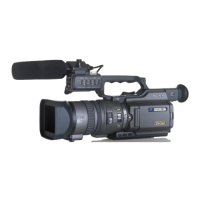
Using a wireless microphone
system
You can use the wireless microphone system including
following models to record sound.
UHF Wireless Microphone
NTSC system: WRT-807B, WRT-847B
PAL system: WRT-807A/B, WRT-847A/B
UHF Synthesized Transmitter
NTSC system: WRT-8B, WRT-822B
PAL system: WRT-8B, WRT-822A/B
UHF Synthesizer Tuner
NTSC system: WRR-855B, WRR-861B, WRR-862B
PAL system: WRR-855A/B, WRR-861A/B (in
Australia and Asia only), WRR-862A/B
Microphone adaptor
Open the CAC-12.
Loosen the screw.
ECM-670/672 or
similar microphone
Close the CAC-12.
Tighten the screw.
m
Notes
to AUDIO IN CH-1/CH-2
connector
Monaural microphone
AUDIO IN (CH-1/CH-2)
switches

Table of Contents

Questions and Answers:

Sony DSR-400L Specifications

General IconGeneral
BrandSony
ModelDSR-400L
CategoryCamcorder
LanguageEnglish

Summary

Chapter 1 Overview

Product Configurations

Details the different DSR-400/450WS series models and their configurations.

Features

Highlights key features of the DVCAM camcorders.

Location and Function of Parts

Identifies and explains the various buttons, connectors, and components of the camcorder.

Using the CD-ROM Manual

Provides instructions for installing and using the provided CD-ROM manual.

Chapter 2 Preparation

Attaching and Replacing the Lithium Battery

Step-by-step guide for installing and replacing the camcorder's internal lithium battery.

Preparing the Lens

Instructions for mounting and adjusting the camcorder lens, including flange focal length.

Preparing a Power Supply

Details on attaching battery packs and using AC adaptors for camcorder power.

Adjusting the Viewfinder

Guides on fitting, adjusting focus, brightness, contrast, and position of the viewfinder.

Using the Shoulder Strap

Instructions on how to attach and use the camcorder's shoulder strap for portability.

Fitting to a Tripod

Describes how to attach the camcorder to a tripod using the provided adaptor.

Using a Video Light

Information on connecting and using an external video light with the camcorder.

Preparing Audio Input System

Covers connecting microphones, including supplied, external, and wireless systems.

Connecting the Remote Control Unit

Explains how to connect and use an optional remote control unit for camcorder operation.

Chapter 3 Connections

Connecting a Monitor

Illustrates how to connect a video monitor to the camcorder's output connectors.

Using an i.LINK Connection

Details connections using i.LINK for digital data transfer, including settings and backup.

Other Connections

Covers connecting multiple camcorders for synchronization and using external sync signals.

Chapter 4 Recording and Playback

Inserting a Cassette

Step-by-step instructions for inserting standard and mini-size DVCAM/DV cassettes.

Basic Procedure for Shooting

Outlines the fundamental steps required to begin shooting with the camcorder.

Recording Settings and Cassette Compatibility

Covers recording operations, usable cassettes, compatibility, and format selection.

Image Quality Adjustments

Details adjustments for black/white balance, electronic shutter, iris, and audio levels for optimal image and sound.

Special Shooting Cases and Editing

Provides settings for special shooting scenarios and covers back space editing and time-lapse recording.

Advanced Recording and Playback

Details analog composite signal recording and techniques for playing/checking recorded content.

Chapter 5 Menu Displays and Detailed Settings

Menu Organization and Operation

Outlines the structure and organization of the camcorder's menu system.

Basic menu operations

Explains how to navigate, select items, and change settings within the camcorder's menus.

USER Menu Management and Status Display Settings

Covers resetting USER menus, customizing displays, and marker settings for viewfinder/LCD.

Shot Data Recording and Settings

Details recording shot data on color bars and setting the shot ID for identification.

Adjustments and Settings via Menus

Details various menu-driven adjustments for gain, output signals, color temperature, and time settings.

Chapter 6 Saving and Loading the User Setting Data

Saving and Loading User Files

Covers saving and loading camcorder settings as user files onto a Memory Stick.

Saving USER menu data to the “Memory Stick”

Step-by-step instructions for saving custom USER menu settings to a Memory Stick.

Loading saved data from a “Memory Stick”

Guide on loading previously saved user files from a Memory Stick back into the camcorder.

Saving and Loading Scene Files

Instructions for saving and loading scene files, which store specific shooting settings.

Resetting Camcorder Settings and Memory Stick Operations

Explains resetting settings to standard and managing Memory Stick files for scenes and other data.

Chapter 7 Appendix

Important Notes on Operation

Provides crucial information on safe operation, storage, and handling of the camcorder.

Maintenance Procedures

Covers essential maintenance tasks like cleaning video heads and using the auto-check function.

Connectivity and Storage Media Information

Explains i.LINK connectivity, Memory Stick types, and related precautions for data transfer and storage.

Warnings, Errors, and Troubleshooting

Lists operation warnings, error codes, and a troubleshooting guide to resolve common issues.

Specifications and Related Products

Lists camcorder technical specifications, microphone details, connector information, and optional accessories.

Glossary

Defines technical terms and abbreviations used throughout the manual for better understanding.

Related product manuals