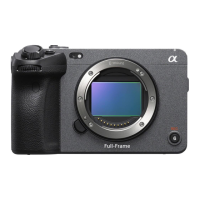
Help Guide
Interchangeable Lens Digital Camera
ILME-FX3 Ver.2 or later
Recording audio using the XLR adaptor of the supplied handle
The handle (supplied) is equipped with an XLR adaptor. By attaching the handle, you can connect multiple external
audio devices to record sound.
The camera is compatible with the digital audio interface of the Multi Interface Shoe. This allows the camera and the XLR
adaptor to communicate with each other through digital signals and provide audio recording with minimum noise
interference.
Switching the audio input to the handle
By switching the audio input from the built-in microphone of the camera to the handle, you can record with the
microphone connected to the handle.
Connecting an external audio device
You can use a microphone (sold separately) or an external audio device, such as an audio mixer, for recording.
Set the HANDLE AUDIO switch to ON.
The built-in microphone of the camera is activated when the HANDLE AUDIO switch is set to OFF.
1.
Connect your desired device to the INPUT1, INPUT2, or INPUT3 jack.
When using either the INPUT1 or INPUT2 jack, connect the device to the INPUT1 jack.
When connecting the device to the INPUT3 jack, proceed to Step 3.
1.
Select an audio source to input.
Depending on the device connected to the INPUT1 or INPUT2 jack, set the INPUT1 (LINE/MIC/MIC+48V) or
INPUT2 (LINE/MIC/MIC+48V) switch as follows:
LINE (standard input level of +4 dBu (0 dBu = 0.775 Vrms)): for an external audio device (e.g. an audio mixer)
MIC: for a dynamic microphone or a microphone with the built-in battery
MIC+48V: for a microphone compatible with +48V power (phantom power)
2.
With the INPUT SELECT switch, select the audio input for recording audio to the channels on the camera.
Select the audio input jack on the XLR adaptor (INPUT1, INPUT2, or INPUT3) through which audio is recorded to
the channels on the camera.
3.
When the device is connected to the INPUT1 or INPUT2 jack, set the standard input level of the microphone.
When the INPUT1 (LINE/MIC/MIC+48V) or INPUT2 (LINE/MIC/MIC+48V) switch is set to either “MIC” or
“MIC+48V,” you can set the standard input level with the ATT (INPUT1) or ATT (INPUT2) switch. Select the level
suitable for the sensitivity of the connected microphone or for the volume level of the input audio.
0dB: Standard input level of -60 dBu
This is suitable for recording with a low-sensitivity microphone while amplifying sounds.
10dB: Standard input level of -50 dBu
This is the recommended input level for an ordinary microphone.
20dB: Standard input level of -40 dBu
This is suitable for recording with a high-sensitivity microphone while keeping the sound volume low.
4.
Adjust the recording volume level.5.