— 29 —
TROUBLESHOOTING
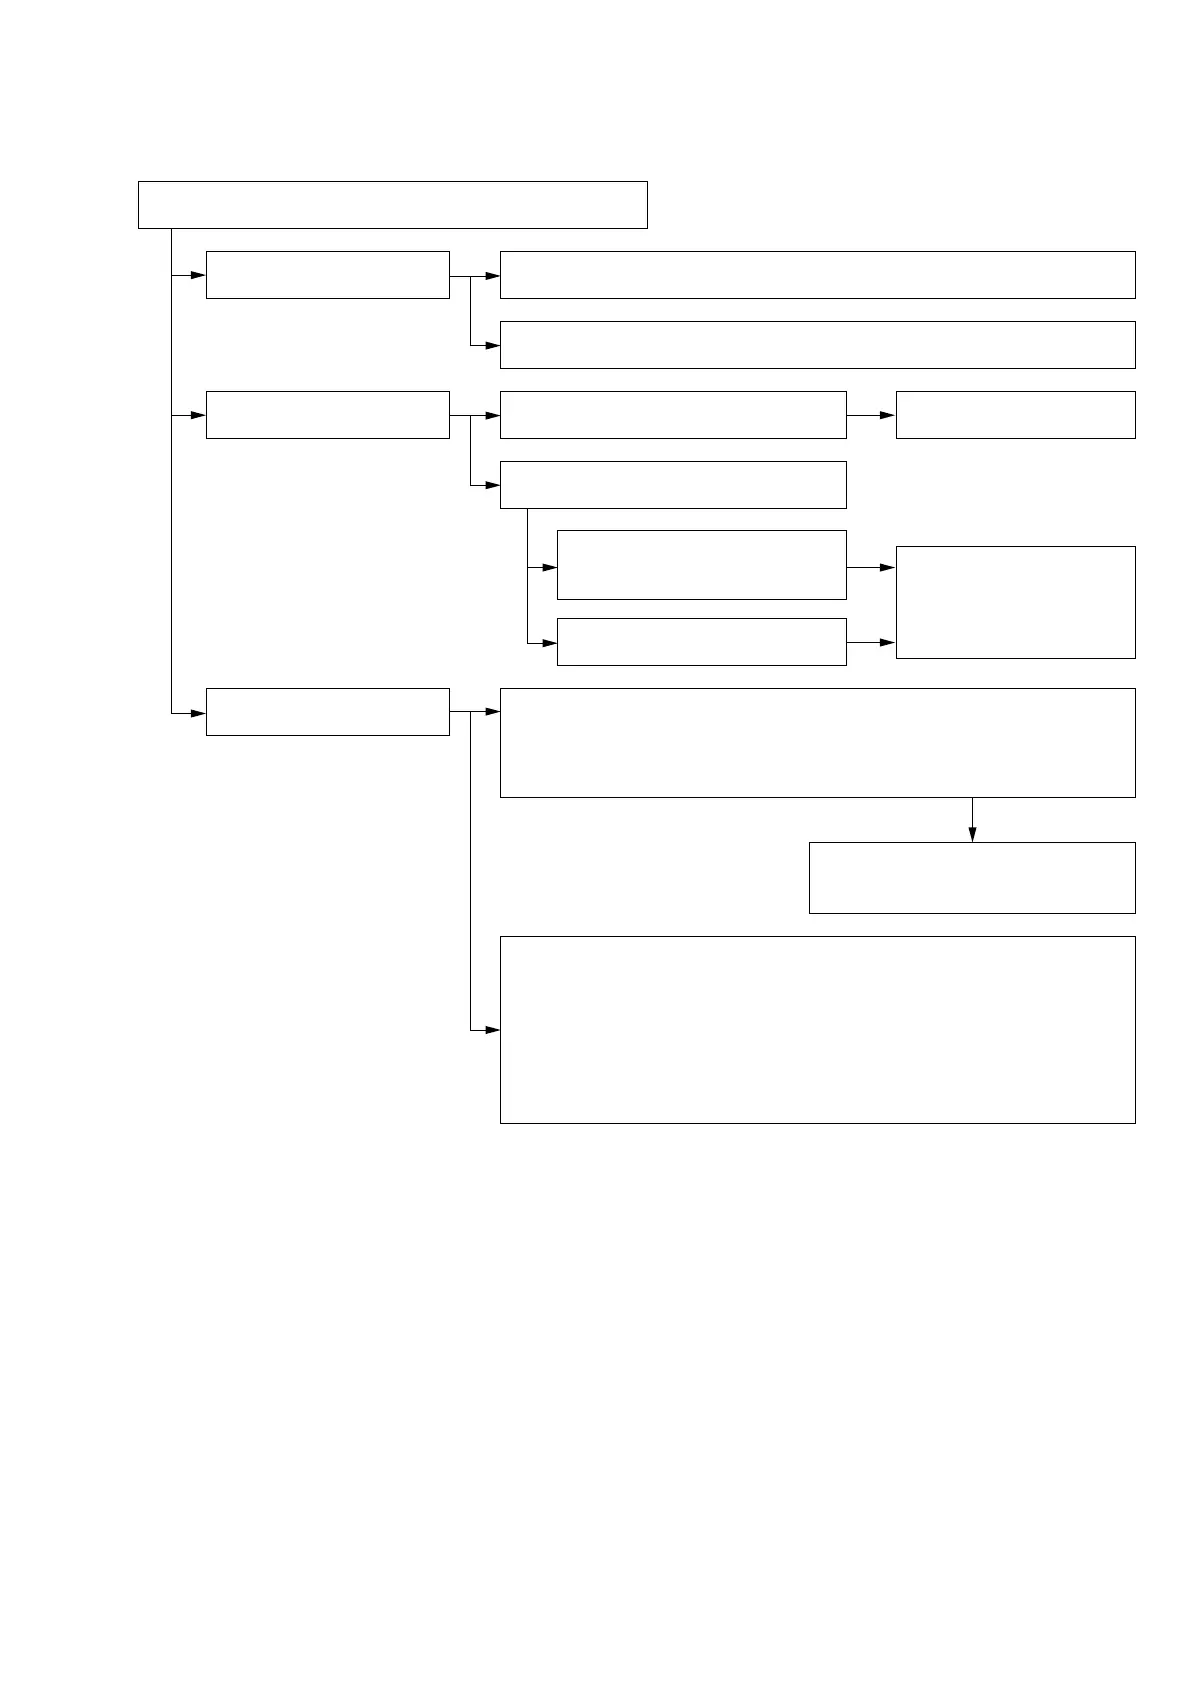
1. FLOW OF TROUBLE ANALYSIS AND REPAIR
Flow of Trouble Analysis and Repair of DDX-G2100
1. Saving the Trouble Status
a. Confirm and save the error log using Error Log File.
Analyze the error log contents referring to the separate error code table.
b. Create a backup file of the EEPROM using EEPROM Menu.
It helps to recover the present status without fail.
2. Analysis and Repair due to
Mechanical Causes
a. Check if any errors can be noticed when
viewing the outside appearance.
Replace the parts as required.
Check if there is any errors
such as some parts do not
start working, or abnormal
sound is heard, etc..
Replace the parts as required.
b. Check the operational errors as follows.
3. Analysis and Repair due to
Electrical Causes
a. Analyze the errors by performing the electrical adjustment.
Perform all the adjustment items of the electrical adjustment.
Do not perform [EEPROM Initialize].
Go through the [SKEW Adjust] for watching the movement of the machine but not
performing any adjustments.
b. When the optical unit (OP unit) is replaced:
Initialize all the data using [EEPROM Initialize]. Then start the electrical adjustment.
Because all the discrete parts are known to be good, other adjustments are
expected to be performed without any trouble if the [SKEW Adjust] is performed
correctly. Result of the [SKEW Adjust] is judged by the items [RF Jitter Check] and
[Self RF Jitter Check].
If result is found to be unacceptable, perform the [SKEW Adjust] again. If the error
cannot be solved still, return the optical unit (OP unit) to the machine and make an
attempt replace the electrical printed circuit boards.
Check if the error reappears or not.
Create a summary of default items.
Is the optical unit (OP unit) defective?
Perform operational check by reading
CD using SKEW Adjust
(Check only without adjustment)
Make an attempt of CD-R seek
Using Seek Check

 Loading...