0458-718-8221-A
22
English
12 Adjusting the Trimmer
Always ensure that both cutting blades are properly
mounted before starting work. Operating the trimmer with
only one blade will reduce cutting performance and may
damage the trimmer.
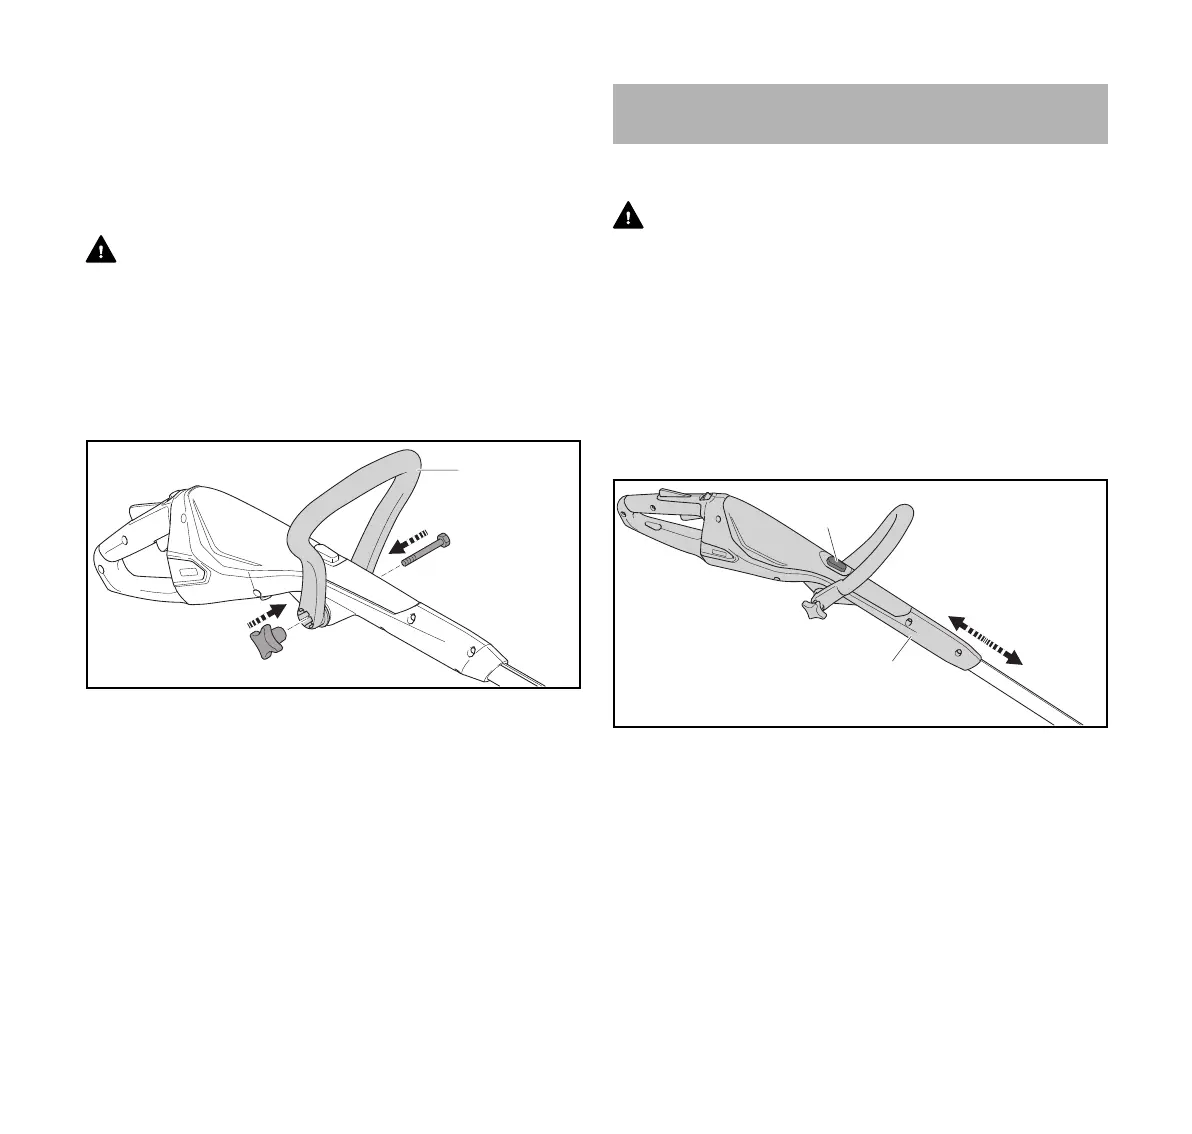
11.3 Mounting the Loop Handle
WARNING
To reduce the risk of injury from loss of control, ensure that
the loop handle is properly mounted and adjusted before
starting work.
To mount the loop handle:
► Switch off the trimmer, @ 14.2.
► Remove the activation key, @ 13.2.
► Line up the loop handle (2) with the mounting hole on the
trimmer, keeping the recess for the star knob (1) on the
right (see illustration).
► Insert the mounting screw (3) and tighten it with the star
knob.
12.1 Adjusting the Length of the Drive Tube
WARNING
To reduce the risk of injury from loss of control, ensure that
the drive tube is properly adjusted and engaged in the
locked position at all times while working.
The length of the drive tube can be adjusted to suit the
height and reach of the operator.
To adjust the length of the drive tube:
► Switch off the trimmer, @ 14.2.
► Remove the activation key, @ 13.2.
► Hold the drive tube firmly.
► Depress and hold the drive tube release button(1).
► Adjust the control handle (2) until it engages in the desired
position.
► Release the drive tube release button.
12.2 Adjusting the Loop Handle
The loop handle can be set in different positions to suit the
height and reach of the operator.
3
1
2
0000-GXX-1410-A0
12 Adjusting the Trimmer
1
2
0000-GXX-1411-A0
 Loading...